Popular Woodworking 2009-10 № 178, страница 10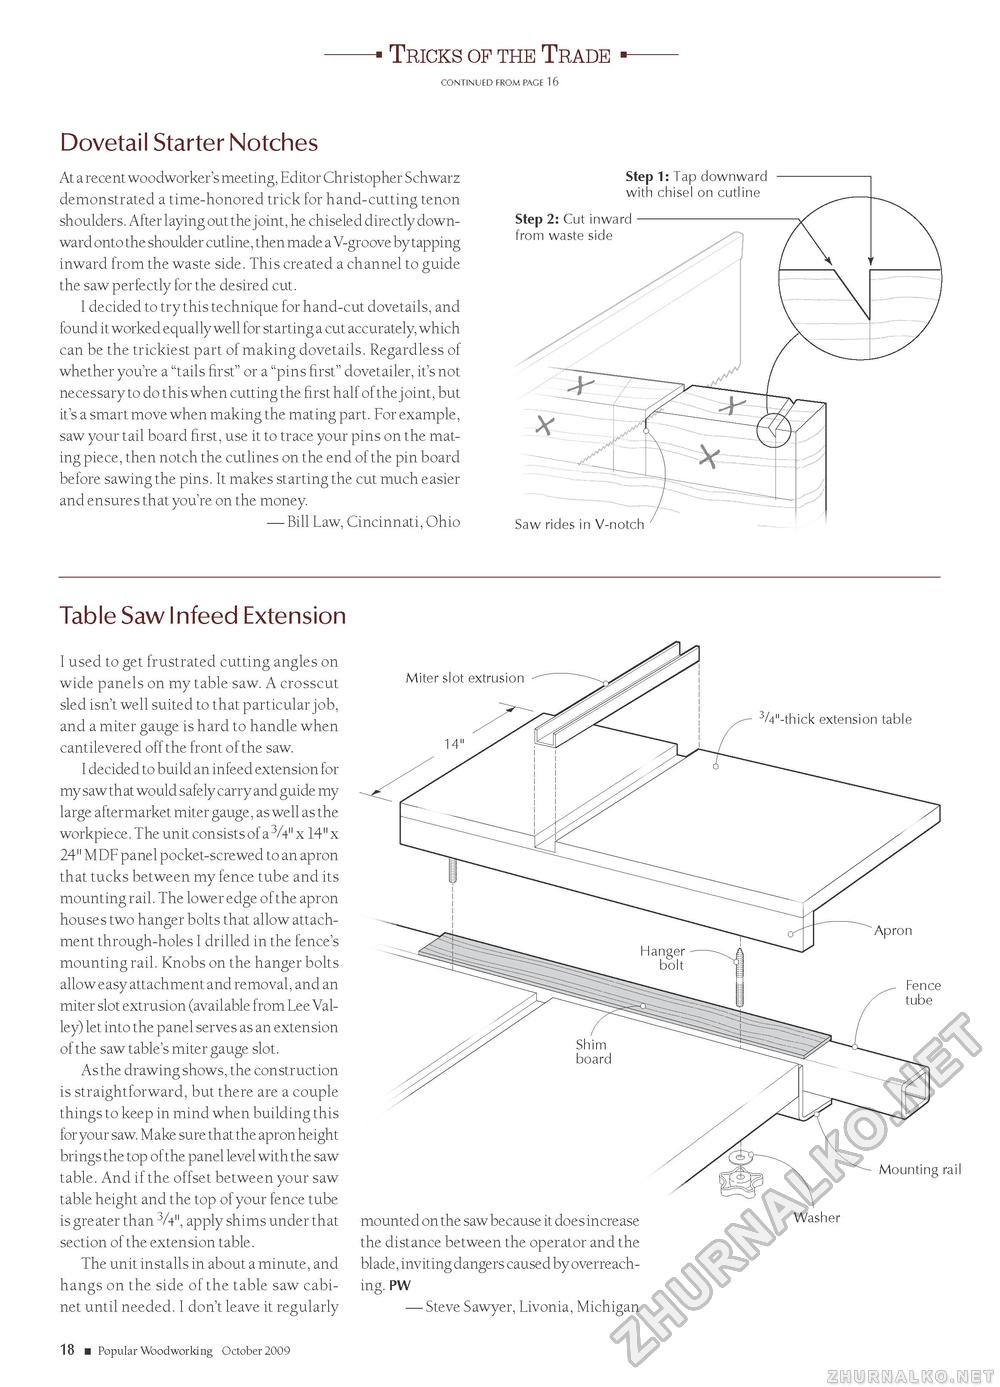
Tricks of the Trade CONTiNUED FROM PAGE 1 6 Dovetail Starter Notches At a recent woodworker's meeting, Editor Christopher Schwarz demonstrated a time-honored trick for hand-cutting tenon shoulders. After laying out the joint, he chiseled directly downward onto the shoulder cutline, then made a V-groove by tapping inward from the waste side. This created a channel to guide the saw perfectly for the desired cut. I decided to try this technique for hand-cut dovetails, and found it worked equally well for starting a cut accurately, which can be the trickiest part of making dovetails. Regardless of whether you're a "tails first" or a "pins first" dovetailer, it's not necessary to do this when cutting the first half of the j oint, but it's a smart move when making the mating part. For example, saw your tail board first, use it to trace your pins on the mating piece, then notch the cutlines on the end of the pin board before sawing the pins. It makes starting the cut much easier and ensures that you're on the money. — Bill Law, Cincinnati, Ohio Table Saw Infeed Extension I used to get frustrated cutting angles on wide panels on my table saw. A crosscut sled isn't well suited to that particular job, and a miter gauge is hard to handle when cantilevered off the front of the saw. I decided to build an infeed extension for my saw th at would safely carry and guide my large aftermarket miter gauge, as well as the workpiece. The unit consists of a 3A" x 14" x 24" MDF panel pocket-screwed to an apron that tucks between my fence tube and its mounting rail. The lower edge of the apron houses two hanger bolts that allow attachment through-holes I drilled in the fence's mounting rail. Knobs on the hanger bolts allow easy attachment and removal, and an miter slot extrusion (available from Lee Valley) let into the panel serves as an extension of the saw table's miter gauge slot. As the drawing shows, the construction is straightforward, but there are a couple things to keep in mind when building this for your saw. Make sure th at the apron height brings the top of the panel level with the saw table. And if the offset between your saw table height and the top of your fence tube is greater than 3/4", apply shims under that section of the extension table. The unit installs in about a minute, and hangs on the side of the table saw cabinet until needed. I don't leave it regularly Miter slot extrusion 3/4"-thick extension table Mounting rail mounted on the saw because it does increase the distance between the operator and the blade, inviting dangers caused by overreaching. PW — Steve Sawyer, Livonia, Michigan Washer 18 ■ Popular Woodworking October 2009 |


