Popular Woodworking 2009-11 № 179, страница 36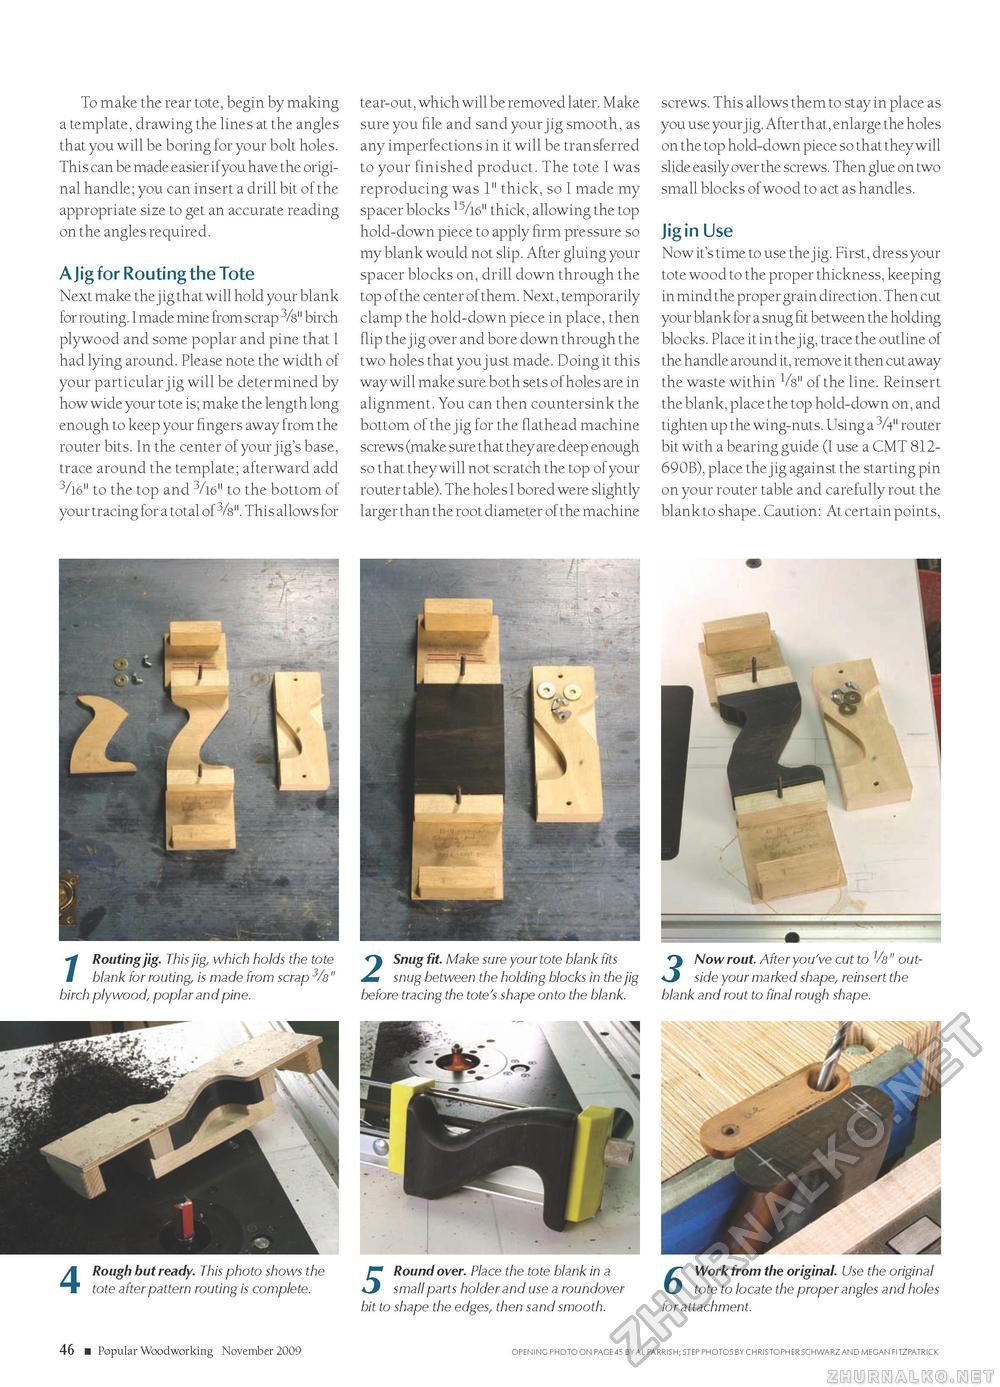
To make the rear tote, begin by making a template, drawing the lines at the angles that you will be boring for your bolt holes. This can be made easier ifyou have the original handle; you can insert a drill bit of the appropriate size to get an accurate reading on the angles required. A Jig for Routing the Tote Next make the jig that will hold your blank for routing. I made mine from scrap 3/8" birch plywood and some poplar and pine that I had lying around. Please note the width of your particular jig will be determined by how wide your tote is; make the length long enough to keep your fingers away from the router bits. In the center of your jig's base, trace around the template; afterward add to the top and 3/l6" to the bottom of your tracing for a total of 3/s". This allows for tear-out, which will be removed later. Make sure you file and sand your jig smooth, as any imperfections in it will be transferred to your finished product. The tote I was reproducing was 1" thick, so I made my spacer blocks 15/l6" thick, allowing the top hold-down piece to apply firm pressure so my blank would not slip. After gluing your spacer blocks on, drill down through the top of the center of them. Next, temporarily clamp the hold-down piece in place, then flip the jig over and bore down through the two holes that you just made. Doing it this way will make sure both sets of holes are in alignment. You can then countersink the bottom of the jig for the flathead machine screws (make sure that they are deep enough so that they will not scratch the top of your router table). The holes I bored were slightly larger than the root diameter of the machine screws. This allows them to stay in place as you use your jig. After that, enlarge the holes on the top hold-down piece so that they will slide easily over the screws. Then glue on two small blocks of wood to act as handles. Jig in Use Now it's time to use the jig. First, dress your tote wood to the proper thickness, keeping in mind the proper grain direction. Then cut your blank for a snug fit between the holding blocks. Place it in the jig, trace the outline of the handle around it, remove it then cut away the waste within Vs" of the line. Reinsert the blank, place the top hold-down on, and tighten up the wing-nuts. Using a 3A" router bit with a bearing guide (I use a CMT 812-690B), place the jig against the starting pin on your router table and carefully rout the blank to shape. Caution: At certain points, /Routing jig. This jig, which holds the tote blank for routing, is made from scrap 3/s" birch plywood, poplar and pine. 2 Snug fit. Make sure your tote blank fits O Now rout. After you've cut to Vs" out- snug between the holding blocks in the jig *J side your marked shape, reinsert the before tracing the tote's shape onto the blank. blank and rout to final rough shape. 4 Rough but ready. This photo shows the tote after pattern routing is complete. 5 Round over. Place the tote blank in a small parts holder and use a roundover bit to shape the edges, then sand smooth. 6 Work from the original. Use the original tote to locate the proper angles and holes for attachment. 46 ■ Popular Woodworking November 2009 OPENING PHOTO ON PACE 45 BY AL PARRISH; STEP PHOTOS BY CHRISTOPHER SCHWARZ AND MEGAN FITZPATRICK |


