15 - Sliding Table, страница 27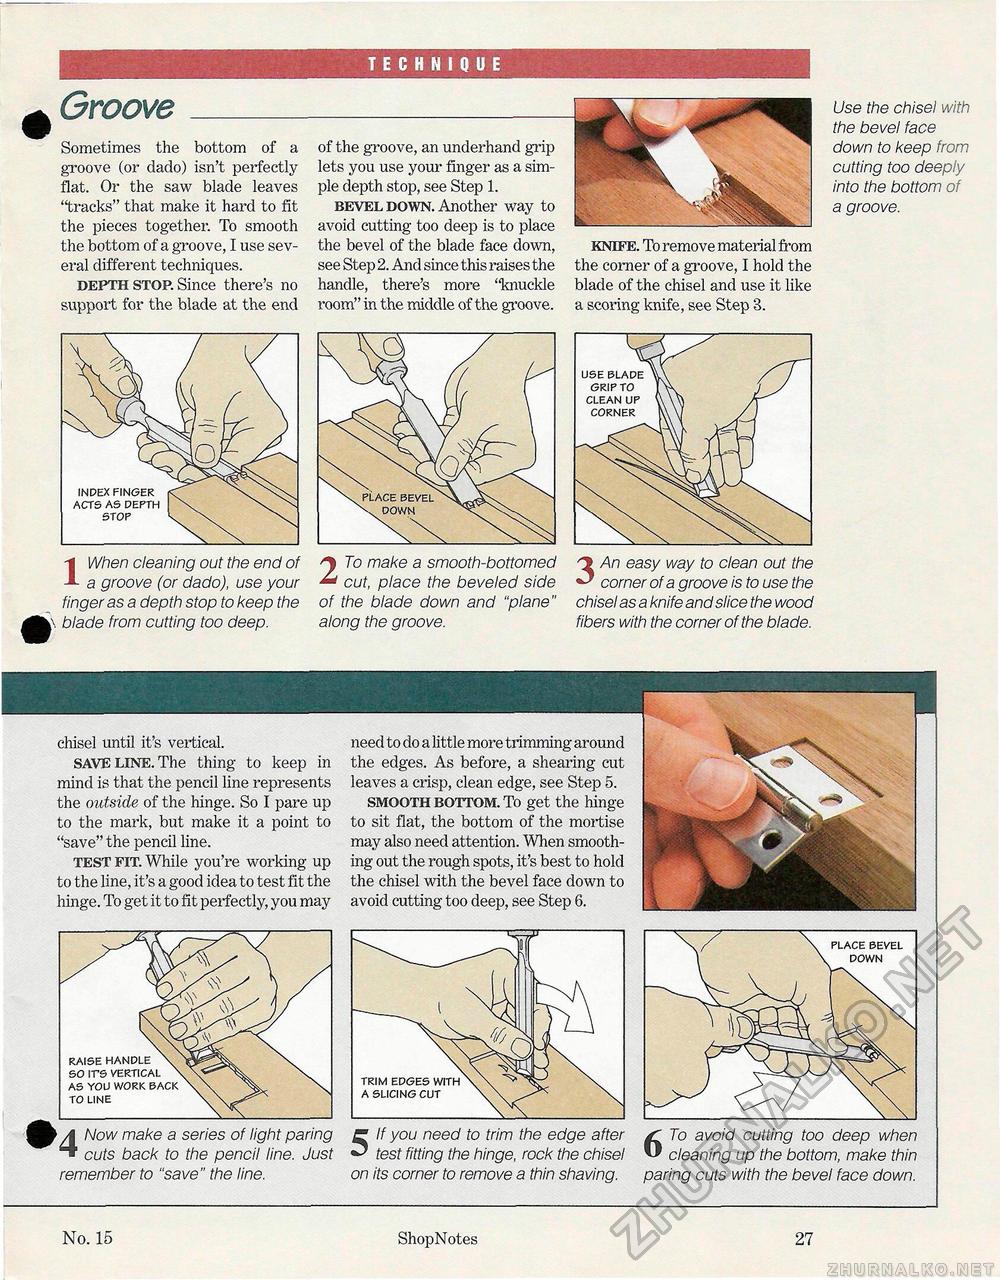
TECHNIQUE GrooveSometimes the bottom of a groove (or dado) isn't perfectly flat. Or the saw blade leaves "tracks" that make it hard to fit the pieces together. To smooth the bottom of a groove, I use several different techniques. depth stop. Since there's no support for the blade at the end of the groove, an underhand grip lets you use your finger as a simple depth stop, see Step 1. bevel down. Another way to avoid cutting too deep is to place the bevel of the blade face down, see Step 2. And since this raises the handle, there's more "knuckle room" in the middle of the groove. knife. To remove material from the corner of a groove, I hold the blade of the chisel and use it like a scoring knife, see Step 8. Use the chisel with the bevel face down to keep from cutting too deeply into the bottom of a groove. IWhen cleaning out the end of a groove (or dado), use your finger as a depth stop to keep the blade from cutting too deep. 2 To make a smooth-bottomed cut, place the beveled side of the blade down and "plane" along the groove. 3 An easy way to clean out the corner of a groove is to use the chisel as a knife and slice the wood fibers with the corner of the blade. USE BLADE GRIP TO CLEAN UP CORNER chisel until it's vertical. save line. The thing to keep in mind is that the pencil line represents the outside of the hinge. So I pare up to the mark, but make it a point to "save" the pencil line. test fit. While you're working up to the line, it's a good idea to test fit the hinge. To get it to fit perfectly, you may need to do a little more trimming around the edges. As before, a shearing cut leaves a crisp, clean edge, see Step 5. smooth bottom. To get the hinge to sit flat, the bottom of the mortise may also need attention. When smoothing out the rough spots, it's best to hold the chisel with the bevel face down to avoid cutting too deep, see Step 6. TRIM EDGES WITH A SLICING CUT s A ma^e a series of light paring ^ cuts back to the pencil line. Just remember to "save" the line. 5 If you need to trim the edge after test fitting the hinge, rock the chisel on its corner to remove a thin shaving. 6 To avoid cutting too deep when cleaning up the bottom, make thin paring cuts with the bevel face down. No. 15 ShopNotes 27 |


