19 - Clamp Storage System, страница 12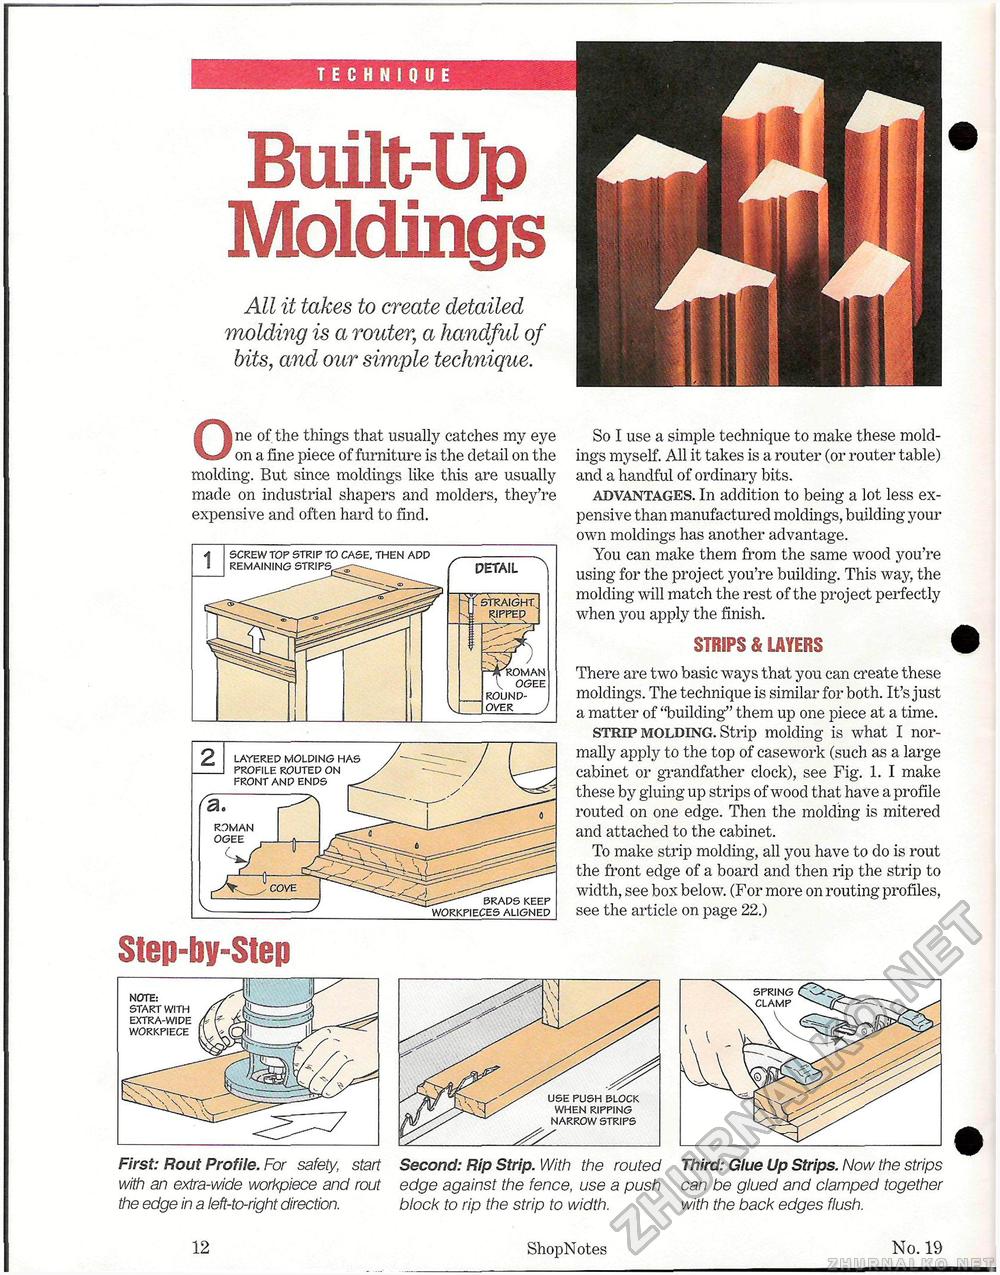
TECHNIQUE Built-Up MoldingsAll it takes to create detailed molding is a router; a handful of bits, and our simple technique. One of the things that usually catches my eye on a fine piece of furniture is the detail on the molding. But since moldings like this are usually made on industrial shapers and molders, they're expensive and often hard to find. Step-by-Step So I use a simple technique to make these moldings myself. All it takes is a router (or router table) and a handful of ordinary bits. advantages. In addition to being a lot less expensive than manufactured moldings, building your own moldings has another advantage. You can make them from the same wood you're using for the project you're building. This way, the molding will match the rest of the project perfectly when you apply the finish. STRIPS & LAYERS There are two basic ways that you can create these moldings. The technique is similar for both. It's just a matter of "building" them up one piece at a time. strip molding. Strip molding is what I normally apply to the top of casework (such as a large cabinet or grandfather clock), see Fig. 1. I make these by gluing up strips of wood that have a profile routed on one edge. Then the molding is mitered and attached to the cabinet. To make strip molding, all you have to do is rout the front edge of a board and then rip the strip to width, see box below. (For more on routing profiles, see the article on page 22.) First: Rout Profile. For safety, start with an extra-wide workpiece and rout the edge in a left-to-right direction. Second: Rip Strip. With the routed edge against the fence, use a push block to rip the strip to width. Third: Glue Up Strips. Now the strips can be glued and clamped together with the back edges flush. 12 ShopNotes No. 19 |


