38 - Ring Boxes, страница 28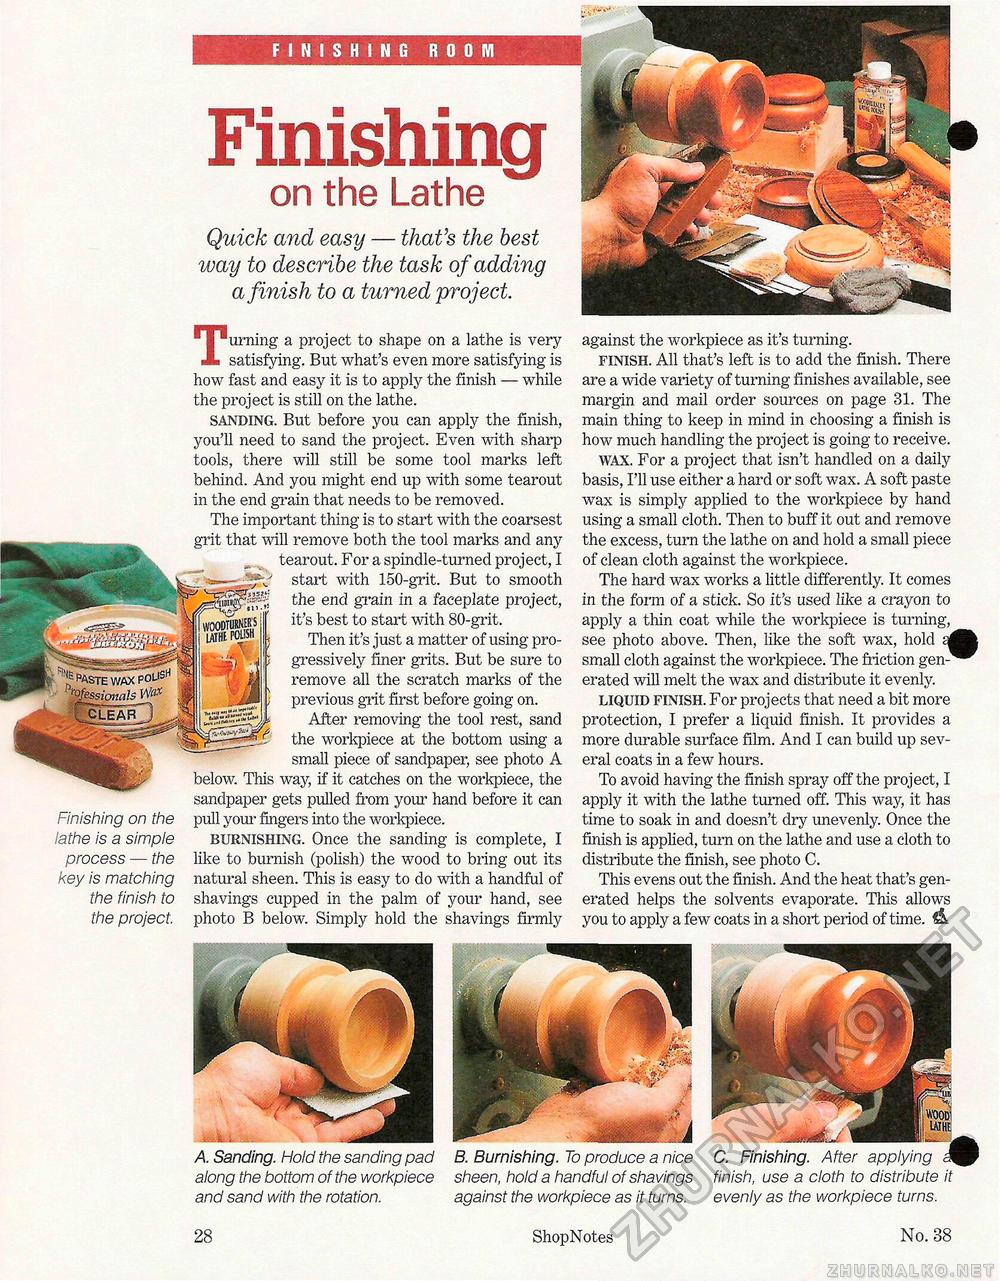
Finishing on the Lathe A. Sanding. Hold the sanding pad along the bottom of the workpiece and sand with the rotation. B. Burnishing. To produce a nice sheen, hold a handful of shavings against the workpiece as it turns. 28 ShopNotes No. 38 against the workpiece as it's turning. finish. All that's left is to add the finish. There are a wide variety of turning finishes available, see margin and mail order sources on page 31. The main thing to keep in mind in choosing a finish is how much handling the project is going to receive. wax. For a project that isn't handled on a daily basis, I'll use either a hard or soft wax. A soft paste wax is simply applied to the workpiece by hand using a small cloth. Then to buff it out and remove the excess, turn the lathe on and hold a small piece of clean cloth against the workpiece. The hard wax works a little differently. It comes in the form of a stick. So it's used like a crayon to apply a thin coat while the workpiece is turning, see photo above. Then, like the soft wax, hold si small cloth against the workpiece. The friction generated will melt the wax and distribute it evenly. liquid finish. For projects that need a bit more protection, I prefer a liquid finish. It provides a more durable surface film. And I can build up several coats in a few hours. To avoid having the finish spray off the project, I apply it with the lathe turned off. This way, it has time to soak in and doesn't dry unevenly. Once the finish is applied, turn on the lathe and use a cloth to distribute the finish, see photo C. This evens out the finish. And the heat that's generated helps the solvents evaporate. This allows you to apply a few coats in a short period of time. Quick and easy — that's the best way to describe the task of adding a finish to a turned project. Finishing on the lathe is a simple process — the key is matching the finish to the project. Turning a project to shape on a lathe is very satisfying. But what's even more satisfying is how fast and easy it is to apply the finish — while the project is still on the lathe. sanding. But before you can apply the finish, you'll need to sand the project. Even with sharp tools, there will still be some tool marks left behind. And you might end up with some tearout in the end grain that needs to be removed. The important thing is to start with the coarsest grit that will remove both the tool marks and any tearout. For a spindle-turned project, I start with 150-grit. But to smooth the end grain in a faceplate project, it's best to start with 80-grit, Then it's just a matter of using progressively finer grits. But be sure to remove all the scratch marks of the previous grit first before going on. After removing the tool rest, sand the workpiece at the bottom using a small piece of sandpaper, see photo A below. This way, if it catches on the workpiece, the sandpaper gets pulled from your hand before it can pull your fingers into the workpiece. burnishing. Once the sanding is complete, I like to burnish (polish) the wood to bring out its natural sheen. This is easy to do with a handful of shavings cupped in the palm of your hand, see photo B below. Simply hold the shavings firmly C. Finishing. After applying o^^ finish, use a cloth to distribute it evenly as the workpiece turns. |


