38 - Ring Boxes, страница 30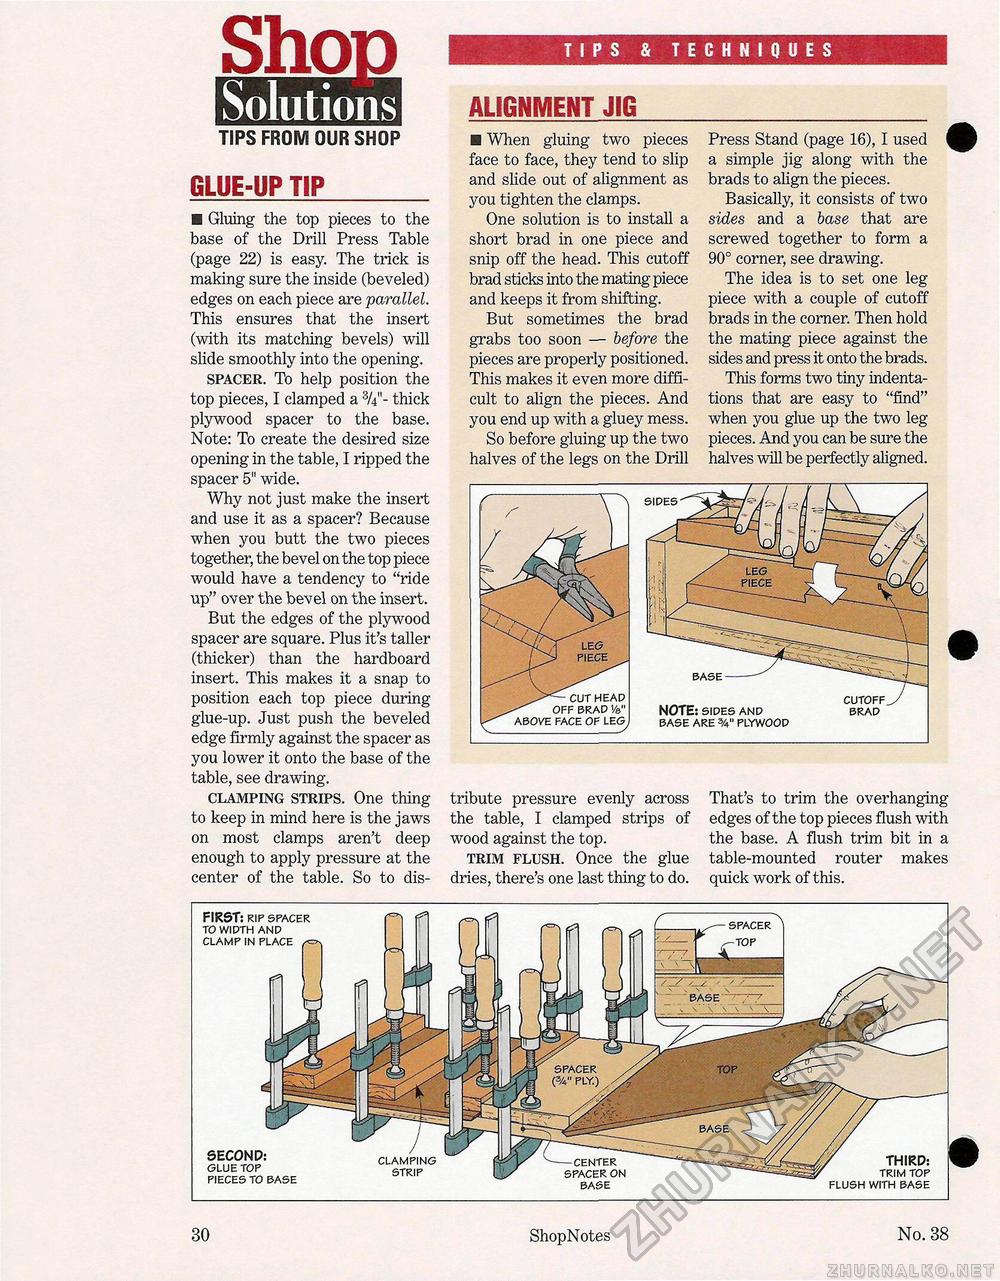
ShoD Solutions TIPS FROM OUR SHOP GLUE-UP TIP_ ■ Gluing the top pieces to the base of the Drill Press Table (page 22) is easy. The trick is making sure the inside (beveled) edges on each piece are parallel. This ensures that the insert (with its matching bevels) will slide smoothly into the opening. SPACER. To help position the top pieces, I clamped a thick plywood spacer to the base. Note: To create the desired size opening in the table, I ripped the spacer 5" wide. Why not just make the insert and use it as a spacer? Because when you butt the two pieces together, the bevel on the top piece would have a tendency to "ride up" over the bevel on the insert. But the edges of the plywood spacer are square. Plus it's taller (thicker) than the hardboard insert. This makes it a snap to position each top piece during glue-up. Just push the beveled edge firmly against the spacer as you lower it onto the base of the table, see drawing. CLAMPING STRIPS. One thing to keep in mind here is the jaws on most clamps aren't deep enough to apply pressure at the center of the table. So to dis- TIPS & TECHNIQUES ALIGNMENT JIG ■ When gluing two pieces face to face, they tend to slip and slide out of alignment as you tighten the clamps. One solution is to install a short brad in one piece and snip off the head. This cutoff brad sticks into the mating piece and keeps it from shifting. But sometimes the brad grabs too soon — before the pieces are properly positioned. This makes it even more difficult to align the pieces. And you end up with a gluey mess. So before gluing up the two halves of the legs on the Drill Press Stand (page 16), I used a simple jig along with the brads to align the pieces. Basically, it consists of two sides and a base that are screwed together to form a 90° corner, see drawing. The idea is to set one leg piece with a couple of cutoff brads in the corner. Then hold the mating piece against the sides and press it onto the brads. This forms two tiny indentations that are easy to "find" when you glue up the two leg pieces. And you can be sure the halves will be perfectly aligned. ABOVE face of leg, NOTE: sides and base are plywood tribute pressure evenly across the table, I clamped strips of wood against the top. TRIM FLUSH. Once the glue dries, there's one last thing to do. That's to trim the overhanging edges of the top pieces flush with the base. A flush trim bit in a table-mounted router makes quick work of this. FIRST: rip spacer to width and clamp in place spacer -top SECOND: glue top pieces to base clamping strip base THIRD: trim top flush with base 30 ShopNotes No. 38 |


