41 - Fold-Down Drafting Table, страница 15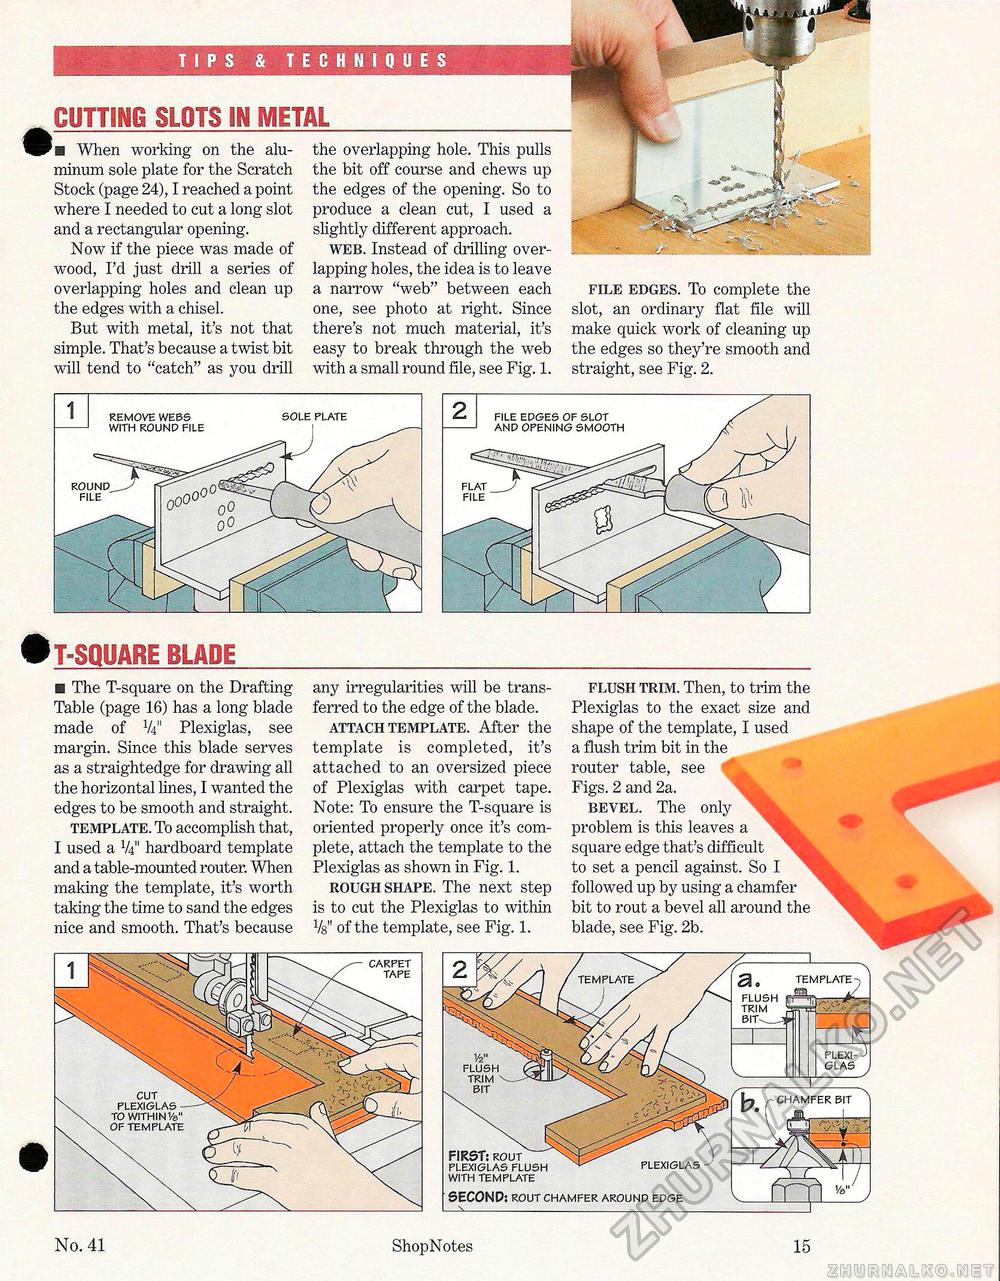
CUTTING SLOTS IN METAL When working on the aluminum sole plate for the Scratch Stock (page 24), I reached a point where I needed to cut a long slot and a rectangular opening. Now if the piece was made of wood, I'd just drill a series of overlapping holes and clean up the edges with a chisel. But with metal, it's not that simple. That's because a twist bit will tend to "catch" as you drill the overlapping hole. This pulls the bit off course and chews up the edges of the opening. So to produce a clean cut, I used a slightly different approach. web. Instead of drilling overlapping holes, the idea is to leave a narrow "web" between each one, see photo at right. Since there's not much material, it's easy to break through the web with a small round file, see Fig. 1. file edges. To complete the slot, an ordinary flat file will make quick work of cleaning up the edges so they're smooth and straight, see Fig. 2. remove webs with round file sole plate # T-SQUARE BLADE ■ The T-square on the Drafting Table (page 16) has a long blade made of V4" Plexiglas, see margin. Since this blade serves as a straightedge for drawing all the horizontal lines, I wanted the edges to be smooth and straight. template. To accomplish that, I used a V4" hardboard template and a table-mounted router. When making the template, it's worth taking the time to sand the edges nice and smooth. That's because any irregularities will be transferred to the edge of the blade. attach template. After the template is completed, it's attached to an oversized piece of Plexiglas with carpet tape. Note: To ensure the T-square is oriented properly once it's complete, attach the template to the Plexiglas as shown in Fig. 1. rough shape. The next step is to cut the Plexiglas to within Vs" of the template, see Fig. 1. flush trim. Then, to trim the Plexiglas to the exact size and shape of the template, I used a flush trim bit in the router table, see Figs. 2 and 2a. bevel. The only problem is this leaves a square edge that's difficult to set a pencil against. So I followed up by using a chamfer bit to rout a bevel all around the blade, see Fig. 2b. 1/2" flush trim FIRST: rout plexiglas flush with template SECOND: rout chamfer around edge No. 41 ShopNotes 15 |


