41 - Fold-Down Drafting Table, страница 18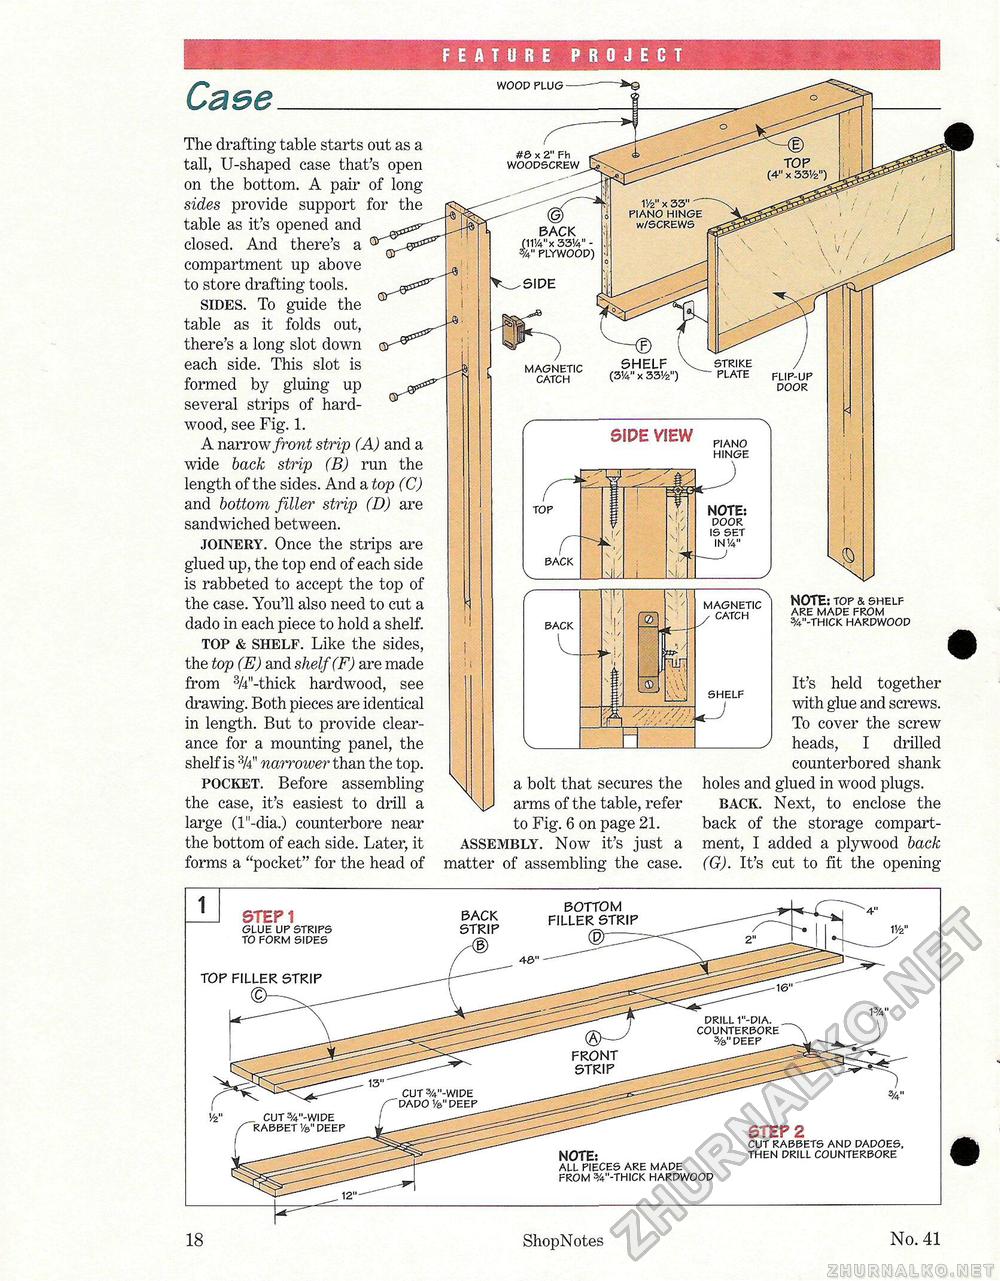
FEATURE PROJECT Caee WOOD PLUG — The drafting table starts out as a tall, U-shaped case that's open on the bottom. A pair of long sides provide support for the table as it's opened and closed. And there's a compartment up above to store drafting tools. sides. To guide the table as it folds out, there's a long slot down each side. This slot is formed by gluing up several strips of hardwood, see Fig. 1. A narrow front strip (A) and a wide back strip (B) run the length of the sides. And a top (C) and bottom filler strip (D) are sandwiched between. joinery. Once the strips are glued up, the top end of each side is rabbeted to accept the top of the case. You'll also need to cut a dado in each piece to hold a shelf. top & shelf. Like the sides, the top (E) and shelf (F) are made from 3/4"-thick hardwood, see drawing. Both pieces are identical in length. But to provide clearance for a mounting panel, the shelf is narrower than the top. pocket. Before assembling the case, it's easiest to drill a large (l"-dia.) counterbore near the bottom of each side. Later, it forms a "pocket" for the head of a bolt that secures the arms of the table, refer to Fig. 6 on page 21. assembly. Now it's just a matter of assembling the case. NOTE: TOP & SHELF ARE MADE FROM %"-THICK HARDWOOD It's held together with glue and screws. To cover the screw heads, I drilled counterbored shank holes and glued in wood plugs. back. Next, to enclose the back of the storage compartment, I added a plywood back (G). It's cut to fit the opening 1 : GLUE UP STRIPS TO FORM SIDES BACK STRIP BOTTOM FILLER STRIP TOP FILLER STRIP NOTE: ALL PIECES ARE MADE FROM %"-THICK HARDWOOD STEP 2 CUT RABBETS AND DADOES, THEN DRILL COUNTERBORE 18 ShopNotes No. 41 |


