47 - Build Your Own Mortising Machine , страница 27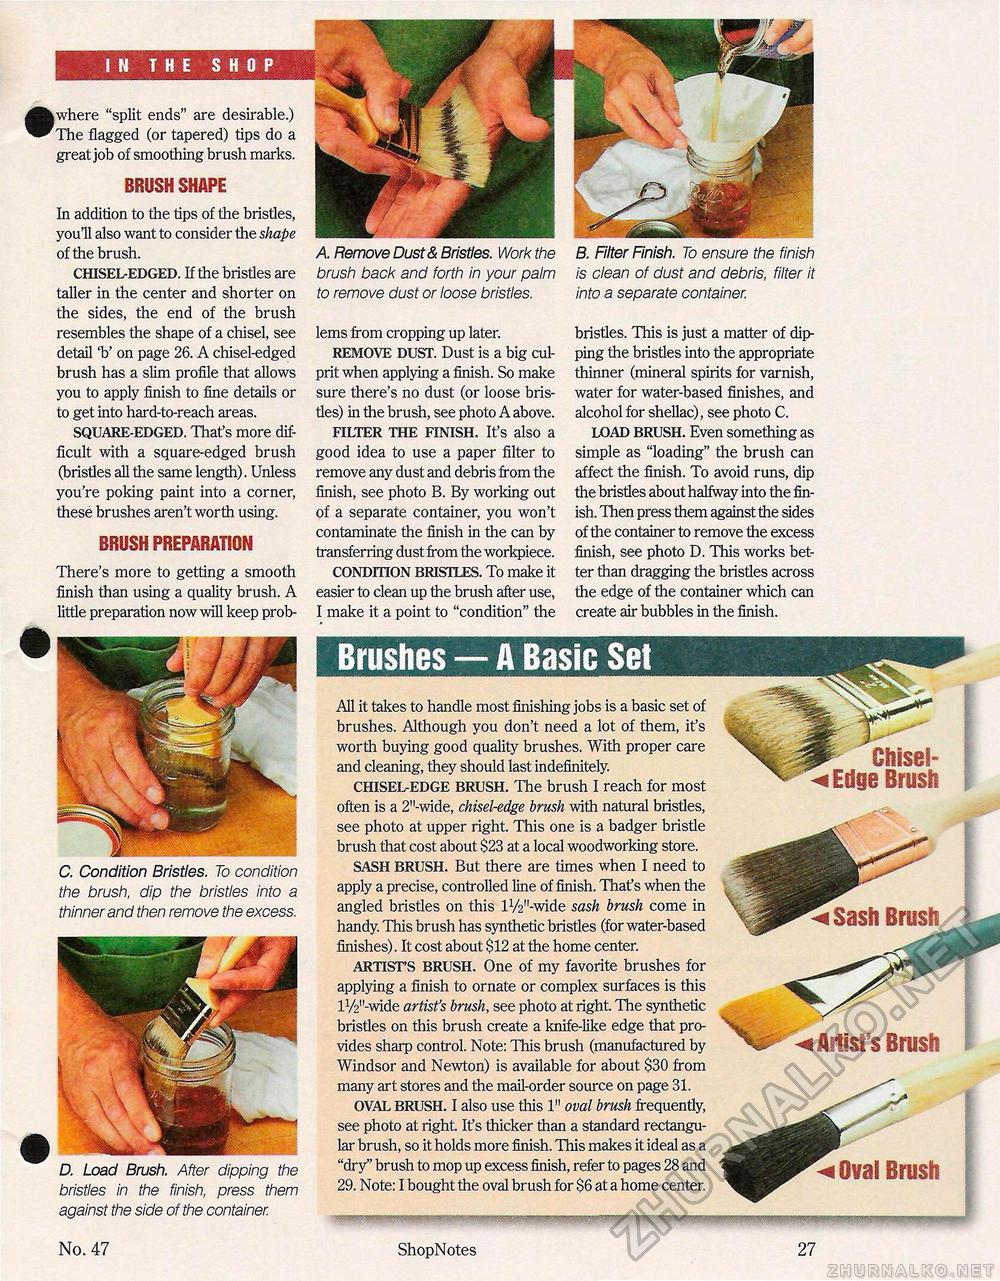
•where "split ends" are desirable.) The flagged (or tapered) tips do a great job of smoothing brush marks. BRUSH SHAPE In addition to the tips of the bristles, you'll also want to consider the shape of the brush. CHISEL-EDGED. If the bristles are taller in the center and shorter on the sides, the end of the brush resembles the shape of a chisel, see detail 'b' on page 26. A chisel-edged brush has a slim profile that allows you to apply finish to fine details or to get into hard-to-reach areas. SQUARE-EDGED. That's more difficult with a square-edged brush (bristles all the same length). Unless you're poking paint into a corner, these brushes aren't worth using. BRUSH PREPARATION There's more to getting a smooth finish than using a quality brush. A little preparation now will keep prob- A Remove Dust & Bristles. Work the brush back and forth in your palm to remove dust or loose bristles. lems from cropping up later. REMOVE DUST. Dust is a big culprit when applying a finish. So make sure there's no dust (or loose bristles) in the brush, see photo A above. FILTER THE FINISH. It's also a good idea to use a paper filter to remove any dust and debris from the finish, see photo B. By working out of a separate container, you won't contaminate the finish in the can by transferring dust from the workpiece. CONDITION BRISTLES. To make it easier to clean up the brush after use, I make it a point to "condition" the B. Filter Finish. To ensure the finish is clean of dust and debris, filter it into a separate container. bristles. This is just a matter of dipping the bristles into the appropriate thinner (mineral spirits for varnish, water for water-based finishes, and alcohol for shellac), see photo C. LOAD BRUSH. Even something as simple as "loading" the brush can affect the finish. To avoid runs, dip the bristles about halfway into the finish. Then press them against the sides of the container to remove the excess finish, see photo D. This works better than dragging the bristles across the edge of the container which can create air bubbles in the finish. Brushes — A Basic Set All it takes to handle most finishing jobs is a basic set of brushes. Although you don't need a lot of them, it's worth buying good quality brushes. With proper care and cleaning, they should last indefinitely. CHISEL-EDGE BRUSH. The brush I reach for most often is a 2"-wide, chisel-edge brush with natural bristles, see photo at upper right. This one is a badger bristle brush that cost about $23 at a local woodworking store. SASH BRUSH. But there are times when I need to apply a precise, controlled line of finish. That's when the angled bristles on this lV2"-wide sash brush come in handy. This brush has synthetic bristles (for water-based finishes). It cost about $12 at the home center. ARTIST'S BRUSH. One of my favorite brushes for applying a finish to ornate or complex surfaces is this lVy'-wide artist's brush, see photo at right. Hie synthetic bristles on this brush create a knife-like edge that provides sharp control. Note: This brush (manufactured by Windsor and Newton) is available for about $30 from many art stores and the mail-order source on page 31. OVAL BRUSH. I also use this 1" oval brush frequently, see photo at right. It's thicker than a standard rectangular brush, so it holds more finish. This makes it ideal as a "dry" brush to mop up excess finish, refer to pages 28 and 29. Note: I bought the oval brush for $6 at a home center. C. Condition Bristles. To condition the brush, dip the bristles into a thinner and then remove the excess. D. Load Brush. After dipping the bristles in the finish, press them against the side of the container. Sash Brush ^Artist's Brush ^Ovat Brush No. 47 ShopNotes 27 |


