47 - Build Your Own Mortising Machine , страница 29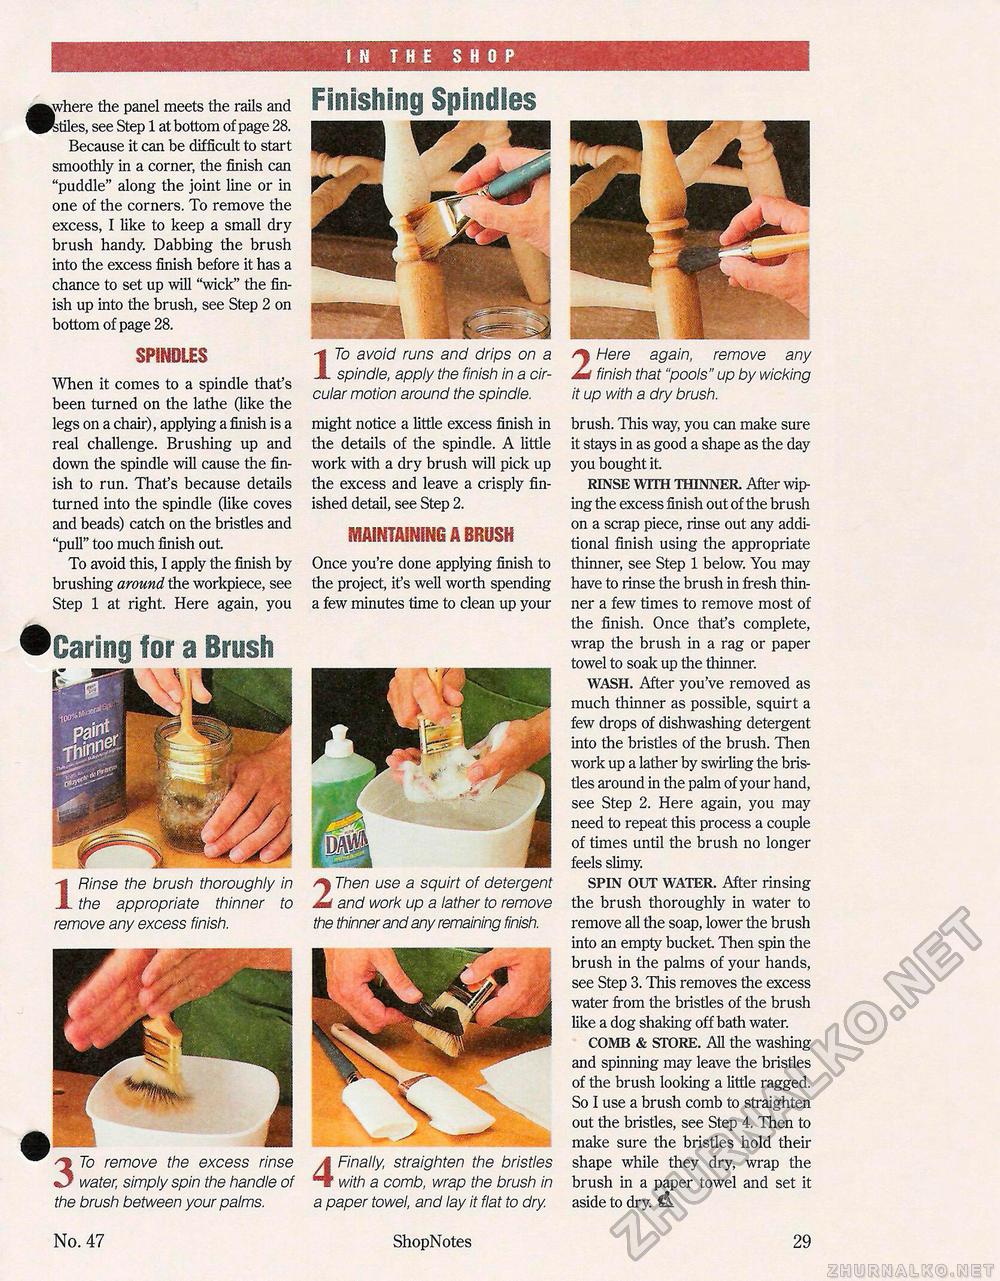
I N THE SHOP 2 Here again, remove any finish that "pools" up by wicking it up with a dry brush. brush. This way, you can make sure it stays in as good a shape as the day you bought it RINSE WITH THINNER. After wip-ing the excess finish out of the brush on a scrap piece, rinse out any additional finish using the appropriate thinner, see Step 1 below. You may have to rinse the brush in fresh thinner a few times to remove most of the finish. Once that's complete, wrap the brush in a rag or paper towel to soak up the thinner. WASH. After you've removed as much thinner as possible, squirt a few drops of dishwashing detergent into the bristles of the brush. Then work up a lather by swirling the bristles around in the palm of your hand, see Step 2. Here again, you may need to repeat this process a couple of times until the brush no longer feels slimy. SPIN OUT WATER. After rinsing the brush thoroughly in water to remove all the soap, lower the brush into an empty bucket Then spin the brush in the palms of your hands, see Step 3. This removes the excess water from the bristles of the brush like a dog shaking off bath water. COMB & STORE. All the washing and spinning may leave the bristles of the brush looking a little ragged. So I use a brush comb to straighten out the bristles, see Step 4. Then to make sure the bristles hold their shape while they dry, wrap the brush in a paper towel and set it aside to dry. •where the panel meets the rails and stiles, see Step 1 at bottom of page 28. Because it can be difficult to start smoothly in a corner, the finish can "puddle" along the joint line or in one of the corners. To remove the excess, I like to keep a small dry brush handy. Dabbing the brush into the excess finish before it has a chance to set up will "wick" the finish up into the brush, see Step 2 on bottom of page 28. SPINDLES When it comes to a spindle that's been turned on the lathe (like the legs on a chair), applying a finish is a real challenge. Brushing up and down the spindle will cause the finish to run. That's because details turned into the spindle (like coves and beads) catch on the bristles and "pull" too much finish out To avoid this, I apply the finish by brushing around the workpiece, see Step 1 at right. Here again, you Finishing Spindles ^Caring lor a Brush 17b avoid runs and drips on a spindle, apply the finish in a circular motion around the spindle. might notice a little excess finish in the details of the spindle. A little work with a dry brush will pick up the excess and leave a crisply finished detail, see Step 2. MAINTAINING A BRUSH Once you're done applying finish to the project, its well worth spending a few minutes time to clean up your 2 Then use a squirt of detergent and work up a lather to remove the thinner and any remaining finish. 4 Finally, straighten the bristles with a comb, wrap the brush in a paper towel, and lay it flat to dry. 1 Rinse the brush thoroughly in the appropriate thinner to remove any excess finish. 3 To remove the excess rinse water, simply spin the handle of the brush between your palms. No. 47 ShopNotes 29 |


