47 - Build Your Own Mortising Machine , страница 28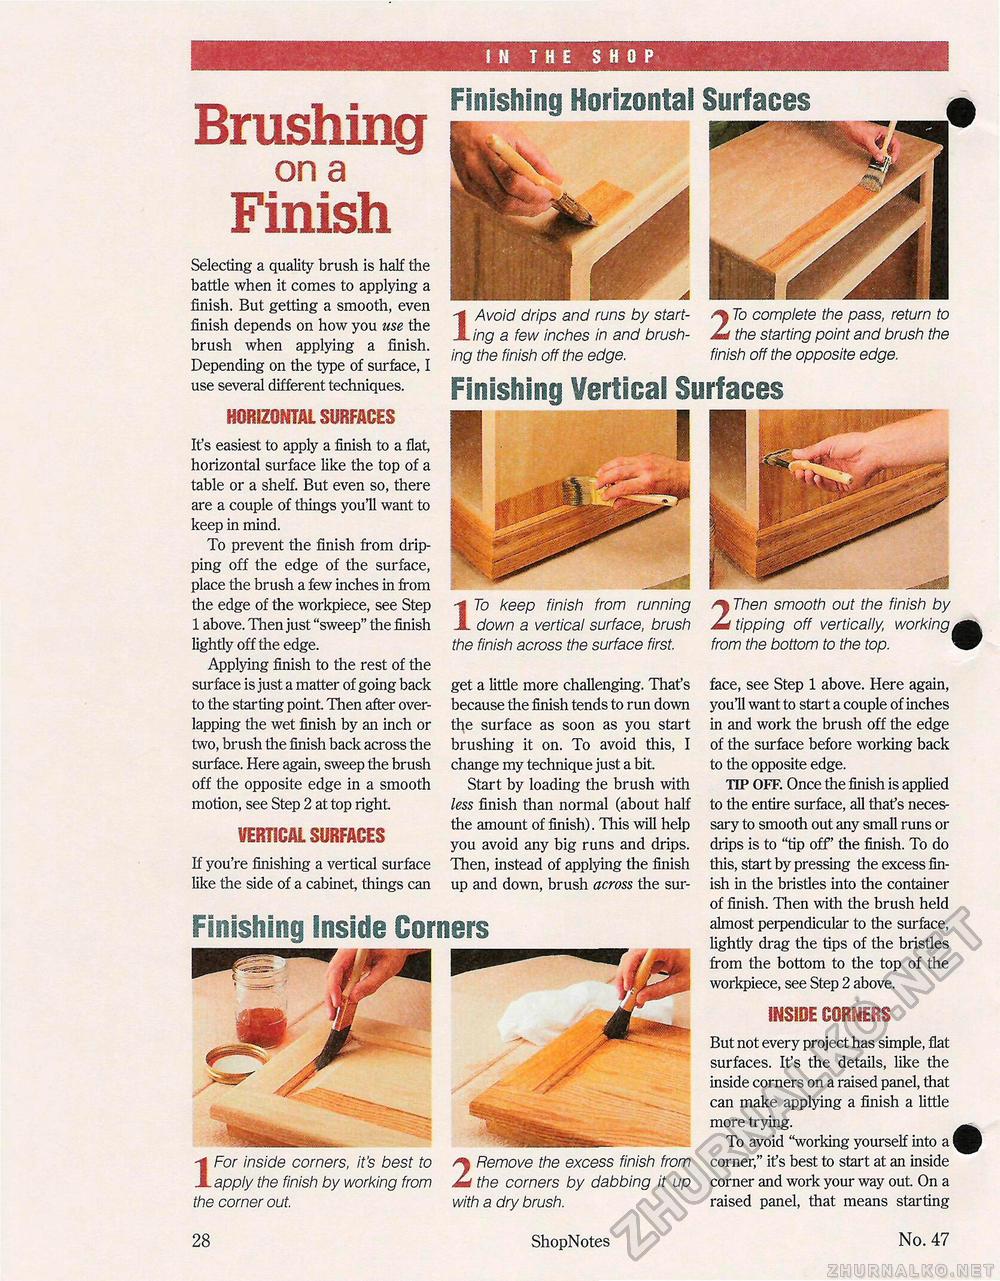
I N T H E SHOP Brushingon a FinishFinishing Horizontal INSIDE CORNERS Selecting a quality brush is half the battle when it comes to applying a finish. But getting a smooth, even finish depends on how you use the brush when applying a finish. Depending on the type of surface, I use several different techniques. HORIZONTAL SURFACES 1 Avoid drips and runs by start- To complete the pass, return to ing a few inches in and brush- JZd the starting point and brush the ing the finish off the edge. finish off the opposite edge. Finishing Vertical Surfaces 2 Then smooth out the finish by tipping off vertically, working from the bottom to the top. ' face, see Step 1 above. Here again, you'll want to start a couple of inches in and work the brush off the edge of the surface before working back to the opposite edge. HP OFF. Once the finish is applied to the entire surface, all thafs necessary to smooth out any small runs or drips is to "tip off' the finish. To do this, start by pressing the excess finish in the bristles into the container of finish. Then with the brush held almost perpendicular to the surface, lightly drag the tips of the bristles from the bottom to the top of the workpiece, see Step 2 above. IFor inside corners, it's best to apply the finish by working from the corner out. 2 Remove the excess finish from the corners by dabbing it up with a dry brush. But not every project has simple, flat surfaces. It's the details, like the inside corners on a raised panel, that can make applying a finish a little more trying. To avoid "working yourself into a corner," if s best to start at an inside corner and work your way out On a raised panel, that means starting Finishing Inside Corners It's easiest to apply a finish to a flat, horizontal surface like the top of a table or a shelf. But even so, there are a couple of things you'll want to keep in mind. To prevent the finish from dripping off the edge of the surface, place the brush a few inches in from the edge of the workpiece, see Step 1 above. Then just "sweep" the finish lightly off the edge. Applying finish to the rest of the surface is just a matter of going back to the starting point. Then after overlapping the wet finish by an inch or two, brush the finish back across the surface. Here again, sweep the brush off the opposite edge in a smooth motion, see Step 2 at top right. VERTICAL SURFACES If you're finishing a vertical surface like the side of a cabinet, things can 17o keep finish from running down a vertical surface, brush the finish across the surface first. get a little more challenging. Thafs because the finish tends to run down the surface as soon as you start brushing it on. To avoid this, I change my technique just a bit. Start by loading the brush with less finish than normal (about half the amount of finish). This will help you avoid any big runs and drips. Then, instead of applying the finish up and down, brush across the sur- Surfaces 28 ShopNotes No. 47 |


