58 - Miter Saw Station, страница 30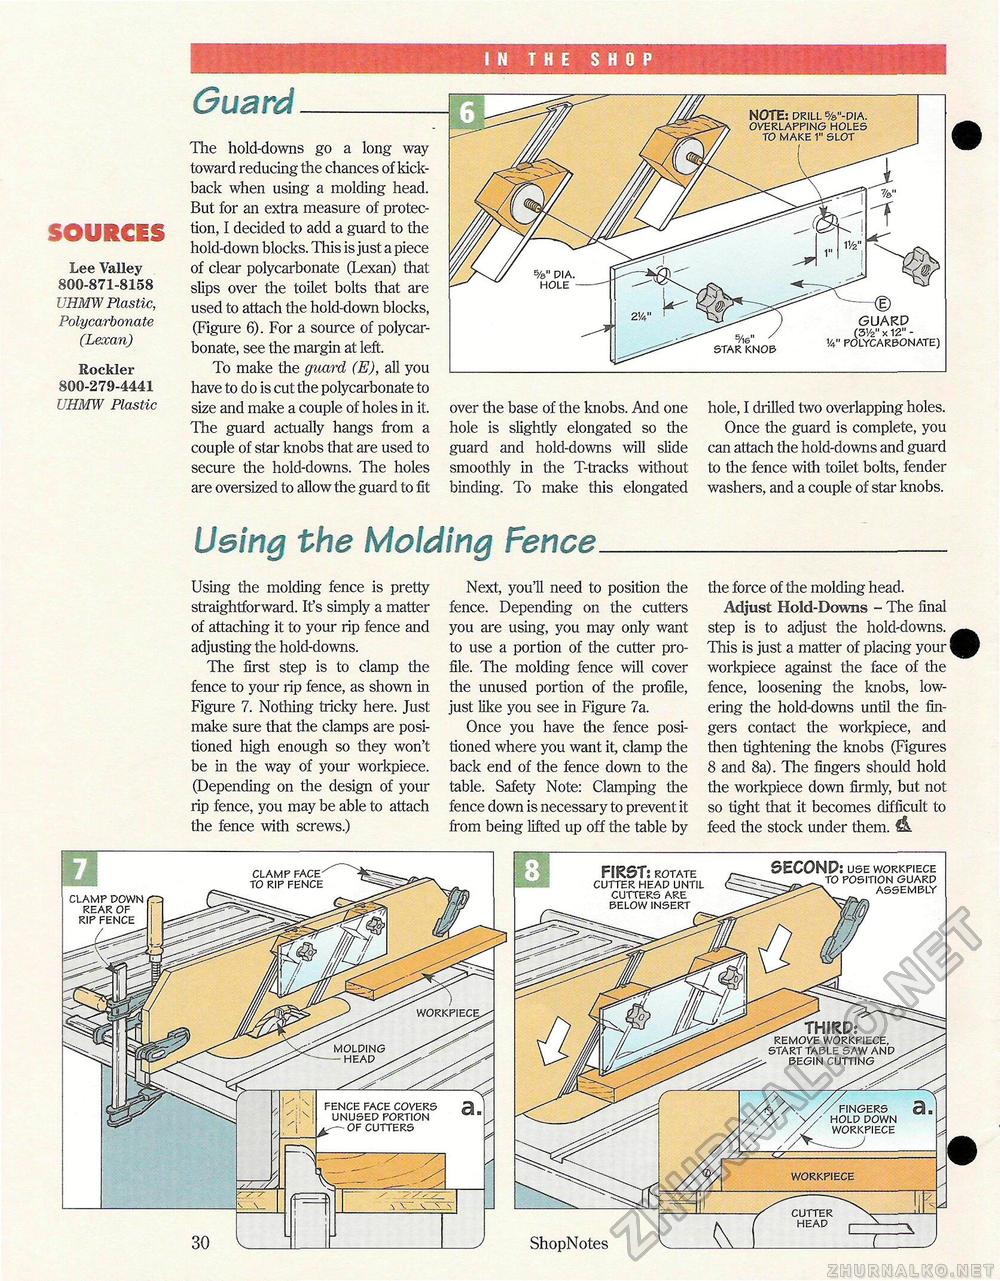
IN THE SHOP GuardSOURCES Lee Valley 800-871-8158 UHMW Plastic, Polycarbonate (Lexan) Rockier 800-279-4441 UHMW Plastic The hold-downs go a long way toward reducing the chances of kickback when using a molding head. But for an extra measure of protection, I decided to add a guard to the hold-down blocks. This is just a piece of clear polycarbonate (Lexan) that slips over the toilet bolts that are used to attach the hold-down blocks, (Figure 6). For a source of polycarbonate, see the margin at left. To make the guard (E), all you have to do is cut the polycarbonate to size and make a couple of holes in it. The guard actually hangs from a couple of star knobs that are used to secure the hold-downs. The holes are oversized to allow the guard to fit NOTE: drill %"-dia. overlapping holes to make 1" slot star knob GUARD (31/2" x 12" -!4" polycarbonate) over the base of the knobs. And one hole is slightly elongated so the guard and hold-downs will slide smoothly in the T-tracks without binding. To make this elongated hole, I drilled two overlapping holes. Once the guard is complete, you can attach the hold-downs and guard to the fence with toilet bolts, fender washers, and a couple of star knobs. Using the Molding FenceUsing the molding fence is pretty straightforward. Ifs simply a matter of attaching it to your rip fence and adjusting the hold-downs. The first step is to clamp the fence to your rip fence, as shown in Figure 7. Nothing tricky here. Just make sure that the clamps are positioned high enough so they won't be in the way of your workpiece. (Depending on the design of your rip fence, you may be able to attach the fence with screws.) Next, you'll need to position the fence. Depending on the cutters you are using, you may only want to use a portion of the cutter profile. The molding fence will cover the unused portion of the profile, just like you see in Figure 7a. Once you have the fence positioned where you want it, clamp the back end of the fence down to the table. Safety Note: Clamping the fence down is necessary to prevent it from being lifted up off the table by the force of the molding head. Adjust Hold-Downs - The final step is to adjust the hold-downs. This is just a matter of placing your I workpiece against the face of the fence, loosening the knobs, lowering the hold-downs until the fingers contact the workpiece, and then tightening the knobs (Figures 8 and 8a). The fingers should hold the workpiece down firmly, but not so light that it becomes difficult to feed the stock under them. clamp face to rip fence workpiece cutter head ShopNotes fingers 3 „ hold down workpiece FIRST: rotate cutter head until cutters are below insert SECOND: use workpiece to position guard assembly THIRD: remove workpiece, start table saw and begin cutting |


