58 - Miter Saw Station, страница 4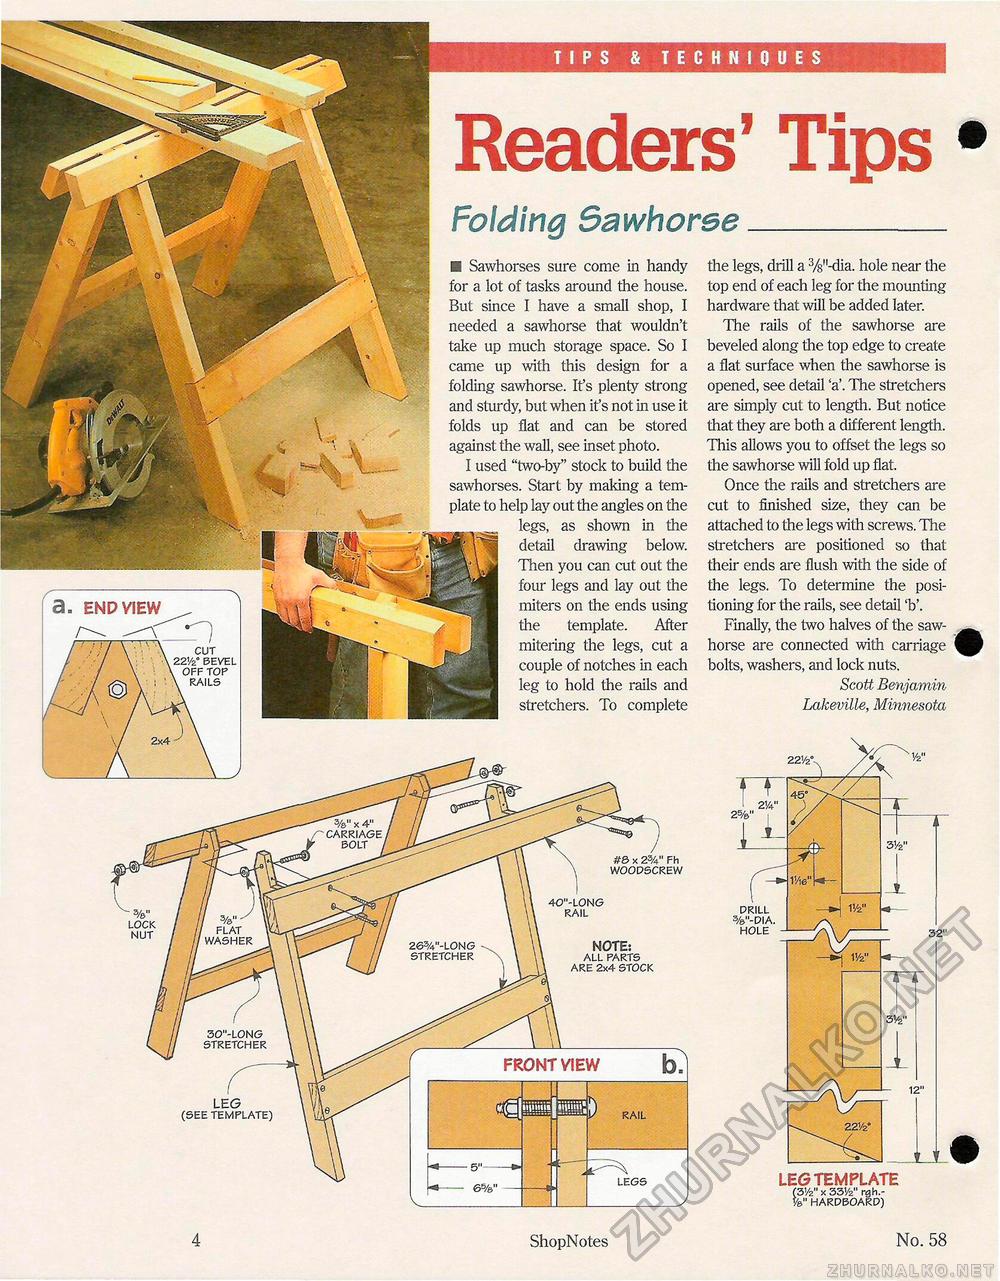
TIPS & TECHNIQUES Readers' TipsFolding Sawhorse_■ Sawhorses sure come in handy for a lot of tasks around the house. But since I have a small shop, I needed a sawhorse that wouldn't take up much storage space. So I came up with this design for a folding sawhorse. It's plenty strong and sturdy, but when it's not in use it folds up flat and can be stored against the wall, see inset photo. I used "two-by" stock to build the sawhorses. Start by making a template to help lay out the angles on the legs, as shown in the detail drawing below. Then you can cut out the four legs and lay out the miters on the ends using the template. After mitering the legs, cut a couple of notches in each leg to hold the rails and stretchers. To complete / #& x 2%" Fh WOODSCREW NOTE; ALL PARTS ARE 2x4 STOCK FRONT VIEW b. LEG (SEE TEMPLATE)
the legs, drill a 3/8n-dia. hole near the top end of each leg for the mounting hardware that will be added later. The rails of the sawhorse are beveled along the top edge to create a flat surface when the sawhorse is opened, see detail 'a'. The stretchers are simply cut to length. But notice that they are both a different length. This allows you to offset the legs so the sawhorse will fold up flat. Once the rails and stretchers are cut to finished size, they can be attached to the legs with screws. The stretchers are positioned so that their ends are flush with the side of the legs. To determine the positioning for the rails, see detail 'b'. Finally, the two halves of the saw-horse are connected with carriage bolts, washers, and lock nuts. Scott Benjamin Lakeville, Minnesota LEG TEMPLATE (31/z" x 33Vz" rgh.-V&" HARDBOARD) 4 ShopNotes No. 58 |


