62 - Box Joint Jig, страница 17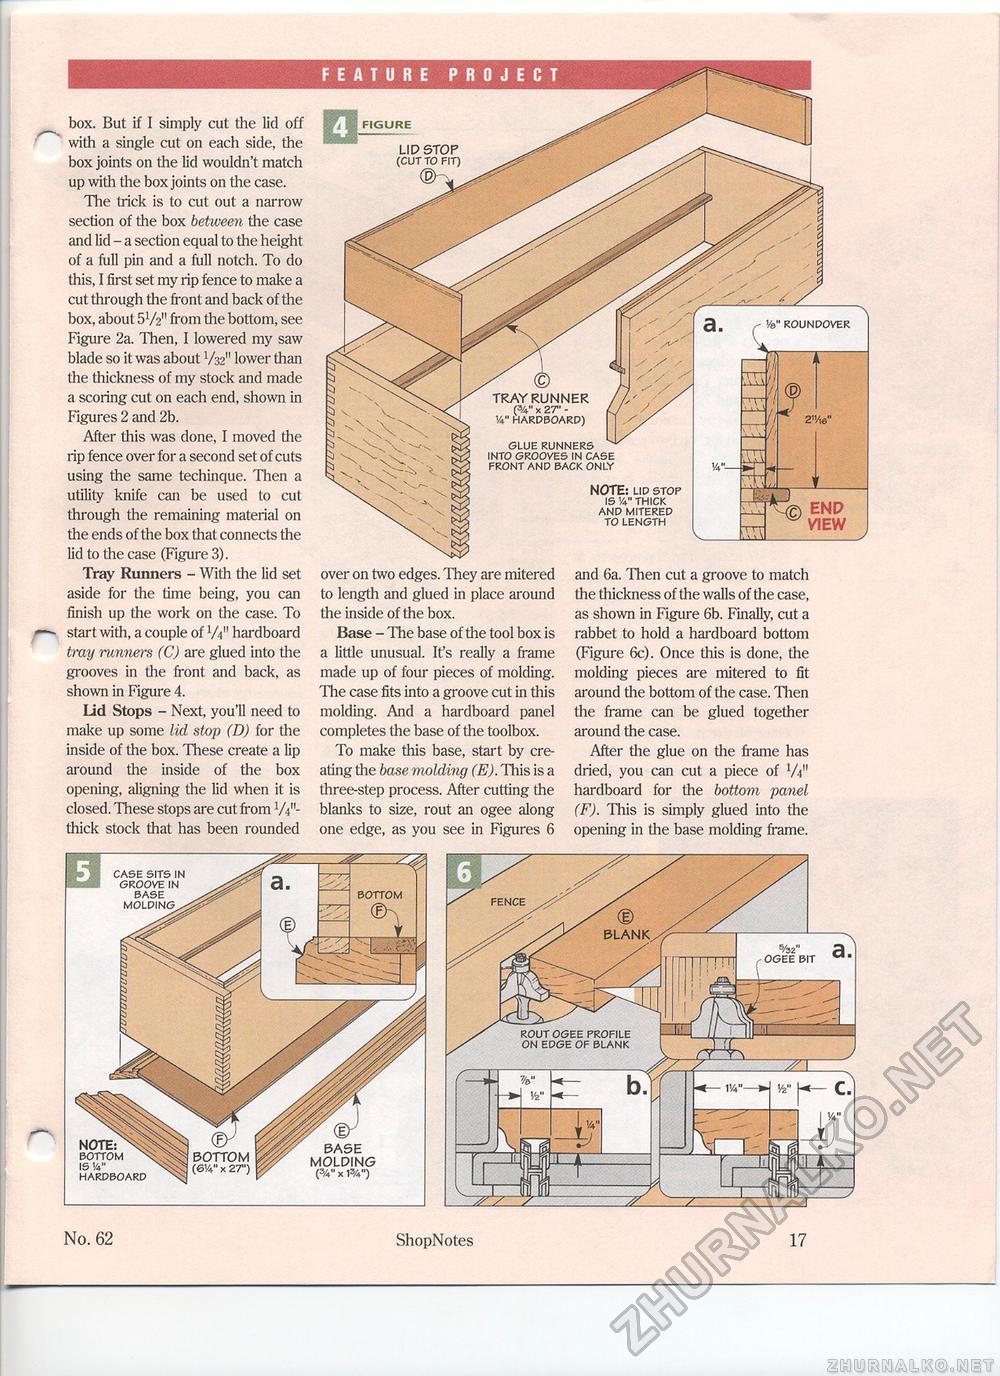
box. But if I simply cut the lid off with a single cut on each side, the box joints on the lid wouldn't match up with the box joints on the case. The trick is to cut out a narrow section of the box between the case and lid - a section equal to the height of a full pin and a full notch. To do this, I first set my rip fence to make a cut through the front and back of the box, about 5V2" from the bottom, see Figure 2a. Then, I lowered my saw blade so it was about V32" lower than the thickness of my stock and made a scoring cut on each end, shown in Figures 2 and 2b. After this was done, I moved the rip fence over for a second set of cuts using the same techinque. Then a utility knife can be used to cut through the remaining material on the ends of the box that connects the lid to the case (Figure 3). Tray Runners - With the lid set aside for the time being, you can finish up the work on the case. To start with, a couple of W hardboard tray runners (C) are glued into the grooves in the front and back, as shown in Figure 4. Lid Stops - Next, you'll need to make up some lid stop (D) for the inside of the box. These create a lip around the inside of the box opening, aligning the lid when it is closed. These stops are cut from W-thick stock that has been rounded over on two edges. They are mitered to length and glued in place around the inside of the box. Base - The base of the tool box is a little unusual. It's really a frame made up of four pieces of molding. The case fits into a groove cut in this molding. And a hardboard panel completes the base of the toolbox. To make this base, start by creating the base molding (E). This is a three-step process. After cutting the blanks to size, rout an ogee along one edge, as you see in Figures 6 and 6a. Then cut a groove to match the thickness of the walls of the case, as shown in Figure 6b. Finally, cut a rabbet to hold a hardboard bottom (Figure 6c). Once this is done, the molding pieces are mitered to fit around the bottom of the case. Then the frame can be glued together around the case. After the glue on the frame has dried, you can cut a piece of W hardboard for the bottom panel (F). This is simply glued into the opening in the base molding frame. CASE SITS IN GROOVE IN BASE MOLDING NOTE: BOTTOM IS '/>" HARDBOARD No. 62 ShopNotes 17 |


