62 - Box Joint Jig, страница 16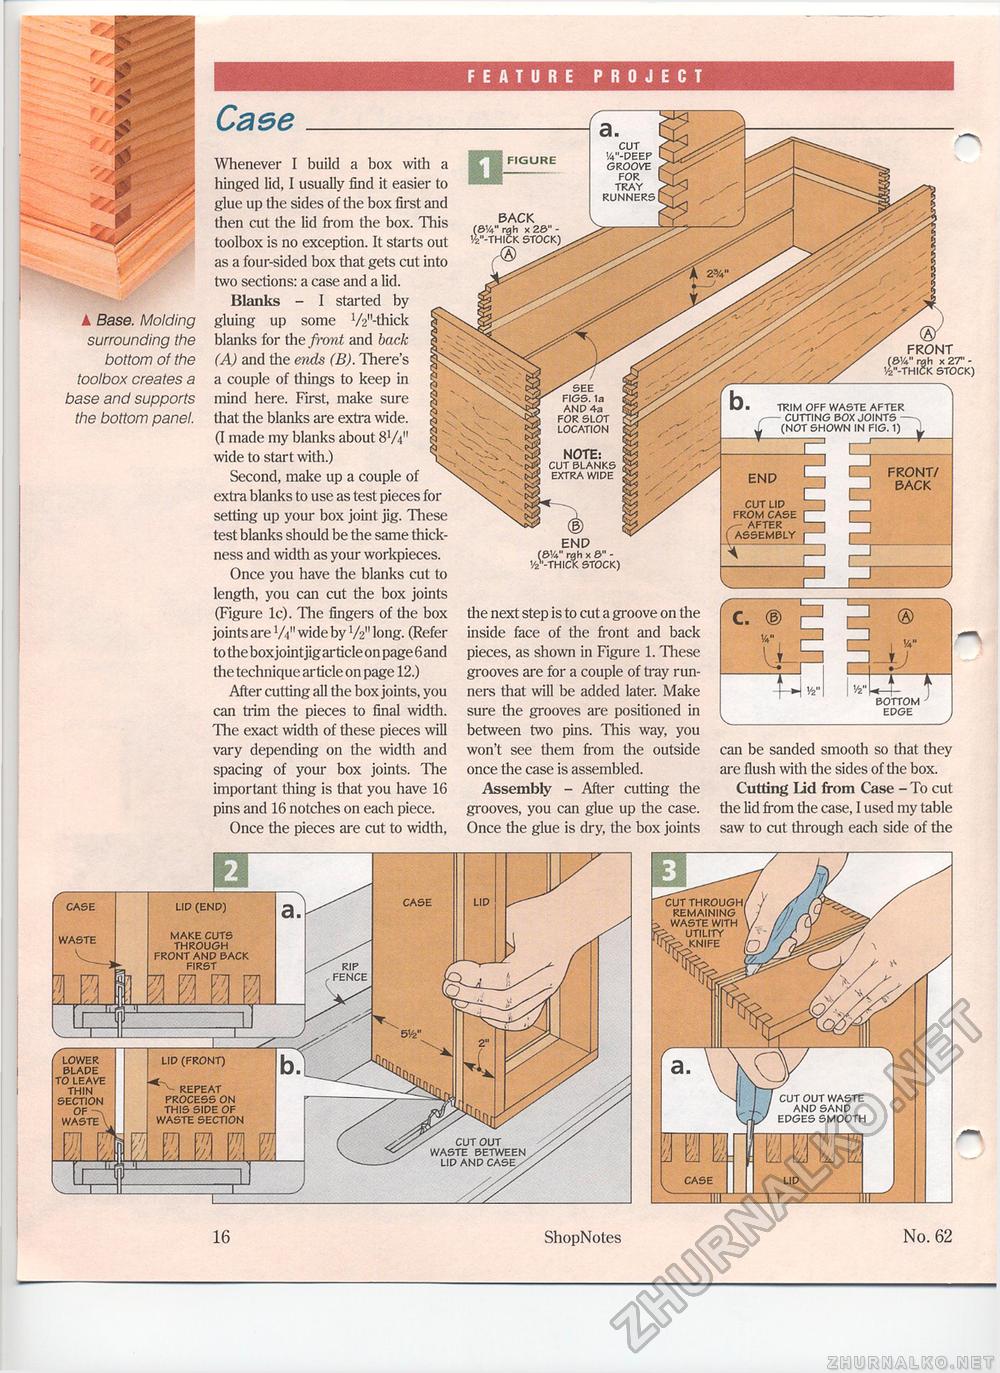
FEATURE PROJECT Caee▲ Base. Molding surrounding the bottom of the toolbox creates a base and supports the bottom panel. Whenever I build a box with a hinged lid, I usually find it easier to glue up the sides of the box first and then cut the lid from the box. This toolbox is no exception. It starts out as a four-sided box that gets cut into two sections: a case and a lid. Blanks - I started by gluing up some V^'-thick blanks for the front and back (A) and the ends (B). There's a couple of things to keep in mind here. First, make sure that the blanks are extra wide. (I made my blanks about 8V4" wide to start with.) Second, make up a couple of extra blanks to use as test pieces for setting up your box joint jig. These test blanks should be the same thickness and width as your workpieces. Once you have the blanks cut to length, you can cut the box joints (Figure lc). The fingers of the box joints are VV1 wide by V2" long. (Refer to the boxjoint jig article on page 6 and the technique article on page 12.) After cutting all the box joints, you can trim the pieces to final width. The exact width of these pieces will vary depending on the width and spacing of your box joints. The important tiling is that you have 16 pins and 16 notches on each piece. Once the pieces are cut to width, the next step is to cut a groove on the inside face of die front and back pieces, as shown in Figure 1. These grooves are for a couple of tray runners that will be added later. Make sure the grooves are positioned in between two pins. This way, you won't see them from the outside once the case is assembled. Assembly - After cutting the grooves, you can glue up the case. Once the glue is dry, the box joints can be sanded smooth so that they are flush with the sides of the box. Cutting Lid from Case - To cut the lid from the case, I used my table saw to cut through each side of the REMAINING CUT OUT WASTE AND SAND EDGES SMOOTH 16 ShopNotes No. 62 |


