79 - Slant Front Tool Cart, страница 16
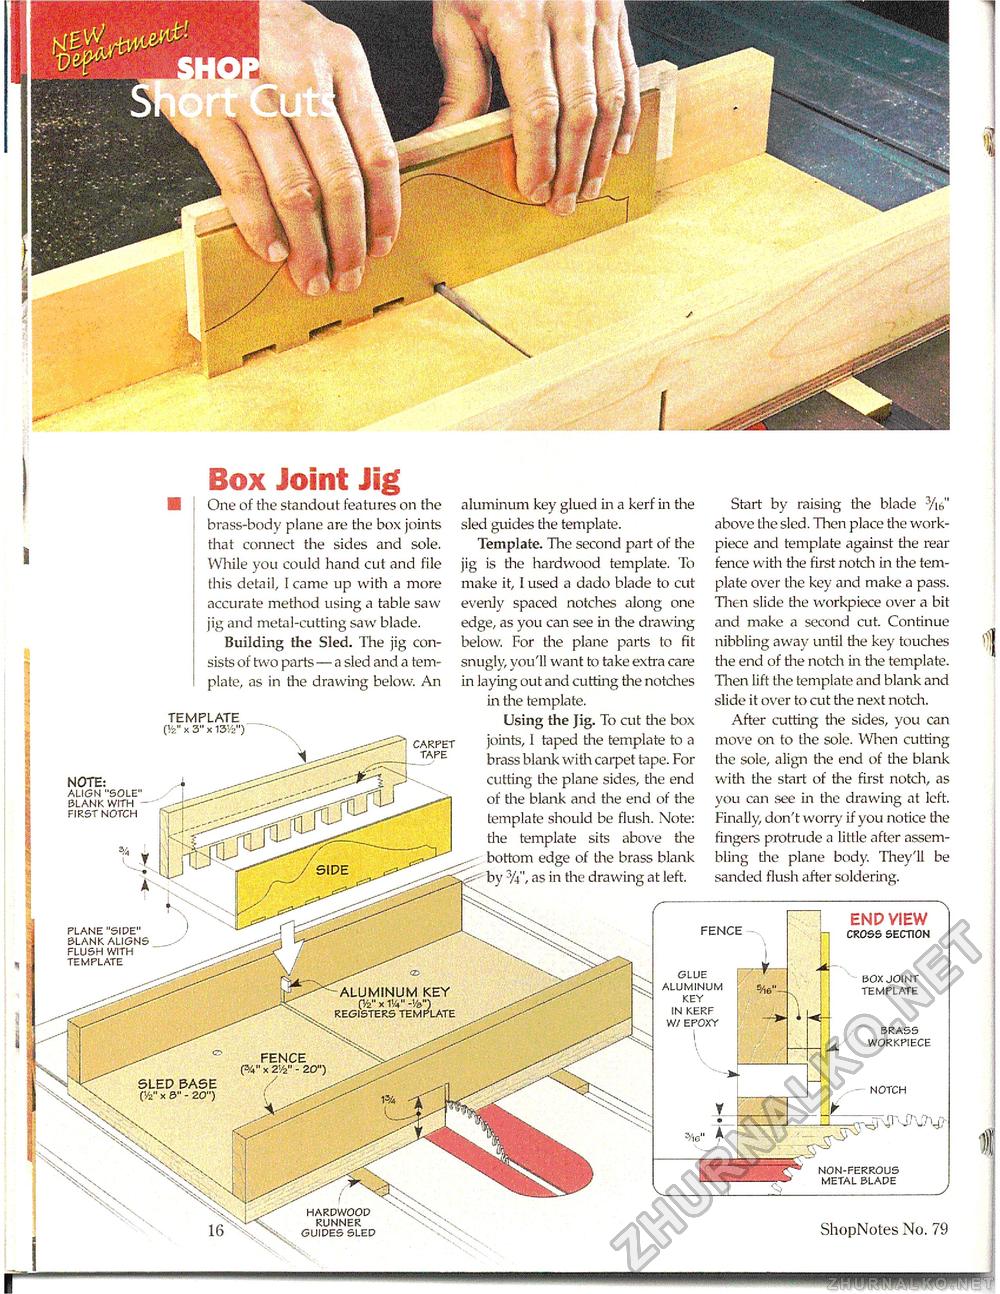
Box Joint Jig One of the standout features on the brass-body plane are the box joints that connect the sides and sole. While you could hand cut and file this detail, i came up with a more accurate method using a table saw jig and metal-cutting saw blade. Building the Sled. The jig consists of two parts — a sled and a template, as in the drawing below. An TEMPLATE (V X 3" x 13',2") CARPET TAPE NOTE: align "sole1 blank with first notch aluminum key glued in a kerf in the sled guides tire template. Template. The second part of the jig is the hardwood template. To make it, 1 used a dado blade to cut evenly spaced notches along one edge, as you can see in the drawing below. For the plane parts to fit snugly, you'll want to take extra care in laying out and cutting the notches in the template. Using the Jig. To cut the box joints, I taped the template to a brass blank with carpet tape. For cutting the plane sides, the end of the blank and the end of the template should be flush. Note: the template sits above the bottom edge of the brass blank by 3A", as in the drawing at left. Start by raising the blade 3/n," above the sled. Then place the work-piece and template against the rear fence with the first notch in the template over the key and make a pass. Then slide the workpiece over a bit and make a second cut. Continue nibbling away until the key touches the end of the notch in the template. Then lift the template and blank and slide it over to cut the next notch. After cutting the sides, you can move on to the sole. When cutting the sole, align the end of the blank with the start of the first notch, as you can see in the drawing at left. Finally, don't worry if you notice the fingers protrude a little after assembling the plane body. They'll be sanded flush after soldering. glue aluminum key in kerf w/efoxy END VIEW CROSS SECTION BOX JOINT TEMPLATE BRASS WORKPIECE & j> JV 16 ShopNotes No. 79 |


