79 - Slant Front Tool Cart, страница 14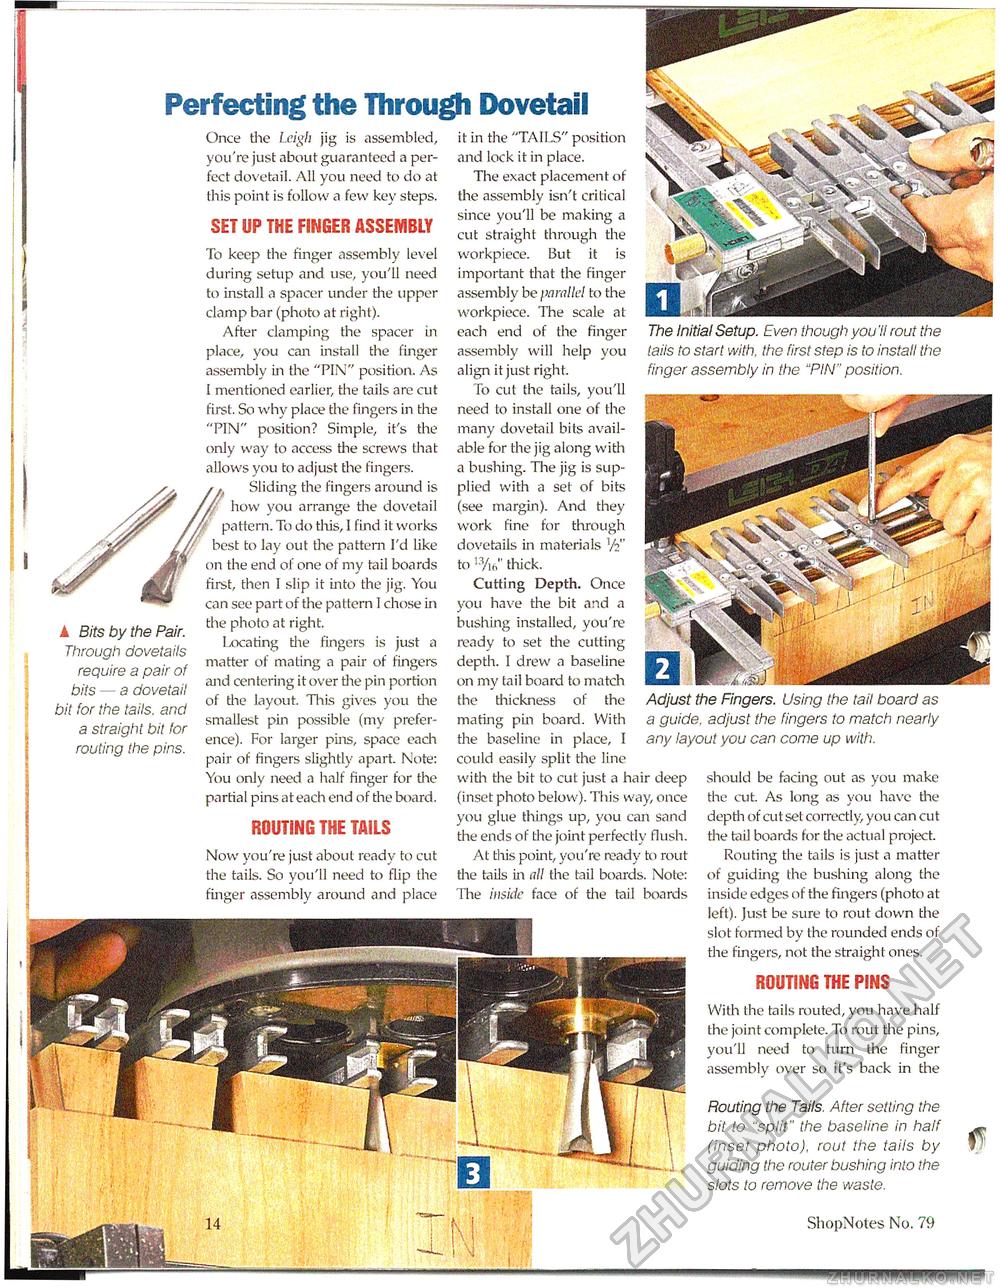
Perfecting the Through Dovetail ROUTING THE PINS With the tails routed, you have half the joint complete. To rout the pins, you'll need to turn the finger assembly over so it's back in the Routing the Tails. After setting the bit to "split" the baseline in half (inset photo), rout the tails by guiding the router bushing into the slots to remove the waste. ShopNotes No. 79 it in the "TAILS" position and lock it in place. The exact placement of the assembly isn't critical since you'll be making a cut straight through the workpiece. But it is important that the finger assembly be parallel to the workpiece. The scale at each end of the finger assembly will help you align it just right. To cut the tails, you'll need to install one of the many dovetail bits available for the jig along with a bushing. The jig is supplied with a set of bits (see margin). And they work fine for through dovetails in materials V2" to i3/i6" thick. Cutting Depth. Once you have the bit and a bushing installed, you're ready to set the cutting depth. 1 drew a baseline on my tail board to match the thickness of the mating pin board. With the baseline in place, I could easily split the line with the bit to cut just a hair deep (inset photo below). Tliis way, once you glue things up, you can sand the ends of the joint perfectly flush. At tliis point, you're ready to rout the tails in all the tail boards. Note: The inside face of the tail boards The Initial Setup. Even though you'll rout the tails to start with, the first step is to install the finger assembly in the "PIN" position. Adjust the Fingers. Using the tail board as a guide, adjust the fingers to match nearly any layout you can come up with. should be facing out as you make the cut. As long as you have the depth of cut set correctly, you can cut the tail boards for the actual project. Routing the tails is just a matter of guiding the bushing along the inside edges of the fingers (photo at left). Just be sure to rout down the slot formed by the rounded ends of the fingers, not the straight ones. Once the Leigh jig is assembled, you're just about guaranteed a perfect dovetail. All you need to do at this point is follow a few key steps. SET UP THE FINGER ASSEMBLY Oil A Bits by the Pair. Through dovetails require a pair of bits — a dovetail bit for the tails, and a straight bit for routing the pins. To keep the finger assembly level during setup and use, you'll need to install a spacer under the upper clamp bar (photo at right). After clamping the spacer in place, you can install the finger assembly in the "PIN" position. As I mentioned earlier, the tails are cut first. So why place the fingers in the "PIN" position? Simple, it's the only way to access the screws that allows you to adjust the fingers. Sliding the fingers around is how you arrange the dovetail pattern. To do tliis, I find it works best to lay out the pattern I'd like the end of one of my tail boards first, then 1 slip it into the jig. You can see part of the pattern I chose in the photo at right. Locating the fingers is just a matter of mating a pair of fingers and centering it over the pin portion of the layout. This gives you the smallest pin possible (my preference). For larger pins, space each pair of fingers slightly apart. Note: You only need a half finger for the partial pins ateach end of the board. ROUTING THE TAILS Now you're just about ready to cut the tails. So you'll need to flip the finger assembly around and place |


