79 - Slant Front Tool Cart, страница 44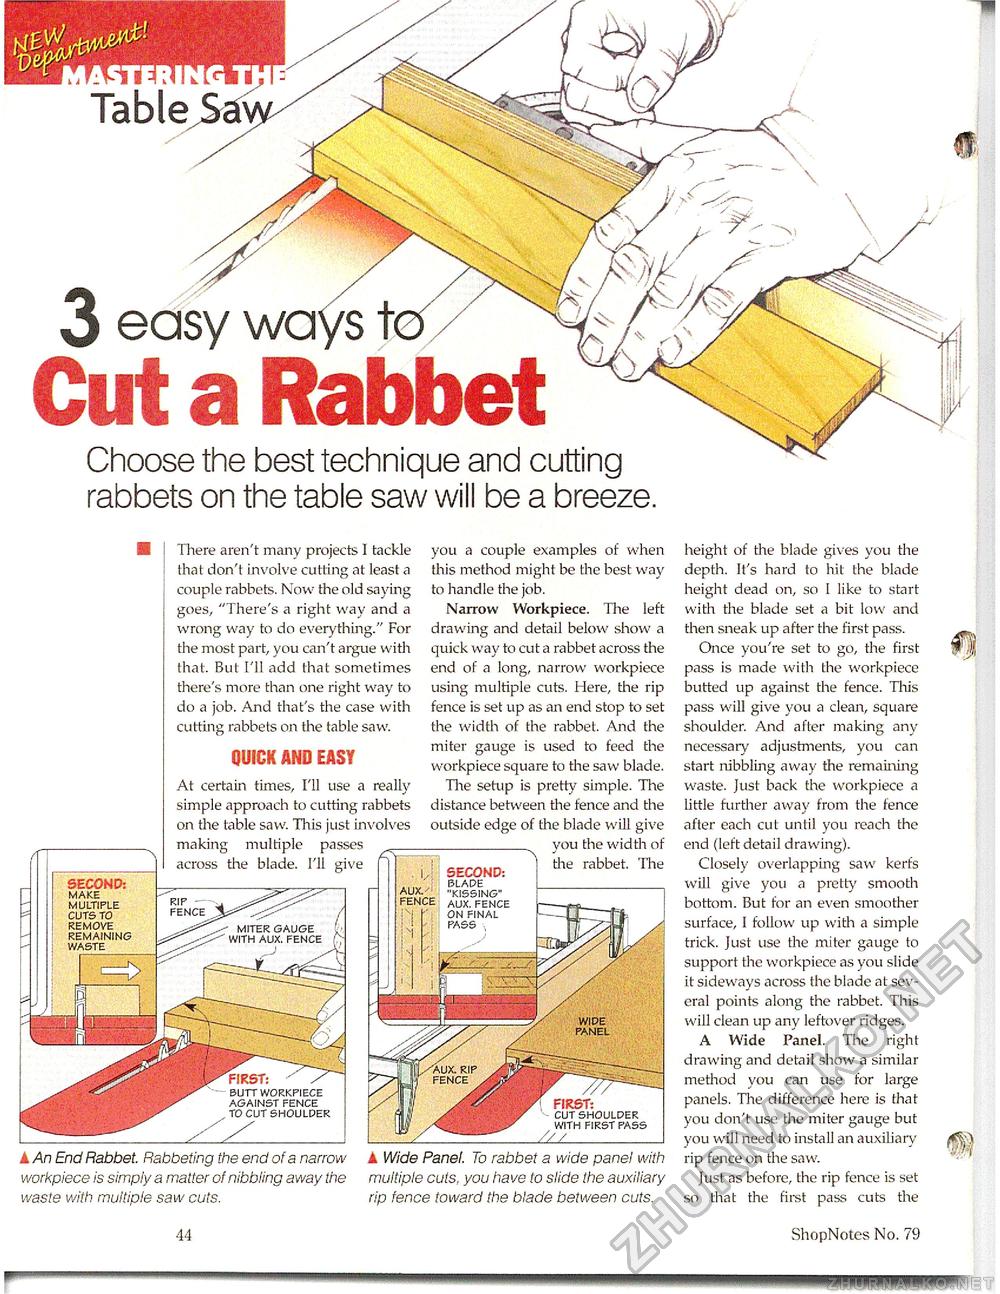
3 © Gut a IChoose the best technique and cutting rabbets on the table saw will be a breeze. SECOND; MAKE MULTIPLE CUTS TO REMOVE REMAINING WASTE MITER GAUGE WITH AUX. FENCE There aren't many projects 1 tackle that don't involve cutting at least a couple rabbets. Now the old saying goes, "There's a right way and a wrong way to do everything." For the most part, you can't argLie with that. But I'll add that sometimes there's more than one right way to do a job. And that's the case with cutting rabbets on the table saw. QUICK AND EASY At certain times, I'll use a really simple approach to cutting rabbets on the table saw. This jList involves making multiple passes across the blade. I'll give you a couple examples of when this method might be the best way to handle the job. Narrow Workpiece. The left drawing and detail below show a quick way to cut a rabbet across the end of a long, narrow workpiece using multiple cuts. Here, the rip fence is set up as an end stop to set the width of the rabbet. And the miter gauge is used to feed the workpiece square to the saw blade. The setup is pretty simple. The distance between the fence and the outside edge of the blade will give you the width of the rabbet. The SECOND; rMADt AUX.-' KISSING BUTT WORKPIECE AGAINST FENCE TO CUT SHOULDER PlK&T: CUT SHOULDER WITH FIRST FASS A An End Rabbet. Rabbeting the end of a narrow workpiece is simpiy a matter of nibbling away the waste with multiple saw cuts. A Wide Panel. To rabbet a wide panel with multiple cuts, you have to slide the auxiliary rip fence toward the blade between cuts. height of the blade gives you the depth. It's hard to hit the blade height dead on, so I like to start with the blade set a bit low and then sneak up after the first pass. Once you're set to go, the first pass is made with the workpiece butted up against the fence. Tliis pass will give you a clean, square shoulder. And after making any necessary adjustments, you can start rubbling away the remaining waste. Just back the workpiece a little further away from the fence after each cut until you reach the end (left detail drawing). Closely overlapping saw kerfs will give you a pretty smooth bottom. But for an even smoother surface, I follow up with a simple trick, just use the miter gauge to support the workpiece as you slide it sideways across the blade at several points along the rabbet. This will clean up any leftover ridges. A Wide Pane). The right drawing and detail show a similar method you can use for large panels. The difference here is that you don't use the miter gauge but you will need to install an auxiliary rip fence on the saw. Just as before, the rip fence is set so that the first pass cuts the 44 ShopNotes No. 79 |


