80 - Heirloom Tool Cabinet, страница 11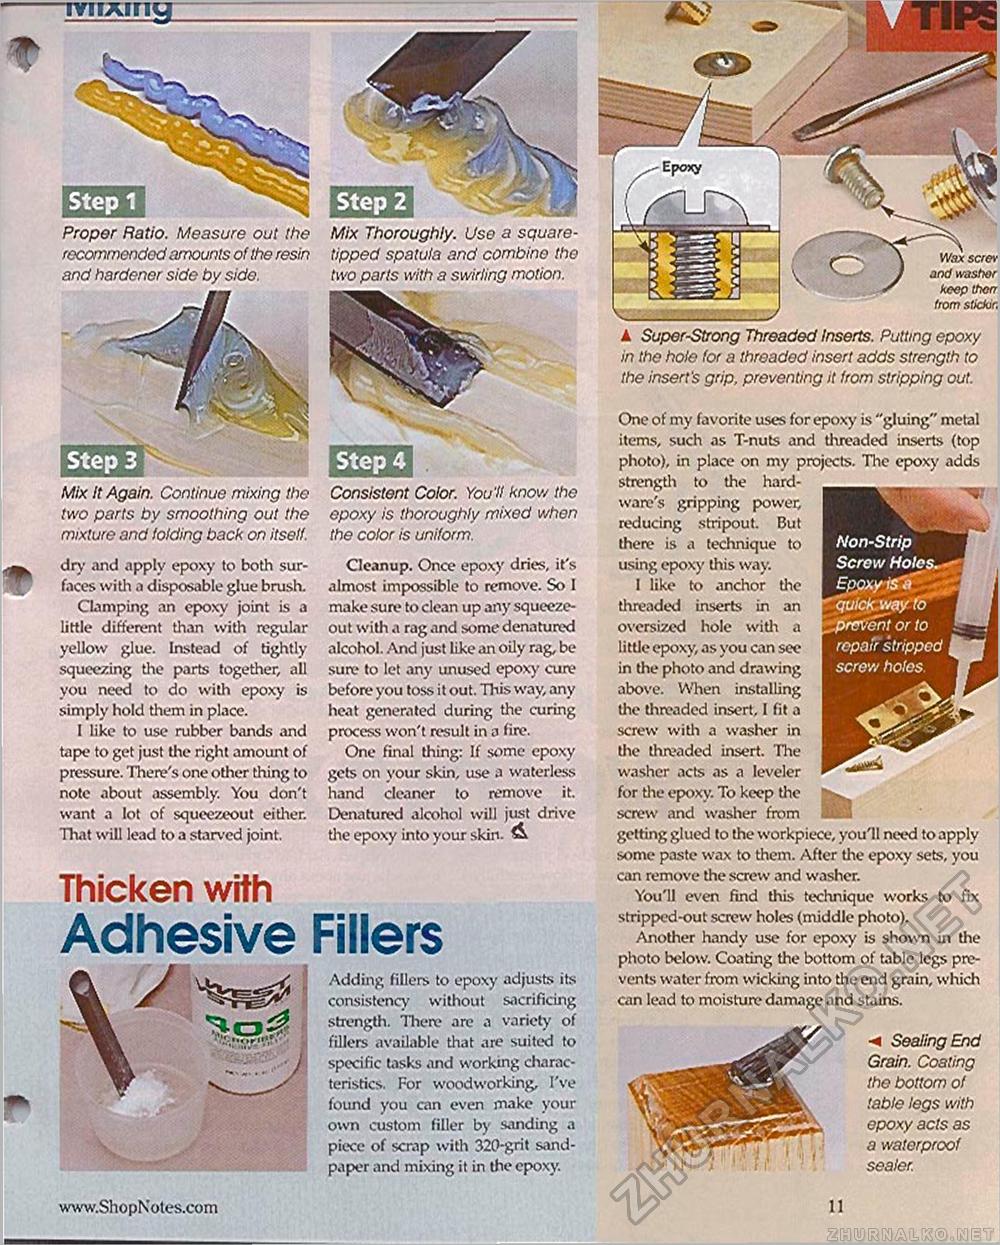
dry and apply epoxy to both surfaces with a disposable glue brush. Clamping an epoxy joint is a little different than with regular yellow glue. Instead of tightly squeezing the parts together, all you need to do with epoxy is simply hold them in place. I like to use rubber bands and tape to get just the right amount of pressure. There's one other thing to note about- assembly. You don't want a lot of squeezeout either. That will lead to a starved joint. Cleanup. Once epoxy dries, it's almost impossible to remove. So I make sure to clean up any squeeze-out with a rag and some denatured alcohol. And just like an oily rag, be sure to let any unused epoxy cure before you toss it out. This way, any heat generated during the curing process won't result in a fire. One final thing: If some epoxy gets on your skin, use a waterless hand cleaner to remove it. Denatured alcohol will just drive the epoxy into your skin. & Thicken with Adhesive FillersAdding fillers to epoxy adjusts its consistency without sacrificing strength. There arc a variety of fillers available that are suited to specific tasks and working characteristics. For woodworking, I've found you can even make your own custom filler by sanding a piece of scrap with 320-grit sandpaper and mixing it in the epoxy. One of my favorite uses for epoxy is "gluing" metal items, such as T-nuts and threaded inserts (top photo), in place on my projects. The epoxy adds strength to the hardware's gripping power, reducing stripout. But there is a technique to using epoxy this way. 1 like to anchor tine threaded inserts in an oversized hole with a little epoxy, as you can see in the photo and drawing above. When installing the threaded insert, I fit a screw with a washer in the threaded insert. The washer acts as a leveler for the epoxy. To keep the screw and washer from getting glued to the workpiece, you'll need to apply some paste wax to them. After the epoxy sets, you can remove the screw and washer. You'll even find this technique works to fix stripped-out screw holes (middle photo). Another handy use for epoxy is shown in the photo below. Coating the bottom of table legs prevents water from wicking into the end grain, which can lead to moisture damage and stains. Sealing End Grain. Coaling the bottom of table legs with epoxy acts as a waterproof sealer. Step 1 Step 2 Step 3 Step 4 Consistent Color. You'll know the epoxy is thoroughly mixed when the color is uniform. mixing — Proper Ratio. Measure out the recommended amounts of the resin side. Mix It Again. Continue mixing the two parts by smoothing out the mixture and folding back on itself. Mix Thoroughly. Use a square-tipped spatula and combine the two parts with a swirling motion. and washer keep then from sticJtir, ▲ Super-Strong Threaded Inserts. Putting epoxy in the hole (or a threaded insert adds strength to the insert's grip, preventing it from stripping out. 11 |


