80 - Heirloom Tool Cabinet, страница 13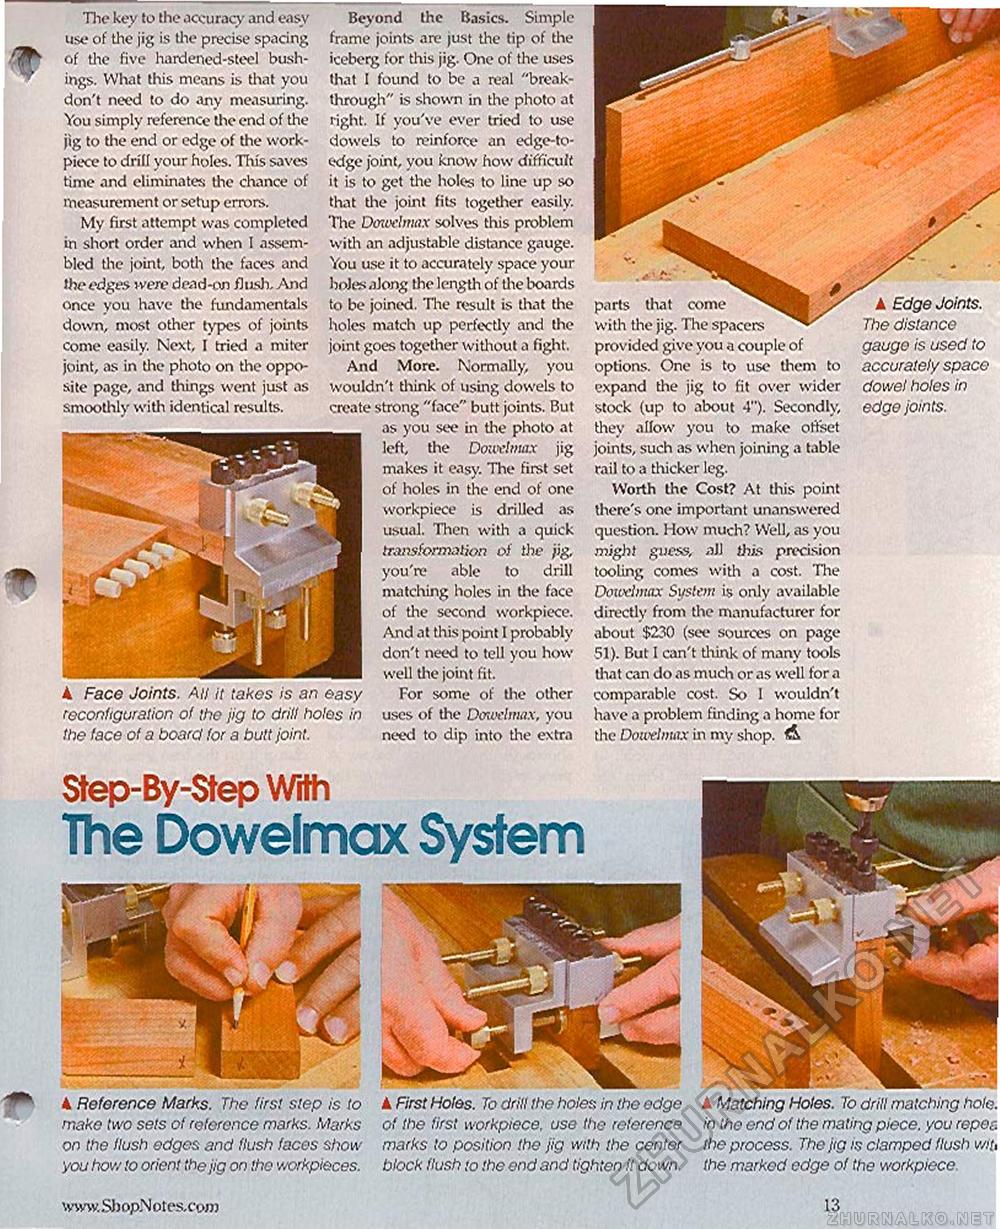
4 Reference Marks. The firs! slep is to make two sets of reference marks. Marks on the flush edges and flush faces show you hov/ to orient the jig on the workpieces. k First Holes. To drill the holes in the edge of the first workpiece, use the reference marks to position the jig with the center block flush to the end and tighten it down. k Matching Holes. To drill matching holQ. in the end of the mating piece, you repez the process. The jig is clamped flush wit, the marked edge of the workpiece. Step-By-Step With The Dowelmax System The key to the accuracy and easy use of the jig is the precise spacing of the five hardened-steel bushings. What this means is that you don't need to do any measuring. You simply reference the end of the jig to the end or edge of the work-piece to drill your holes. This saves time and eliminates the chance of measurement or setup errors. My first attempt was completed in short order and when I assembled the joint, both the faces and the edges were dead-on flush. And once you have the fundamentals down, most other types of joints come easily. Next, I tried a miter joint, as in the photo on the opposite page, and things went just as smoothly with identical results. k Face Joints. Ail it takes is an easy reconfiguration of the jig to drill holes in the (ace of a board for a butt joint. Beyond the Basics. Simple frame joints are just the tip of the iceberg for this jig. One of the uses that I found to be a real "breakthrough" is shown in the photo at right. If you've ever tried to use dowels to reinforce an edge-to-edge joint, you know how difficult it is to get the holes to line up so that the joint fits together easily. The Dcnvehmx solves this problem With an adjustable distance gauge. You use it to accurately space your holes along the length of the boards to be joined. The result is that the holes match up perfectly and the joint goes together without a fight. And More. Normally, you wouldn't think of using dowels to create strong "face" butt joints. But as you see in tine photo at left, the Douvbnax jig makes it easy. The first set of holes in the end of one workpiece is drilled as usual. Then with a quick transformation of the jig, you're able to drill matching holes in the face of the second workpiece. And at this point I probably don't need to tell you how well the joint fit. For some of the other uses of the Dowelmax, you need to dip into the extra parts that come with the jig. The spacers provided give you a couple of options. One is to use them to expand the jig to fit over wider stock (up to about 4"). Secondly, they allow you to make offset joints, such as when joining a table rail to a thicker leg. Worth the Cost? At this point there's one important unanswered question. How much? Well, as you might guess, all this precision tooling comes with a cost. The Dowelmax System is only available directly from the manufacturer for about $230 (see sources on page 51). But I can't think of many tools that can do as much or as well for a comparable cost. So I wouldn't have a problem finding a home for the Dowelmax in my shop. ▲ Edge Joints. The distance gauge is used to accurately space dowel holes in edge joints. www. Sb opN ores, com 13 |


