81 - Ultimate Sharpening Station, страница 35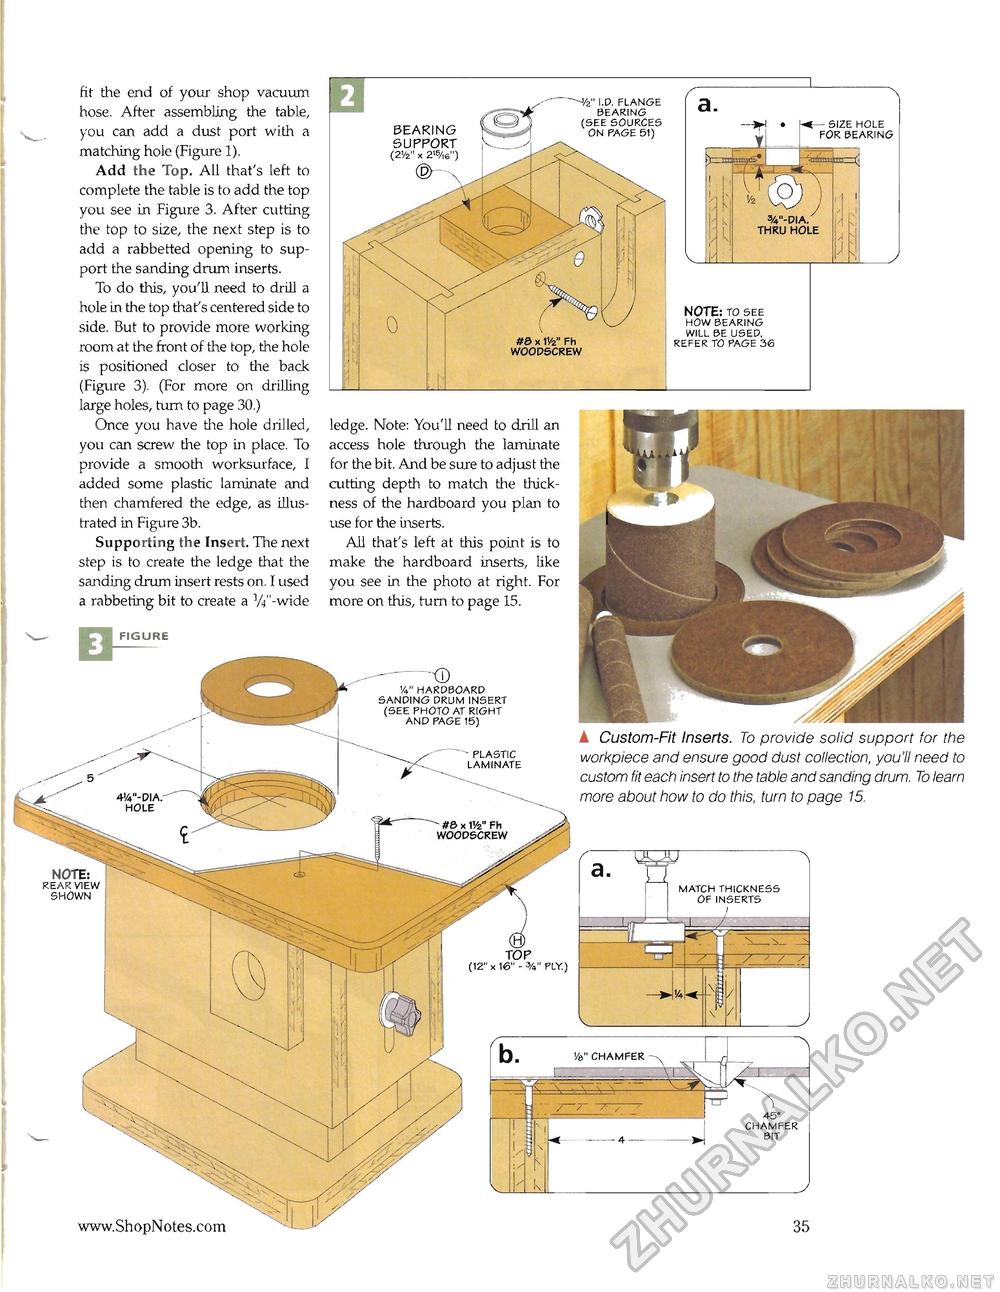
fit the end of your shop vacuum hose. After assembling the table, you can add a dust port with a matching hole (Figure 1). Add the Top. All that's left to complete the table is to add the top you see in Figure 3. After cutting the top to size, the next step is to add a rabbetted opening to support the sanding drum inserts. To do this, you'll need to drill a hole in the top that's centered side to side. But to provide more working room at the front of the top, the hole is positioned closer to the back (Figure 3). (For more on drilling large holes, turn to page 30.) Once you have the hole drilled, you can screw the top in place. To provide a smooth worksurface, I added some plastic laminate and then chamfered the edge, as illustrated in Figure 3b. Supporting the Insert. The next step is to create the ledge that the sanding drum insert rests on. I used a rabbeting bit to create a W'-wide NOTE: REAR VIEW SHOWN ve," chamfer 45" chamfer bit (12" x 16" - PLY.) id. flange bearing (see sources on page 51) A Custom-Fit Inserts. To provide solid support for the workpiece and ensure good dust collection, you'll need to custom fit each insert to the table and sanding drum. To learn more about how to do this, turn to page 15. ledge. Note: You'll need to drill an access hole through the laminate for the bit. And be sure to adjust the cutting depth to match the thickness of the hardboard you plan to use for the inserts. All that's left at this point is to make the hardboard inserts, like you see in the photo at right. For more on this, turn to page 15. match thickness of inserts w' hardboard sanding drum insert (see photo at right and page 15) plastic laminate BEARING SUPPORT (W x 2'S/,6") - size hole for bearing v_u NOTE: to see how bearing will be used. refer to page 36 |


