81 - Ultimate Sharpening Station, страница 34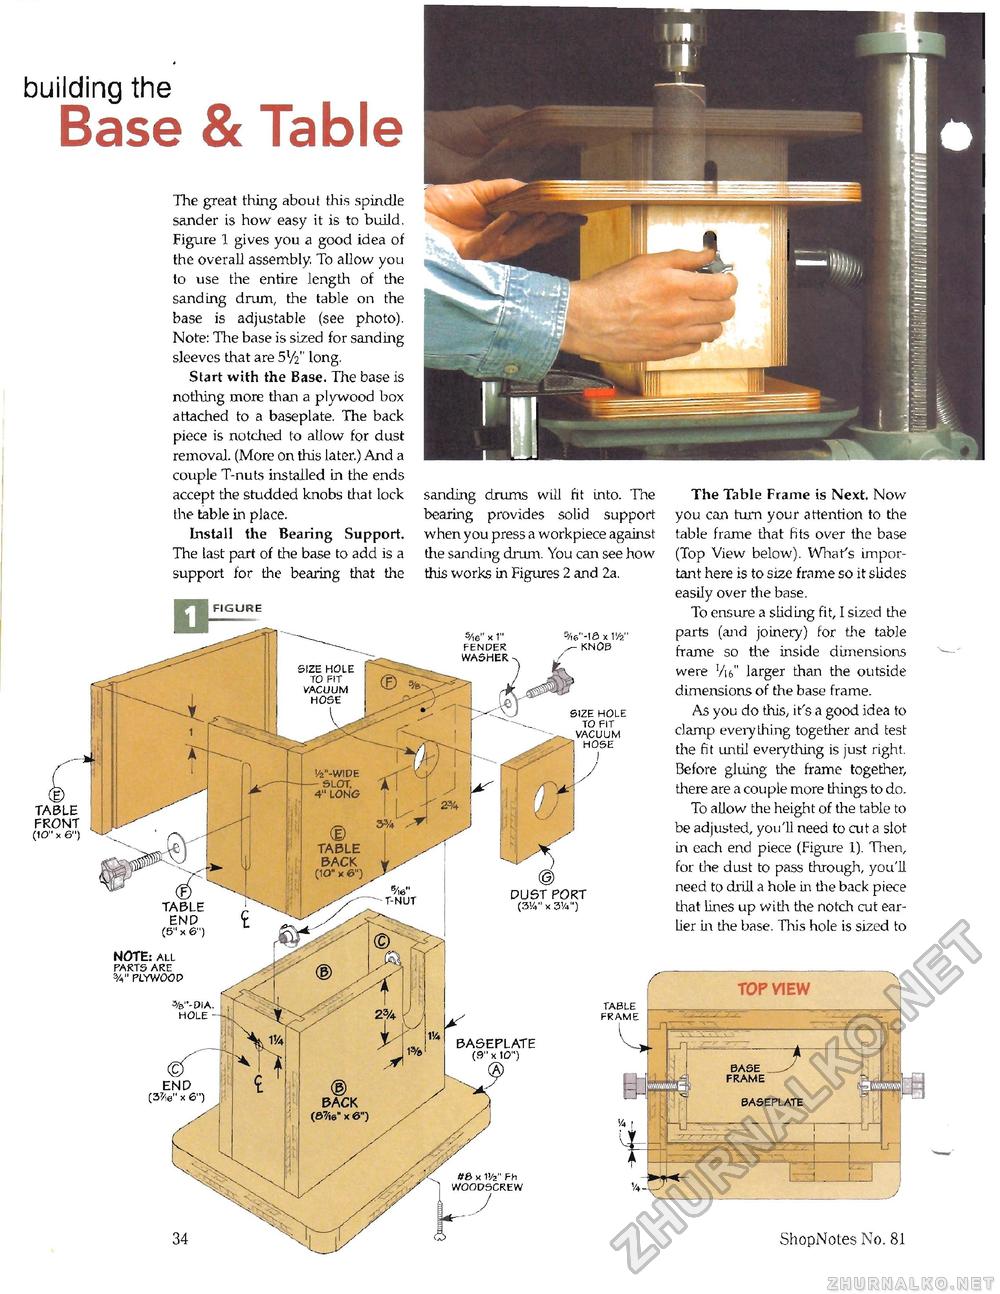
building the Base & TableThe great thing about this spindle sander is how easy it is to build. Figure 1 gives you a good idea of the overaLl assembly. To allow you to use the entire length of the sanding drum, the table on the base is adjustable (see photo). Note: The base is sized for sanding sleeves that are 5xfi long. Start with the Base. The base is nothing more than a plywood box attached to a baseplate. The back piece is notched to allow for dust removal (More on this later.) And a couple T-nuts installed in the ends accept the studded knobs that lock the table in place. Install the Bearing Support. The last part of the base to add is a support for the bearing that the sanding drums will fit into. The bearing provides solid support when you press a workpiece against the sanding drum. You can see how this works in Figures 2 and 2a. 5/l6M-ia X 1'/2" knob (E, TAI3LE FRONT (10" x 6") The Table Frame is Next. Now you can turn your attention to the table frame that fits over the base (Top View below). What's important here is to size frame so it slides easily over the base. To ensure a sliding fit, I sized the parts (and joinery) for the table frame so the inside dimensions were VW' larger than the outside dimensions of the base frame. As you do this, it's a good idea to clamp eveiy thing together and test the fit until everything is just right. Before gluing the frame together, there are a couple more things to do. To allow the height of the table to be adjusted, you'll need to cut a slot in each end piece (Figure 1). Then, for the dust to pass through, you'll need to drill a hole in the back piece that lines up with the notch cut earlier in the base. This hole is sized to 34 ShopNotes No. 81 |


