81 - Ultimate Sharpening Station, страница 41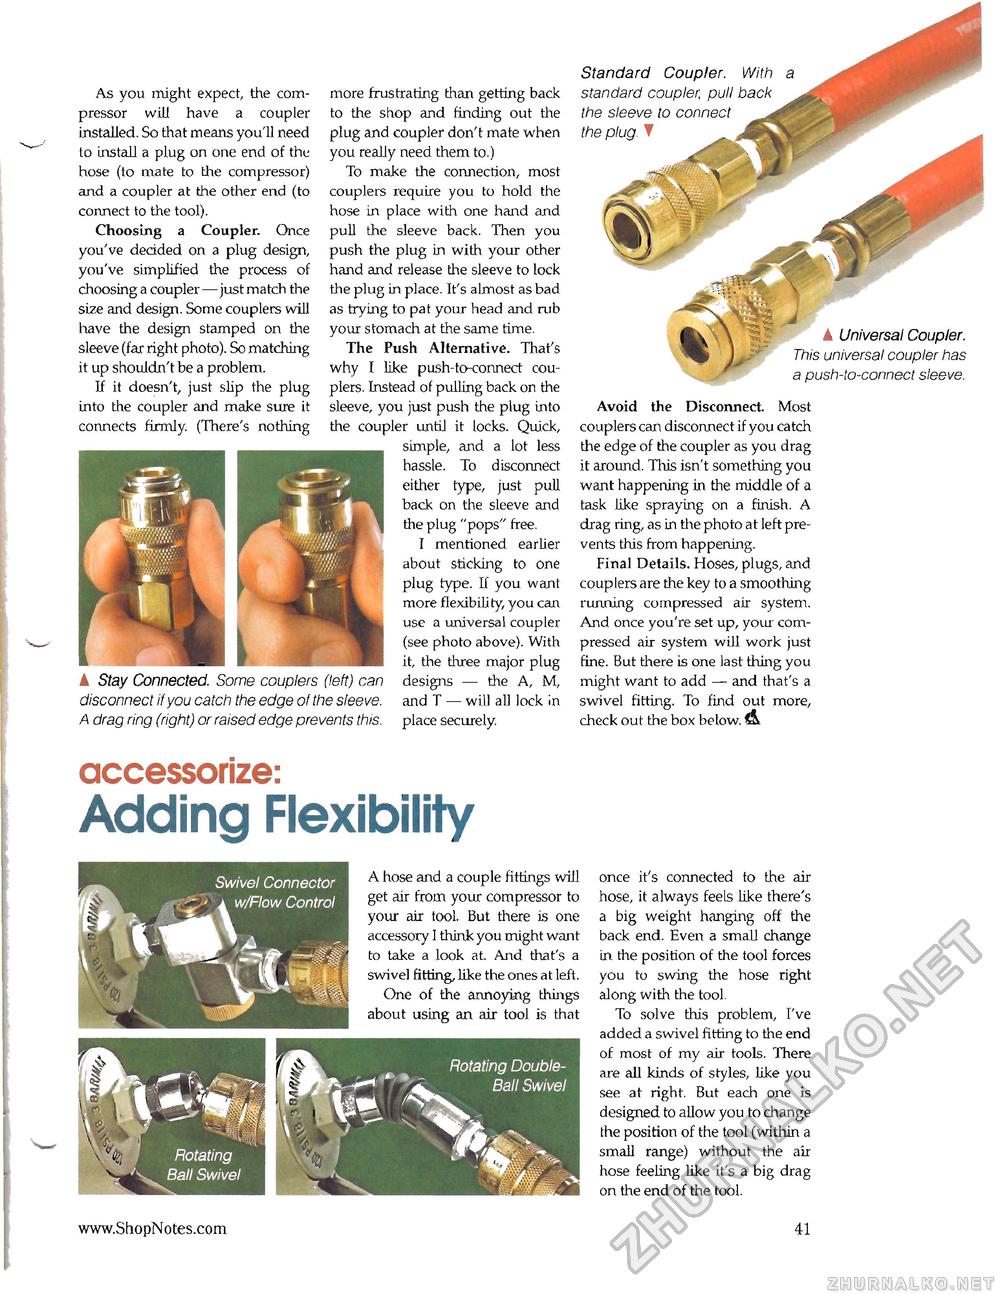
As you might expect, the compressor will have a coupler installed. So that means you'll need to install a plug on one end of the hose (to mate to the compressor) and a coupler at the other end (to connect to the tool). Choosing a Coupler. Once you've decided on a plug design, you've simplified the process of choosing a coupler—just match the size and design. Some couplers will have the design stamped on the sleeve (far right photo). So matching it up shouldn't be a problem. If it doesn't, just slip the plug into the coupler and make sure it connects firmly. (There's nothing ▲ Stay Connected. Some couplers (left) can disconnect if you catch the edge of the sleeve. A drag ring (right) or raised edge prevents this. more frustrating than getting back to the shop and finding out the plug and coupler don't mate when you really need them to.) To make the connection, most couplers require you to hold the hose in place with one hand and pull the sleeve back. Then you push the plug in with your other hand and release the sleeve to lock the plug in place. It's almost as bad as trying to pat your head and rub your stomach at the same time. The Push Alternative. That's why I like push-to-connect couplers. Instead of pulling back on the sleeve, you just push the plug into the coupler until it locks. Quick, simple, and a lot less hassle. To disconnect either type, just pull back on the sleeve and the plug "pops" free. I mentioned earlier about sticking to one plug type. If you want more flexibility, you can use a universal coupler (see photo above). With it, the three major plug designs — the A, M, and T — will all lock in place securely. Standard Coupler. With a standard coupler, pull back the sleeve to connect the plug, f ▲ Universal Coupler. This universal coupler has a push-to-connect sleeve. Avoid the Disconnect Most couplers can disconnect if you catch the edge of the coupler as you drag it around. This isn't something you want happening in the middle of a task like spraying on a finish. A drag ring, as in the photo at left prevents this from happening. Final Details. Hoses, plugs, and couplers are the key to a smoothing running compressed air system. And once you're set up, your compressed air system will work just fine. But there is one last thing you might want to add — and that's a swivel fitting. To find out more, check out the box below. accessorize: Adding FlexibilityA hose and a couple fittings will get air from your compressor to your air tool. But there is one accessory I think you might want to take a look at. And that's a swivel fitting, like the ones at left. One of the annoying things about using an air tool is that
once it's connected to the air hose, it always feels like there's a big weight hanging off the back end. Even a small change in the position of the tool forces you to swing the hose right along with the tool To solve this problem, I've added a swivel fitting to the end of most of my air tools. There are all kinds of styles, like you see at right. But each one is designed to allow you to change the position of the tool (within a small range) without the air hose feeling like it's a big drag on the end of the tool. Swivel Connector 4 w/Flow Control 41 |


