82 - The Complete Miter Saw Workstation, страница 13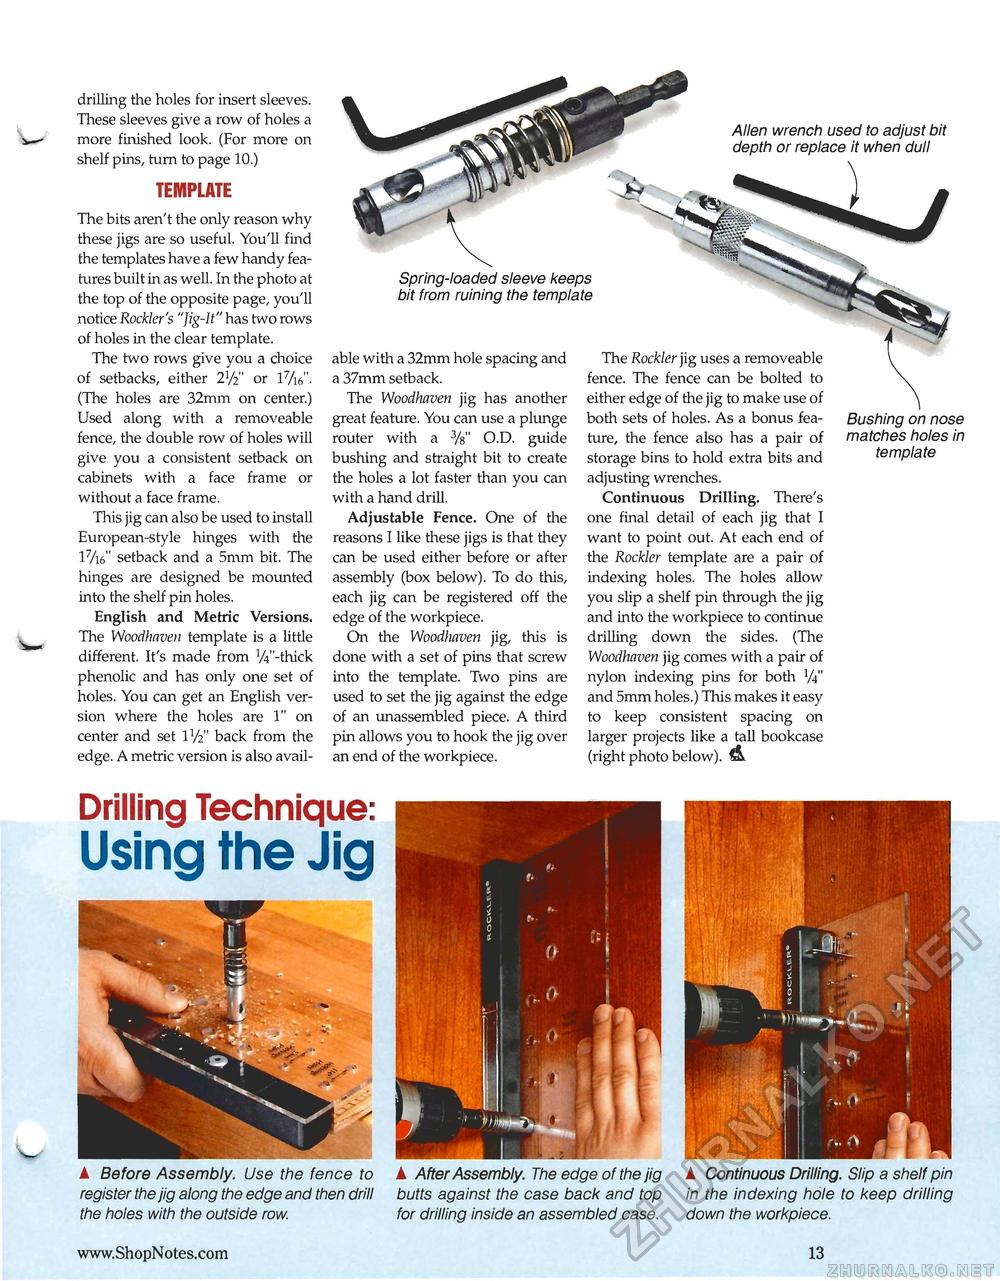
drilling the holes for insert sleeves. These sleeves give a row of holes a more finished look. (For more on shelf pins, turn to page 10.) TEMPLATE The bits aren't the only reason why these jigs are so useful. You'll find the templates have a few handy features built in as well. In the photo at the top of the opposite page, you'll notice Rockler's "Jig-It" has two rows of holes in the clear template. The two rows give you a choice of setbacks, either 2V2" or l7/i6". (The holes are 32mm on center.) Used along with a removeable fence, the double row of holes will give you a consistent setback on cabinets with a face frame or without a face frame. This jig can also be used to install European-style hinges with the l7/i6" setback and a 5mm bit. The hinges are designed be mounted into the shelf pin holes. English and Metric Versions. The Woodhaven template is a little different. It's made from V^'-thick phenolic and has only one set of holes. You can get an English version where the holes are 1" on center and set IV2" back from the edge. A metric version is also avail- Drilling Technique: Using the Jig ▲ After Assembly. The edge of the jig butts against the case back and top for drilling inside an assembled case. A Continuous Drilling. Slip a shelf pin in the indexing hole to keep drilling down the workpiece. A Before Assembly. Use the fence to register the jig along the edge and then drill the holes with the outside row. Spring-loaded sleeve keeps bit from ruining the template able with a 32mm hole spacing and a 37mm setback. The Woodhaven jig has another great feature. You can use a plunge router with a 3/s" O.D. guide bushing and straight bit to create the holes a lot faster than you can with a hand drill. Adjustable Fence. One of the reasons I like these jigs is that they can be used either before or after assembly (box below). To do this, each jig can be registered off the edge of the workpiece. On the Woodhaven jig, this is done with a set of pins that screw into the template. Two pins are used to set the jig against the edge of an unassembled piece. A third pin allows you to hook the jig over an end of the workpiece. The Rockier jig uses a removeable fence. The fence can be bolted to either edge of the jig to make use of both sets of holes. As a bonus feature, the fence also has a pair of storage bins to hold extra bits and adjusting wrenches. Continuous Drilling. There's one final detail of each jig that I want to point out. At each end of the Rockier template are a pair of indexing holes. The holes allow you slip a shelf pin through the jig and into the workpiece to continue drilling down the sides. (The Woodhaven jig comes with a pair of nylon indexing pins for both V4" and 5mm holes.) This makes it easy to keep consistent spacing on larger projects like a tall bookcase (right photo below). Bushing on nose matches holes in template Allen wrench used to adjust bit depth or replace it when dull 13 |


