83, страница 15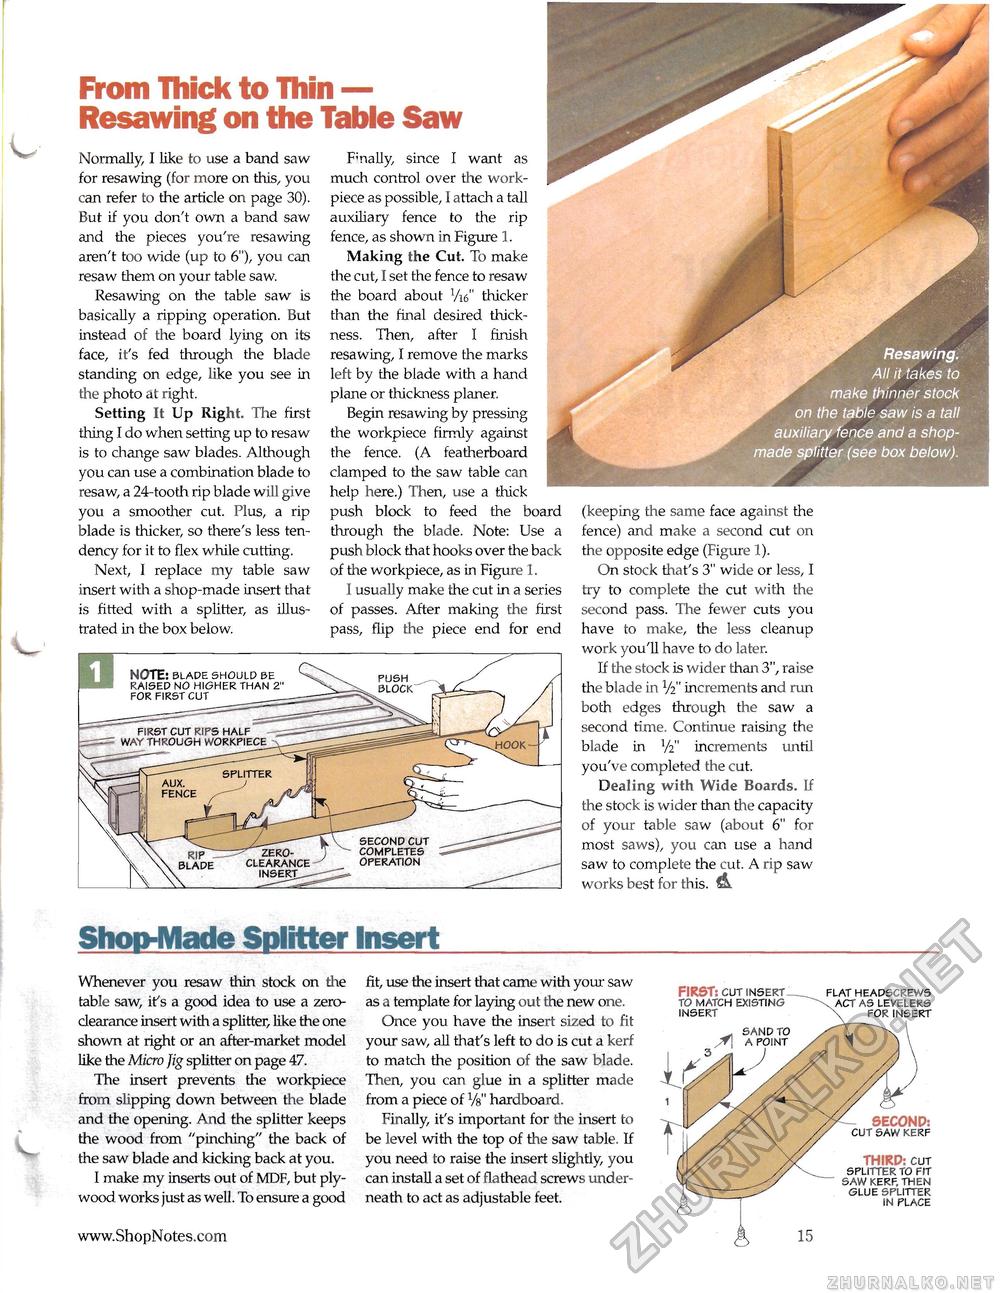
V- Shop-Made Splitter Insert Whenever you resaw thin stock on the table saw, it's a good idea to use a zero-clearance insert with a splitter, like the one shown at right or an after-market model like the Micro jig splitter on page 47. The insert prevents the workpiece from slipping down between the blade and the opening. And the splitter keeps the wood from "pinching" the back of the saw blade and kicking back at you. I make my inserts out of MDF, but plywood works just as well. To ensure a good fit, use the insert that came with your saw as a template for laying out the new one. Once you have the insert sized to fit your saw, all that's left to do is cut a kerf to match the position of the saw blade. Then, you can glue in a splitter made from a piece of Vs" hardboard. Finally, it's important for the insert to be level with the top of the saw table. If you need to raise the insert slightly, you can install a set of flathead screws underneath to act as adjustable feet. From Thick to Thin — Resawing on the Table Saw Normally, I like to use a band saw for resawing (for more on this, you can refer to the article on page 30). But if you don't own a band saw and the pieces you're resawing aren't too wide (up to 6"), you can resaw them on your table saw. Resawing on the table saw is basically a ripping operation. But instead of the board lying on its face, it's fed through the blade standing on edge, like you see in the photo at right. Setting It Up Right. The first thing I do when setting up to resaw is to change saw blades. Although you can use a combination blade to resaw, a 24-tooth rip blade will give you a smoother cut. Plus, a rip blade is thicker, so there's less tendency for it to flex while cutting. Next, I replace my table saw insert with a shop-made insert that is fitted with a splitter, as illustrated in the box below. Fmally, since I want as much control over the work-piece as possible, I attach a tall auxiliary fence to the rip fence, as shown in Figure 1. Making the Cut. To make the cut, I set the fence to resaw the board about l/\e thicker than the final desired thickness. Then, after I finish resawing, I remove the marks left by the blade with a hand plane or thickness planer. Begin resawing by pressing the workpiece firmly against the fence. (A featherboard clamped to the saw table can help here.) Then, use a thick push block to feed the board through the blade. Note: Use a push block that hooks over the back of the workpiece, as in Figure 1. I usually make the cut in a series of passes. After making the first pass, flip the piece end for end (keeping the same face against the fence) and make a second cut on the opposite edge (Figure 1). On stock that's 3" wide or less, I try to complete the cut with the second pass. The fewer cuts you have to make, the less cleanup work you'll have to do later. If the stock is wider than 3", raise the blade in V2" increments and run both edges through the saw a second time. Continue raising the blade in V2" increments until you've completed the cut. Dealing with Wide Boards. If the stock is wider than the capacity of your table saw (about 6" for most saws), you can use a hand saw to complete the cut. A rip saw works best for this. & push block first cut rips half way through workpiece hook second cut completes operation ^zero-clearance inserts- rip blade NOTE: blade should be raised no higher than 2" for first cut FIRST: cut insert to match existing insert flat headscrews act as levelers for insert SECONP: cut saw kerf THIRD: cut splitter to fit saw kerf, then glue splitter in place |


