90 - Get the Most out of a Plunge Router, страница 16
Our Shop I k Cuts FIRST: USE TOP EDGE TO POSITION TOP SUDE — _ 2 OVi T
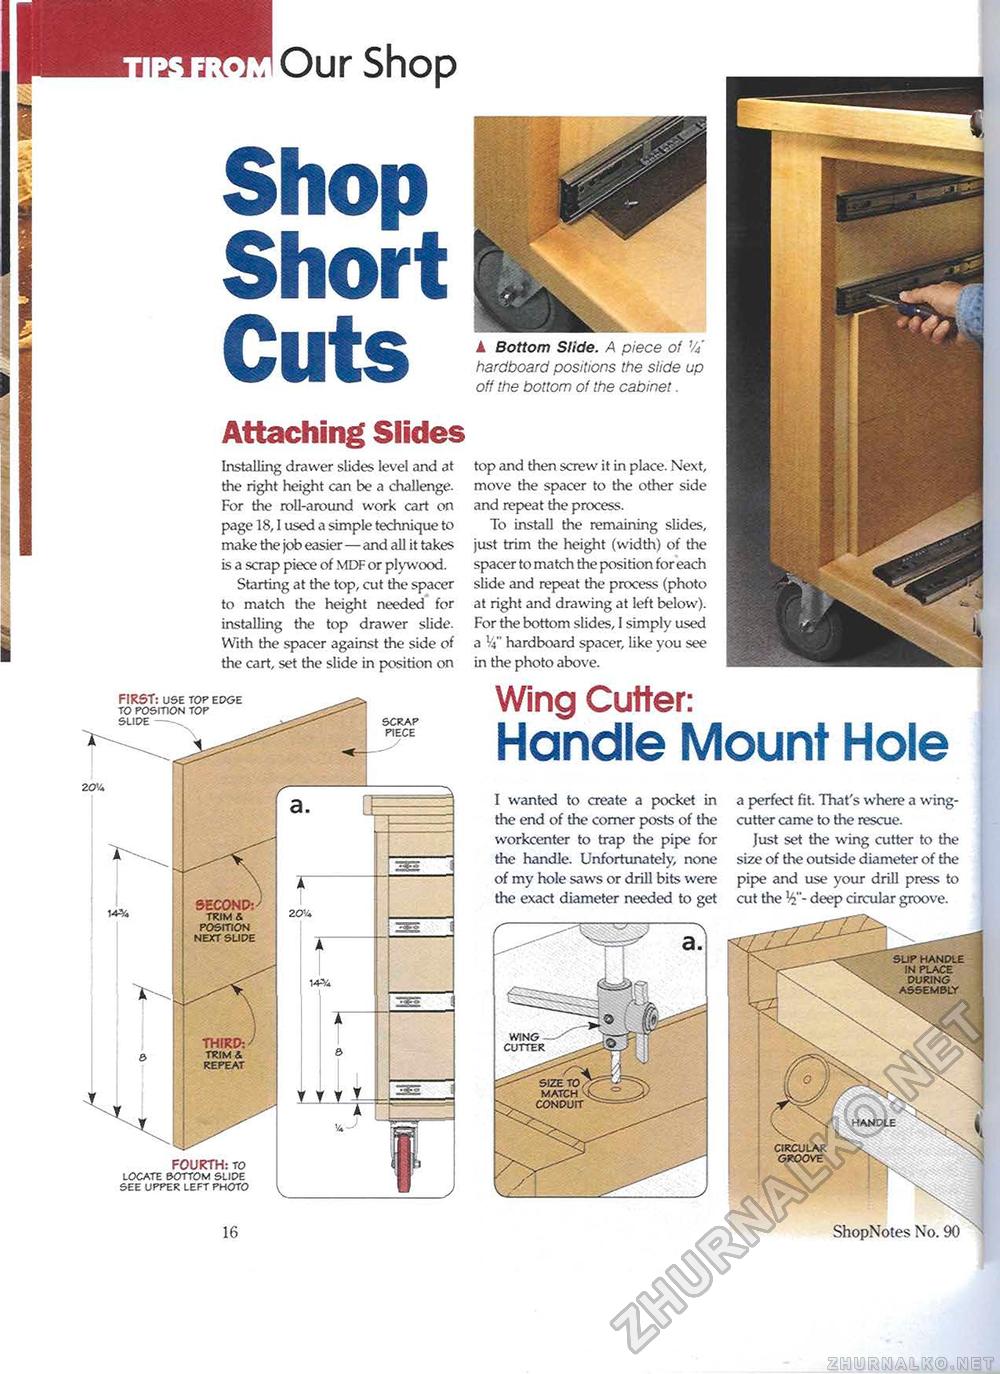
SECONDS TRIM & POSITION NEXT SLIDE THIRD:- TRIM A REPEAT FOURTH: TO LOCATE BOTTOM SLIDE SEE UPPER LEFT PHOTO a. 2 OVi 14^/i Y Y Y JL V ▲ Bottom Slide. A piece of V/ hardboard positions the slide up off the bottom of the cabinet. Attaching Slides Installing drawer slides level and at the right height can be a challenge. For the roll-around work cart on page 18,1 used a simple technique to make the job easier—and all it takes is a scrap piece of MDF or plywood. Starting at the top, cut the spacer to match the height needed for installing the top drawer slide. With the spacer against the side of the cart, set the slide in position on top and then screw it in place. Next, move the spacer to the other side and repeat the process. To install the remaining slides, just trim the height (width) of the spacer to match the position for each slide and repeat the process (photo at right and drawing at left below). For the bottom slides, 1 simply used a V4" hardboard spacer, like you see in the photo above. Wing Cutter: Handle Mount Hole I wanted to create a pocket in the end of the comer posts of the workcenter to trap the pipe for the handle. Unfortunately, none of my hole saws or drill bits were the exact diameter needed to get a perfect fit. That's where a wing-cutter came to the rescue. Just set the wing cutter to the size of the outside diameter of the pipe and use your drill press to cut the H '- deep circular groove. 16 wing cutter SUP HANDLE IN PLACE DURING ASSEMBLY ShopNotes |


