90 - Get the Most out of a Plunge Router, страница 15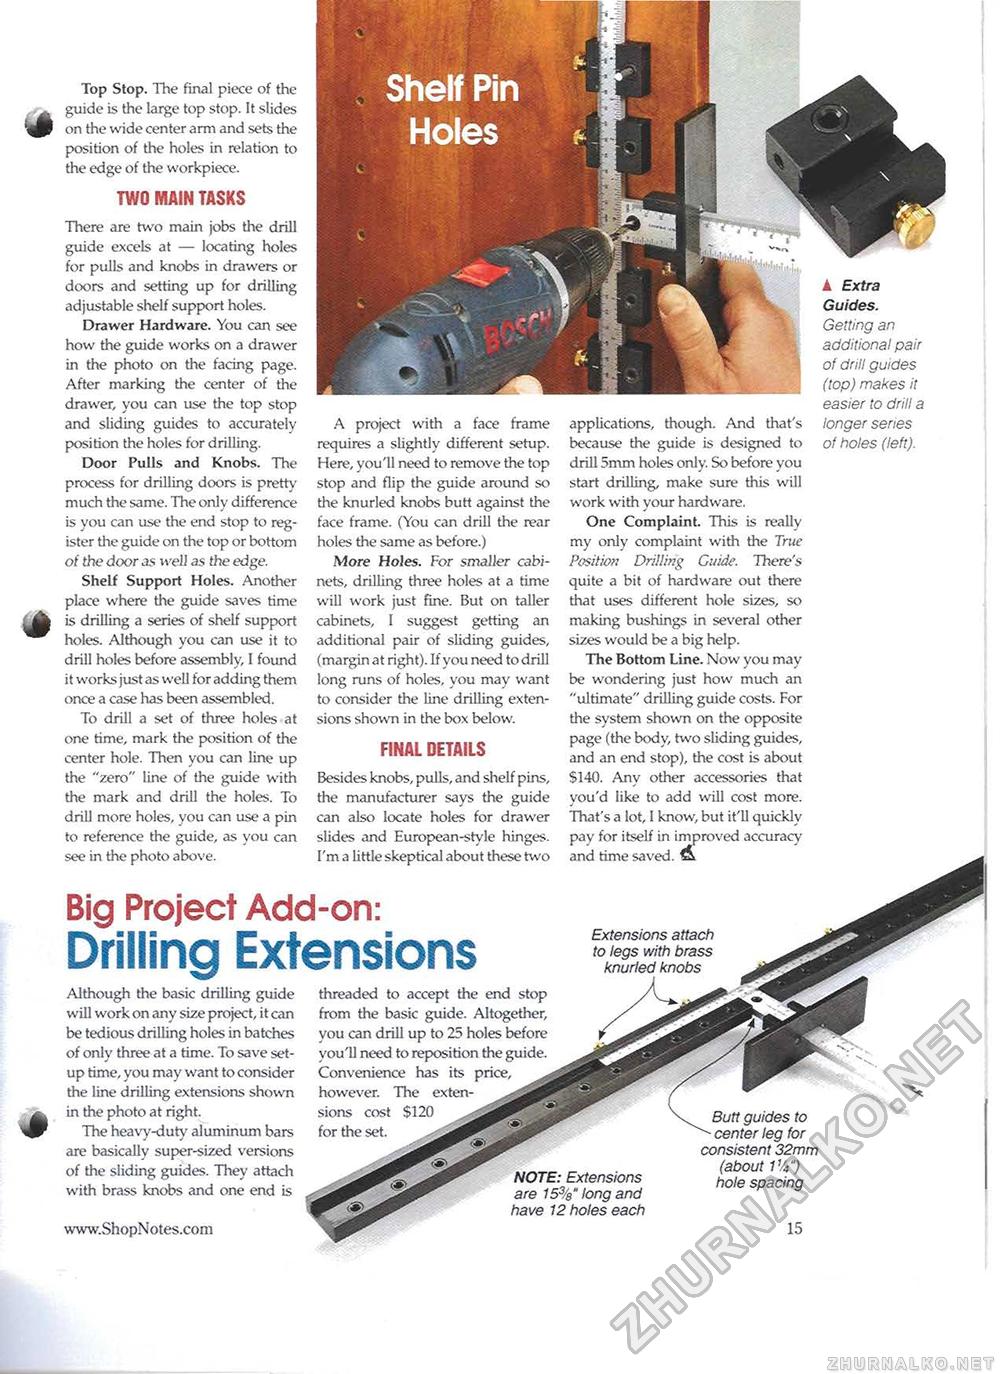
Top Stop. The final piece of the guide is the large top stop. It slides on the wide center arm and sets the position of the holes in relation to the edge of the workpiece. TWO MAIN TASKS There are two main jobs the drill guide excels at — locating holes for pulls and knobs in drawers or doors and setting up for drilling adjustable shelf support holes. Drawer Hardware. You can see how the guide works on a drawer in the photo on the facing page. After marking the center of the drawer, you can use the top stop and sliding guides to accurately position the holes for drilling. Door Pulls and Knobs. The process for drilling doors is pretty much the same. The only difference is you can use the end stop to register the guide on the top or bottom of the door as well as the edge. Shelf Support Holes. Another place where the guide saves time is drilling a series of shelf support holes. Although you can use it to drill holes before assembly, 1 found it works just as well for adding them once a case has been assembled. To drill a set of three holes at one time, mark the position of the center hole. Then you can line up the "zero" line of the guide with the mark and drill the holes. To drill more holes, you can use a pin to reference the guide, as you can see in the photo above. A project with a face frame requires a slightly different setup. Here, you'll need to remove the top stop and flip the guide around so the knurled knobs butt against the face frame. (You can drill the rear holes the same as before.) More Holes. For smaller cabinets, drilling three holes at a time will work just fine. But on taller cabinets, I suggest getting an additional pair of sliding guides, (margin at right). If you need to drill long runs of holes, you may want to consider the line drilling extensions shown in the box below. FINAL DETAILS Besides knobs, pulls, and shelf pins, the manufacturer says the guide can also locate holes for drawer slides and European-style hinges. I'm a little skeptical about these two applications, though. And that's because the guide is designed to drill 5mm holes only. So before you start drilling, make sure this will work with your hardware. One Complaint. This is really my only complaint with the True Position Drilling Guide. There's quite a bit of hardware out there that uses different hole sizes, so making bushings in several other sizes would be a big help. The Bottom Line. Now you may be wondering just how much an "ultimate" drilling guide costs. For the system shown on the opposite page (the body, two sliding guides, and an end stop), the cost is about $140. Any other accessories that you'd like to add will cost more. That's a lot, I know, but it'll quickly pay for itself in improved accuracy and time saved, ft ▲ Extra Guides. Getting an additional pair of drill guides (top) makes it easier to drill a longer series of holes (left). Big Project Add-on: Drilling Extensions Extensions attach to legs with brass knurled knobs Although the basic drilling guide will work on any size project, it can be tedious drilling holes in batches of only three at a time. To save setup time, you may want to consider the line drilling extensions shown in the photo at right. The heavy-duty aluminum bars are basically super-sized versions of the sliding guides. They attach with brass knobs and one end is threaded to accept the end stop from the basic guide. Altogether, you can drill up to 25 holes before you'll need to reposition the guide. Convenience has its price, however. The extensions cost $120 for the set. NOTE: Extensions are 15%" long and have 12 holes each Butt guides to center leg for consistent 32mm (about 1%m) hole spacing |


