91 - Planer Stand, страница 13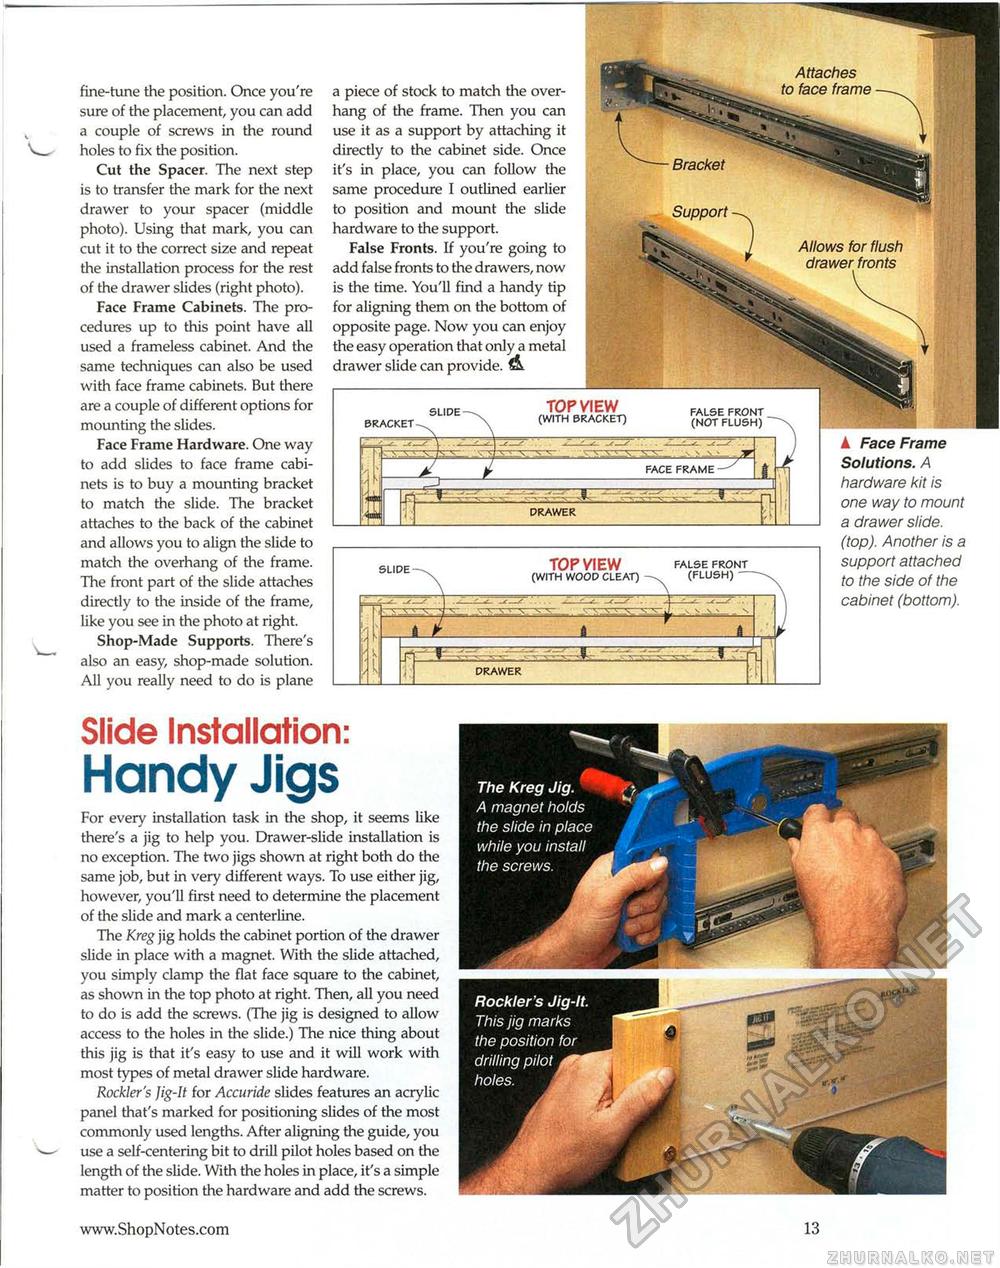
fine-tune the position. Once you're sure of the placement, you can add a couple of screws in the round holes to fix the position. Cut the Spacer. The next step is to transfer the mark for the next drawer to your spacer (middle photo). Using that mark, you can cut it to the correct size and repeat the installation process for the rest of the drawer slides (right photo). Face Frame Cabinets. The procedures up to this point have all used a frameless cabinet. And the same techniques can also be used with face frame cabinets. But there are a couple of different options for mounting the slides. Face Frame Hardware. One way to add slides to face frame cabinets is to buy a mounting bracket to match the slide. The bracket attaches to the back of the cabinet and allows you to align the slide to match the overhang of the frame. The front part of the slide attaches directly to the inside of the frame, like you see in the photo at right. Shop-Made Supports. There's also an easy, shop-made solution. All you really need to do is plane TOP VIEW (with wood cleat) false front (flush) — slide drawer Slide Installation: Handy Jigs For every installation task in the shop, it seems like there's a jig to help you. Drawer-slide installation is no exception. The two jigs shown at right both do the same job, but in very different ways. To use either jig, however, you'll first need to determine the placement of the slide and mark a centerline. The Kreg jig holds the cabinet portion of the drawer slide in place with a magnet. With the slide attached, you simply clamp the flat face square to the cabinet, as shown in the top photo at right. Then, all you need to do is add the screws. (The jig is designed to allow access to the holes in the slide.) The nice thing about this jig is that it's easy to use and it will work with most types of metal drawer slide hardware. Rockler's Jig-It for Accuride slides features an acrylic panel that's marked for positioning slides of the most commonly used lengths. After aligning the guide, you use a self-centering bit to drill pilot holes based on the length of the slide. With the holes in place, it's a simple matter to position the hardware and add the screws. false front (not flush) face frame drawer a piece of stock to match the overhang of the frame. Then you can use it as a support by attaching it directly to the cabinet side. Once it's in place, you can follow the same procedure I outlined earlier to position and mount the slide hardware to the support. False Fronts. If you're going to add false fronts to the drawers, now is the time. You'll find a handy tip for aligning them on the bottom of opposite page. Now you can enjoy the easy operation that only a metal drawer slide can provide. slide- bracket Attaches ♦ rt f KO KM Support Allows for flush drawer fronts TOP VIEW (with bracket) ▲ Face Frame Solutions. A hardware kit is one way to mount a drawer slide, (top). Another is a support attached to the side of the cabinet (bottom). Rockler's c. This jig man the position drilling pilot holes |


