93, страница 11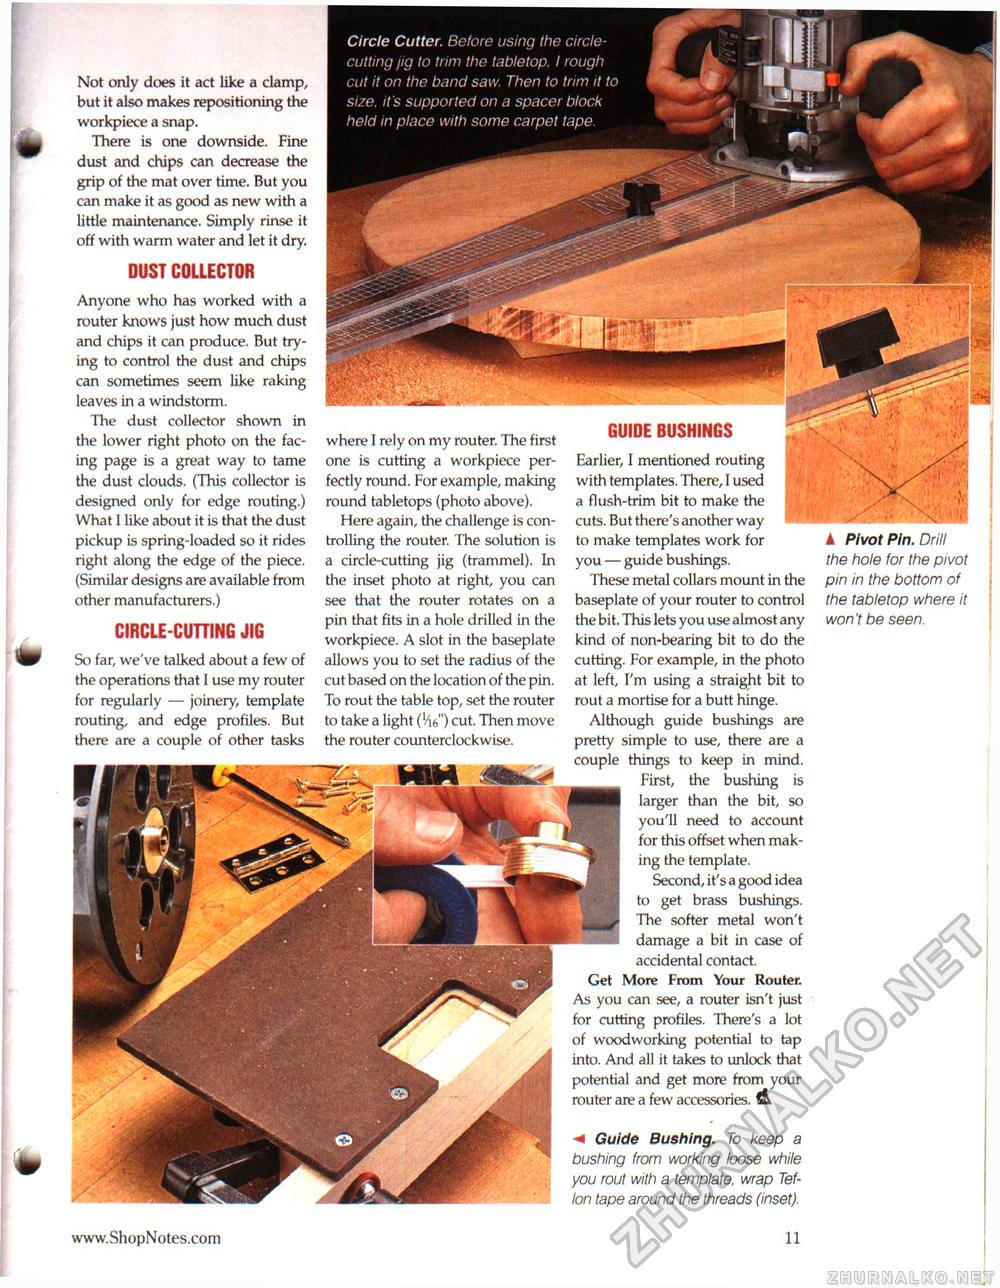
Circle Cutter. Before using the circle-cutting jig to trim the tabletop. I rough cut it on the band saw. Then to trim it to size, it's supported on a spacer block held in place with some carpet tape. Not only does it act like a clamp, but it also makes repositioning the workpiece a snap. There is one downside. Fine dust and chips can decrease the grip of the mat over time. But you can make it as good as new with a little maintenance. Simply rinse it off with warm water and let it dry. DUST COLLECTOR Anyone who has worked with a router knows just how much dust and chips it can produce. But trying to control the dust and chips can sometimes seem like raking leaves in a windstorm. The dust collector shown in the lower right photo on the facing page is a great way to tame the dust clouds. (This collector is designed only for edge routing.) What I like about it is that the dust pickup is spring-loaded so it rides right along the edge of the piece. (Similar designs are available from other manufacturers.) CIRCLE-CUTTING JIG A Pivot Pin. Drill the hole for the pivot pin in the bottom of the tabletop where it won't be seen. So far, we've talked about a few of the operations that I use my router for regularly — joinery, template routing, and edge profiles. But there are a couple of other tasks where I rely on my router. The first one is cutting a workpiece perfectly round. For example, making round tabletops (photo above). Here again, the challenge is controlling the router. The solution is a circle-cutting jig (trammel). In the inset photo at right, you can see that the router rotates on a pin that fits in a hole drilled in the workpiece. A slot in the baseplate allows you to set the radius of the cut based on the location of the pin. To rout the table top, set the router to take a light (Vi6") cut. Then move the router counterclockwise. GUIDE BUSHINGS Earlier, I mentioned routing with templates. There, I used a flush-trim bit to make the cuts. But there's another way to make templates work for you — guide bushings. These metal collars mount in the baseplate of your router to control the bit. This lets you use almost any kind of non-bearing bit to do the cutting. For example, in the photo at left, I'm using a straight bit to rout a mortise for a butt hinge. Although guide bushings are pretty simple to use, there are a couple things to keep in mind. First, the bushing is larger than the bit, so you'll need to account for this offset when making the template. Second, it's a good idea to get brass bushings. The softer metal won't damage a bit in case of accidental contact. Get More From Your Router. As you can see, a router isn't just for cutting profiles. There's a lot of woodworking potential to tap into. And all it takes to unlock that potential and get more from your router are a few accessories. A M Guide Bushing. To keep a bushing from working loose while you rout with a template, wrap Teflon tape around the threads (inset). 11 |


