94, страница 13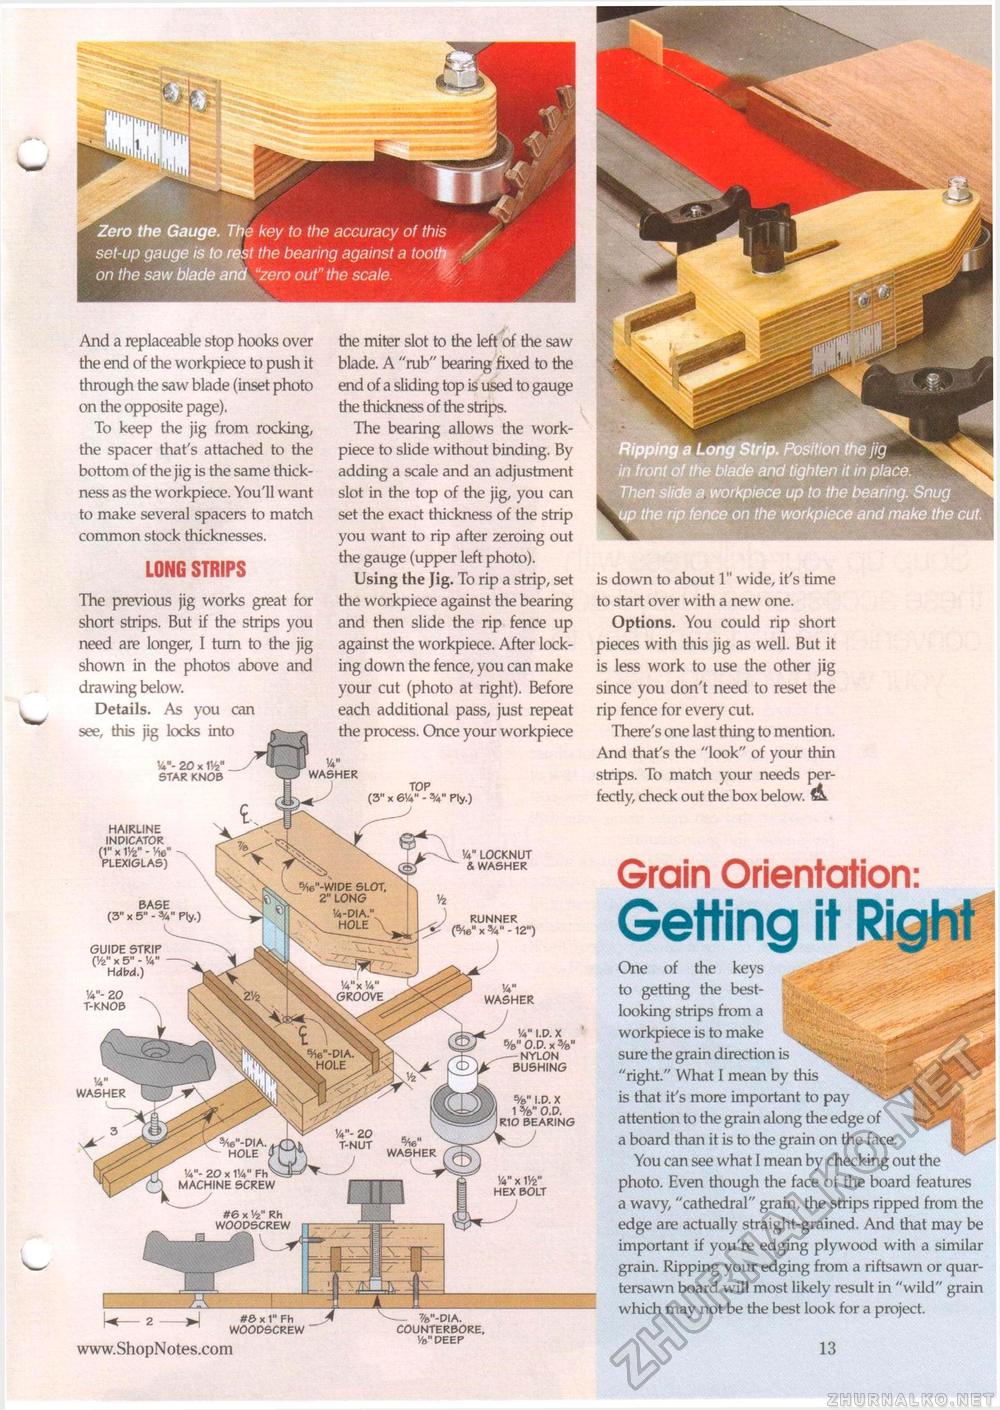
And a replaceable stop hooks over the end of the workpiece to push it through the saw blade (inset photo on the opposite page). To keep the jig from rocking, the spacer that's attached to the bottom of the jig is the same thickness as the workpiece. You'll want to make several spacers to match common stock thicknesses. LONG STRIPS The previous jig works great for short strips. But if the strips you need are longer, I turn to the jig shown in the photos above and drawing below. Details. As you can see, this jig locks into W- 20 X W STAR KNOB HAIRLINE INDICATOR (1" x ttfe" - He" PLEXIGLAS) the miter slot to the left of the saw blade. A "rub" bearing fixed to the end of a sliding top is used to gauge the thickness of the strips. The bearing allows the work-piece to slide without binding. By adding a scale and an adjustment slot in the top of the jig, you can set the exact thickness of the strip you want to rip after zeroing out the gauge (upper left photo). Using the Jig. To rip a strip, set the workpiece against the bearing and then slide the rip fence up against the workpiece. After locking down the fence, you can make your cut (photo at right). Before each additional pass, just repeat the process. Once your workpiece TOP (3" X 6V4" - Ply.) x 1" Fh WOODSCREW %"-DIA. COUNTERBORE, Vb" DEEP Ripping a Long Strip. Position the jig ^^jfc in front of the blade and tighten it in place. Then slide a workpiece up to the bearing. Snug up the rip fence on the workpiece and make the cut. is down to about 1" wide, it's time to start over with a new one. Options. You could rip short pieces with this jig as well. But it is less work to use the other jig since you don't need to reset the rip fence for every cut. There's one last thing to mention. And that's the "look" of your thin strips. To match your needs perfectly, check out the box below, d Grain Orientation: Getting it Right One of the keys , r to getting the best- ; ( looking strips from a : \ * • workpiece is to make sure the grain direction is ^ "right." What I mean by this ^HHl is that it's more important to pay attention to the grain along the edge of a board than it is to the grain on the face. You can see what I mean by checking out the photo. Even though the face of the board features a wavy, "cathedral" grain, the strips ripped from the edge are actually straight-grained. And that may be important if you're edging plywood with a similar grain. Ripping your edging from a riftsawn or quar-tersawn board will most likely result in "wild" grain which may not be the best look for a project. • 13 |


