94, страница 11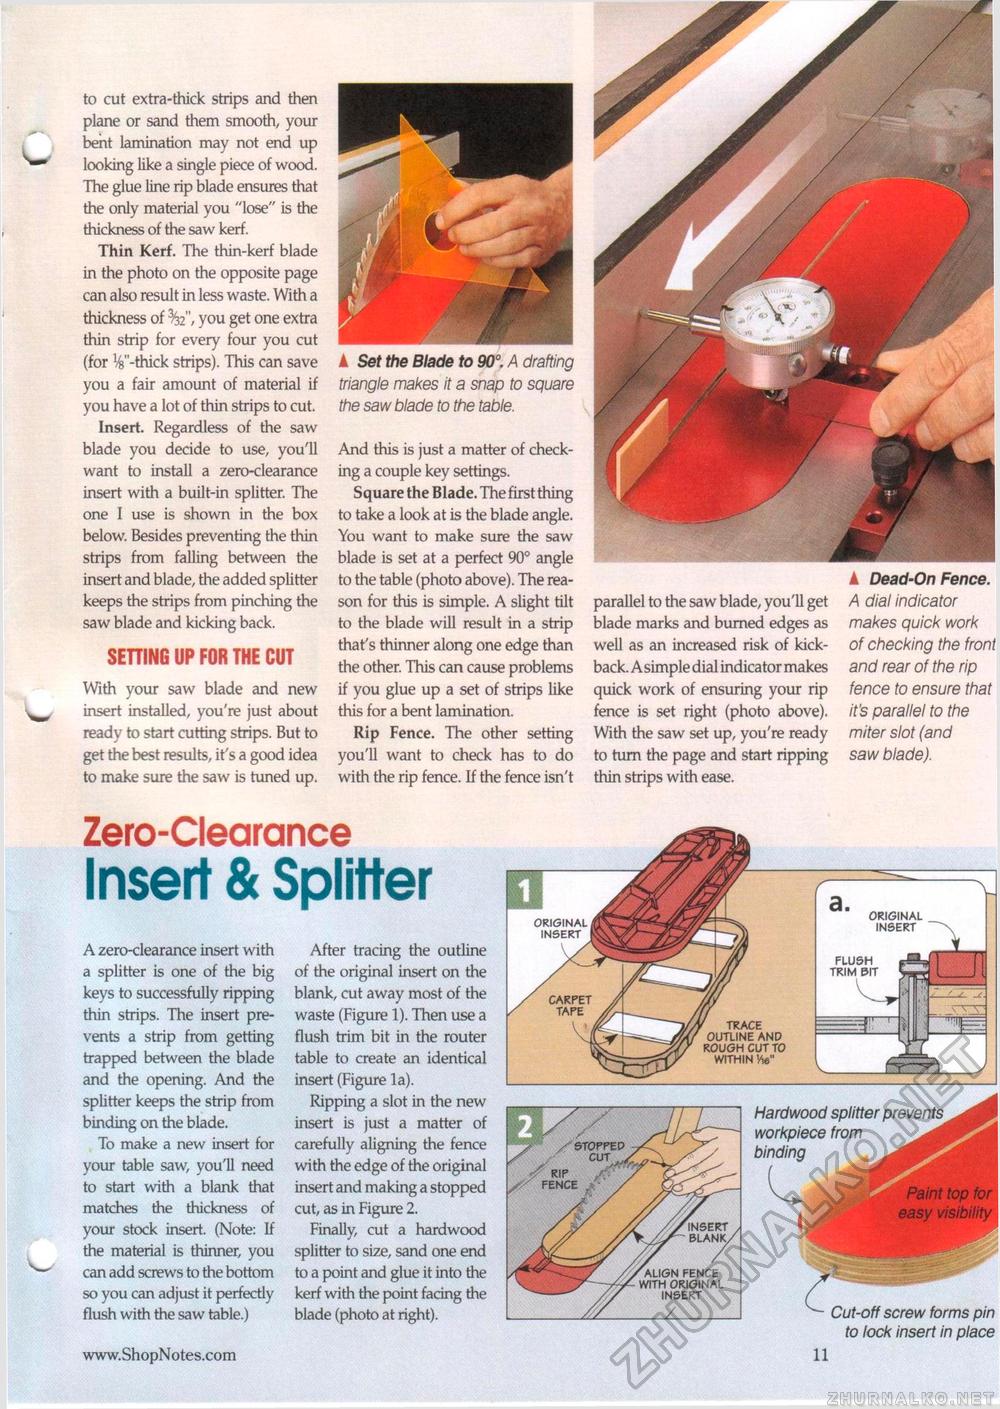
to cut extra-thick strips and then plane or sand them smooth, your bent lamination may not end up looking like a single piece of wood. The glue line rip blade ensures that the only material you "lose" is the thickness of the saw kerf. Thin Kerf. The thin-kerf blade in the photo on the opposite page can also result in less waste. With a thickness of you get one extra thin strip for every four you cut (for Vs'-thick strips). This can save you a fair amount of material if you have a lot of thin strips to cut. Insert. Regardless of the saw blade you decide to use, you'll want to install a zero-clearance insert with a built-in splitter. The one I use is shown in the box below. Besides preventing the thin strips from falling between the insert and blade, the added splitter keeps the strips from pinching the saw blade and kicking back. SETTING UP FOR THE CUT With your saw blade and new insert installed, you're just about ready to start cutting strips. But to get the best results, it's a good idea to make sure the saw is tuned up. And this is just a matter of checking a couple key settings. Square the Blade. The first thing to take a look at is the blade angle. You want to make sure the saw blade is set at a perfect 90° angle to the table (photo above). The reason for this is simple. A slight tilt to the blade will result in a strip that's thinner along one edge than the other. This can cause problems if you glue up a set of strips like this for a bent lamination. Rip Fence. The other setting you'll want to check has to do with the rip fence. If the fence isn't parallel to the saw blade, you'll get blade marks and burned edges as well as an increased risk of kickback. A simple dial indicator makes quick work of ensuring your rip fence is set right (photo above). With the saw set up, you're ready to turn the page and start ripping thin strips with ease. ▲ Dead-On Fence. A dial indicator makes quick work of checking the front and rear of the rip fence to ensure that it's parallel to the miter slot (and saw blade). Zero-ClearanceInsert & SplitterA zero-clearance insert with a splitter is one of the big keys to successfully ripping thin strips. The insert prevents a strip from getting trapped between the blade and the opening. And the splitter keeps the strip from binding on the blade. To make a new insert for your table saw, you'll need to start with a blank that matches the thickness of your stock insert. (Note: If the material is thinner, you can add screws to the bottom so you can adjust it perfectly flush with the saw table.) After tracing the outline of the original insert on the blank, cut away most of the waste (Figure 1). Then use a flush trim bit in the router table to create an identical insert (Figure la). Ripping a slot in the new insert is just a matter of carefully aligning the fence with the edge of the original insert and making a stopped cut, as in Figure 2. Finally, cut a hardwood splitter to size, sand one end to a point and glue it into the kerf with the point facing the blade (photo at right). ▲ Set the Blade to 90°. A drafting triangle makes it a snap to square the saw blade to the table. ORIGINAL INSERT ORIGINAL INSERT FLUSH TRIM PIT carpet tape ' trace outline and rough cut to within vie" Hardwood splitter prevents workpiece from binding ^^k Paint top for easy visibility insert blank/ 'align fence with original insert Cut-off screw forms pin to lock insert in place • 11 |


