94, страница 9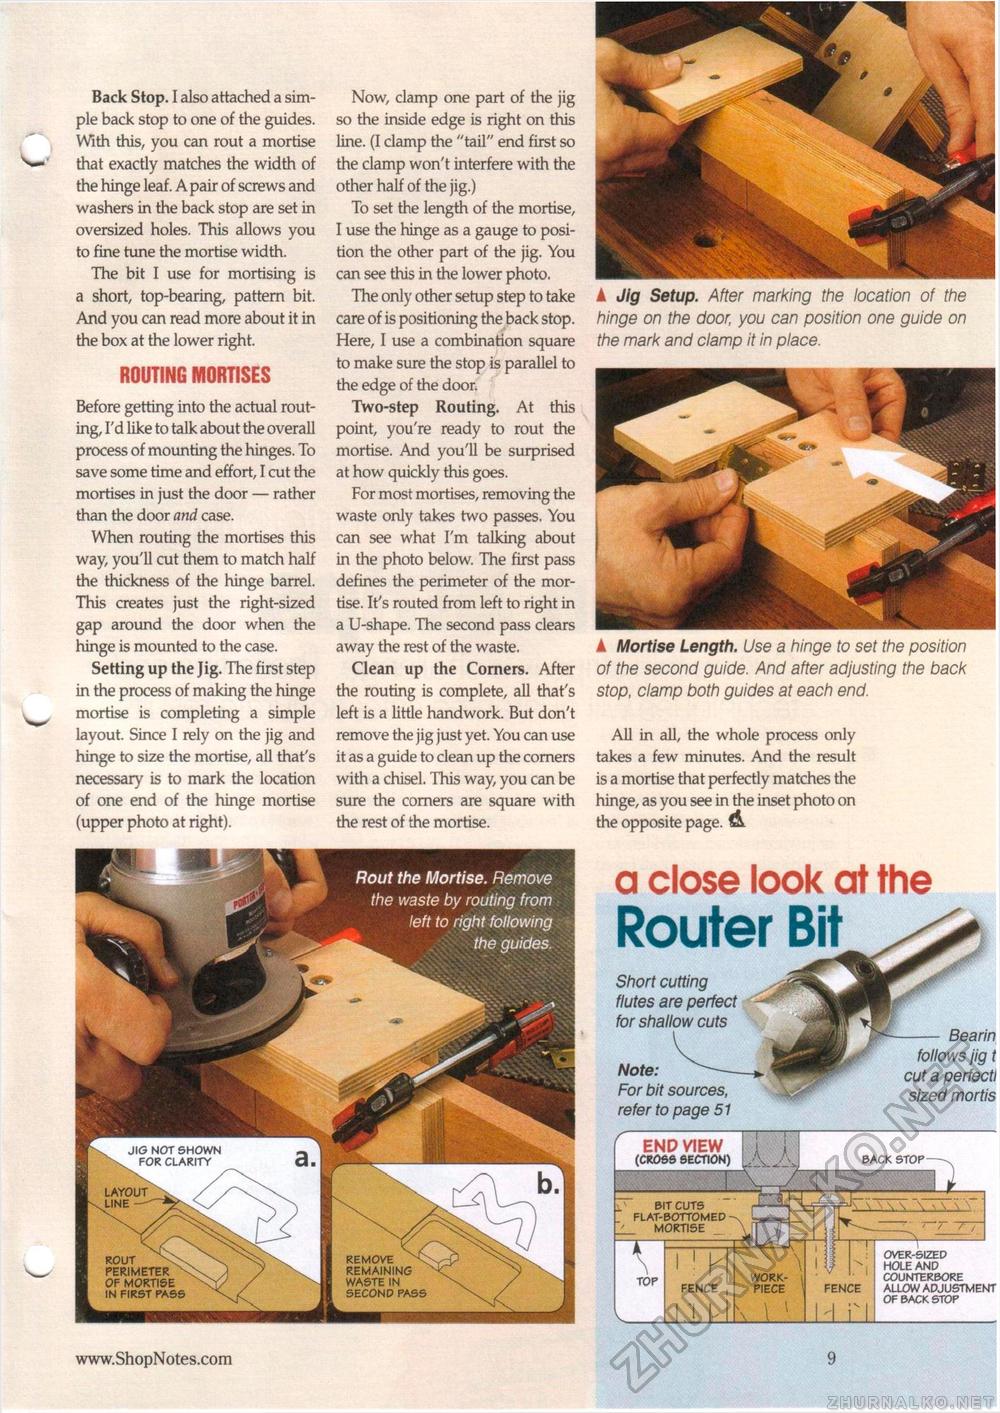
Back Stop. I also attached a simple back stop to one of the guides. With this, you can rout a mortise that exactly matches the width of the hinge leaf. A pair of screws and washers in the back stop are set in oversized holes. This allows you to fine tune the mortise width. The bit I use for mortising is a short, top-bearing, pattern bit. And you can read more about it in the box at the lower right. ROUTING MORTISES Before getting into the actual routing, I'd like to talk about the overall process of mounting the hinges. To save some time and effort, I cut the mortises in just the door — rather than the door and case. When routing the mortises this way, you'll cut them to match half the thickness of the hinge barrel. This creates just the right-sized gap around the door when the hinge is mounted to the case. Setting up the Jig. The first step in the process of making the hinge mortise is completing a simple layout. Since I rely on the jig and hinge to size the mortise, all that's necessary is to mark the location of one end of the hinge mortise (upper photo at right). Now, clamp one part of the jig so the inside edge is right on this line. (I clamp the "tail" end first so the clamp won't interfere with the other half of the jig.) To set the length of the mortise, I use the hinge as a gauge to position the other part of the jig. You can see this in the lower photo. The only other setup step to take care of is positioning the back stop. Here, I use a combination square to make sure the stop is parallel to the edge of the door. Two-step Routing. At this point, you're ready to rout the mortise. And you'll be surprised at how quickly this goes. For most mortises, removing the waste only takes two passes. You can see what I'm talking about in the photo below. The first pass defines the perimeter of the mortise. It's routed from left to right in a U-shape. The second pass clears away the rest of the waste. Clean up the Corners. After the routing is complete, all that's left is a little handwork. But don't remove the jig just yet. You can use it as a guide to clean up the corners with a chisel. This way, you can be sure the corners are square with the rest of the mortise. ▲ Jig Setup. After marking the location of the hinge on the door, you can position one guide on the mark and clamp it in place. ▲ Mortise Length. Use a hinge to set the position of the second guide. And after adjusting the back stop, clamp both guides at each end. All in all, the whole process only takes a few minutes. And the result is a mortise that perfectly matches the hinge, as you see in the inset photo on the opposite page. & layout line — JIG NOT SHOWN FOR CLARITY rout perimeter of mortise in first pass remove remaining waste in second pass work- fence piece fence a close look at theRouter Bit OVER-SIZED HOLE AND COUNTERBORE ALLOW ADJUSTMENT OF BACK STOP BACK STOP- Bearin follows jig t cut a perfectl sized mortis END VIEW (cross section) bit cuts flat-bottomed mortise Short cutting flutes are perfect for shallow cuts Note: For bit sources, refer to page 51 |


