95, страница 18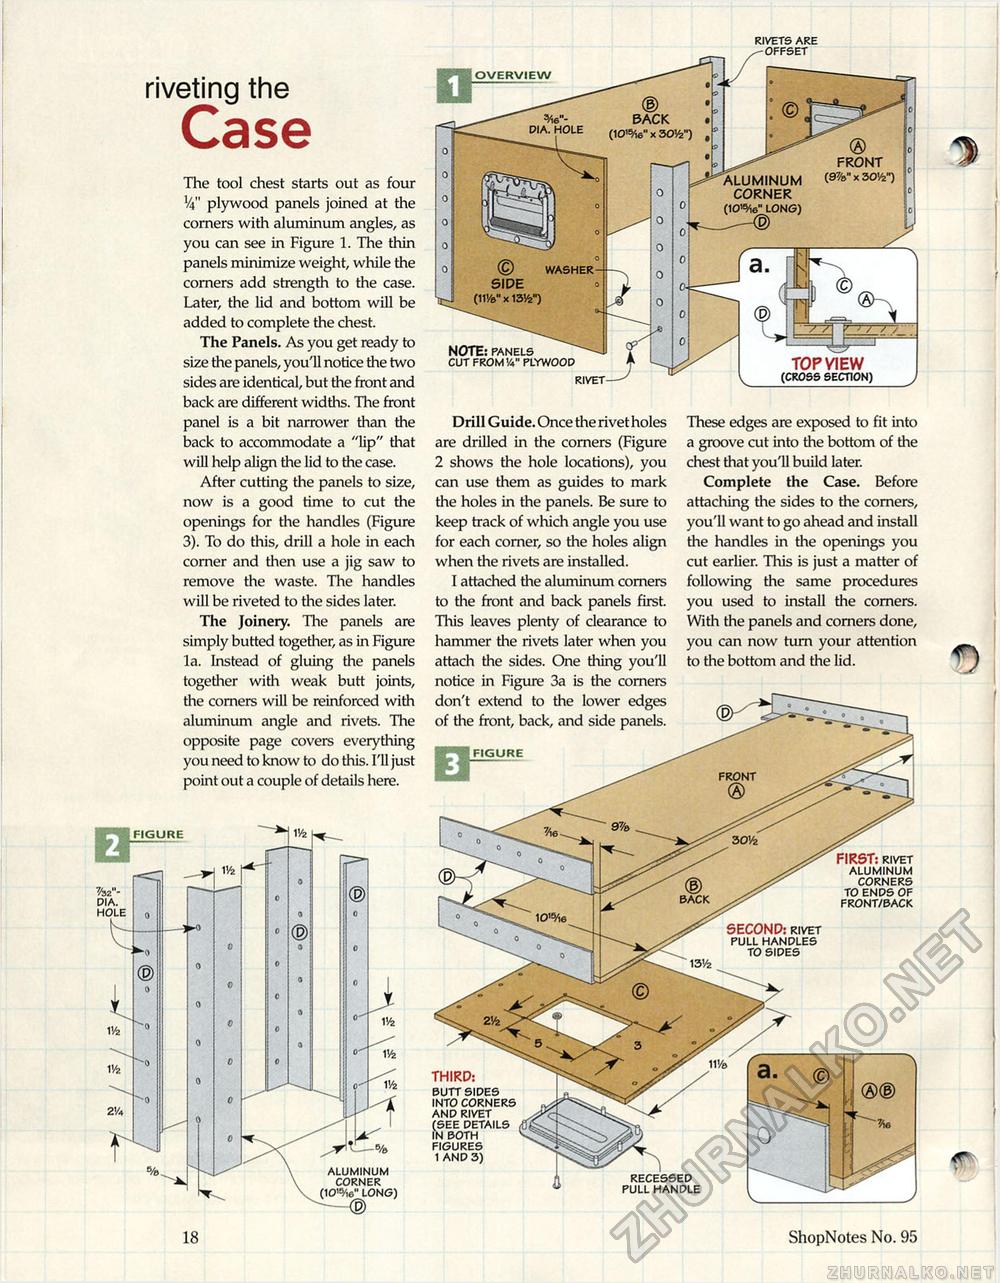
riveting the The tool chest starts out as four V4'1 plywood panels joined at the corners with aluminum angles, as you can see in Figure 1. The thin panels minimize weight, while the corners add strength to the case. Later, the lid and bottom will be added to complete the chest. The Panels. As you get ready to size the panels, you'll notice the two sides are identical, but the front and back are different widths. The front panel is a bit narrower than the back to accommodate a "lip" that will help align the lid to the case. After cutting the panels to size, now is a good time to cut the openings for the handles (Figure 3). To do this, drill a hole in each corner and then use a jig saw to remove the waste. The handles will be riveted to the sides later. The Joineiy. The panels are simply butted together, as in Figure la. Instead of gluing the panels together with weak butt joints, the corners will be reinforced with aluminum angle and rivets. The opposite page covers everything you need to know to do this. I'll just point out a couple of details here. OVERVIEW BACK (10'^ie" x 3 OVz") dia. hole FRONT (9%"x3 oyi") ALUMINUM CORNER long) washer rivet TOP VIEW (cross section) NOTE: panels cut from V«" plywood 18 ShopNotes No. 95 These edges are exposed to fit into a groove cut into the bottom of the chest that you'll build later. Complete the Case. Before attaching the sides to the corners, you'll want to go ahead and install the handles in the openings you cut earlier. This is just a matter of following the same procedures you used to install the corners. With the panels and comers done, you can now turn your attention to the bottom and the lid. SECOND: rivet pull handles to sides FIRST: rivet aluminum corners to ends of front/back Drill Guide. Once the rivetholes are drilled in the corners (Figure 2 shows the hole locations), you can use them as guides to mark the holes in the panels. Be sure to keep track of which angle you use for each comer, so the holes align when the rivets are installed. I attached the aluminum comers to the front and back panels first. This leaves plenty of clearance to hammer the rivets later when you attach the sides. One thing you'll notice in Figure 3a is the comers don't extend to the lower edges of the front, back, and side panels. FIGURE THIRD: BUTT sides into corners and rivet (see details in both figures 1 and 3) recessed pull handle |


