95, страница 19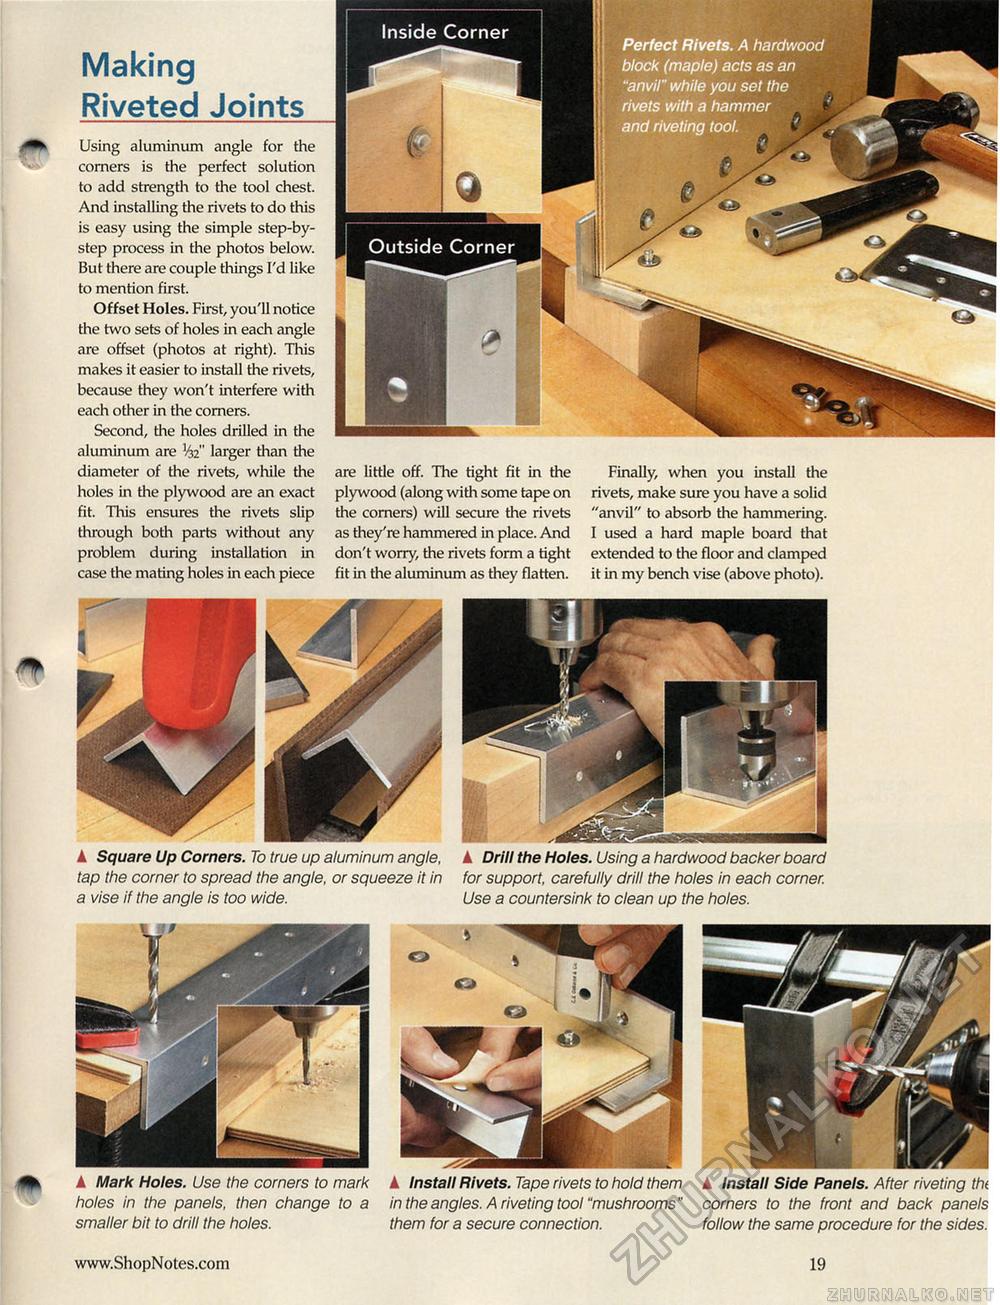
Making Riveted Joints Using aluminum angle for the corners is the perfect solution to add strength to the tool chest. And installing the rivets to do this is easy using the simple step-by-step process in the photos below. But there are couple things I'd like to mention first. Offset Holes. First, you'll notice the two sets of holes in each angle are offset (photos at right). This makes it easier to install the rivets, because they won't interfere with each other in the comers. Second, the holes drilled in the aluminum are ^2" larger than the diameter of the rivets, while the holes in the plywood are an exact fit. This ensures the rivets slip through both parts without any problem during installation in case the mating holes in each piece are little off. The tight fit in the plywood (along with some tape on the comers) will secure the rivets as they're hammered in place. And don't worry, the rivets form a tight fit in the aluminum as they flatten. Finally, when you install the rivets, make sure you have a solid "anvil" to absorb the hammering. I used a hard maple board that extended to the floor and clamped it in my bench vise (above photo). A Square Up Corners. To true up aluminum angle, tap the corner to spread the angle, or squeeze it in a vise if the angle is too wide. k Drill the Holes. Using a hardwood backer board for support, carefully drill the holes in each corner. Use a countersink to clean up the holes. k Mark Holes. Use the corners to mark holes in the panels, then change to a smaller bit to drill the holes. k Install Rivets. Tape rivets to hold them in the angles. A riveting tool "mushrooms" them for a secure connection. k Install Side Panels. After riveting th( corners to the front and back panels follow the same procedure for the sides. Inside Corner Perfect Rivets. A hardwood block (maple) acts as an "anvil" while you set the rivets with a hammer and riveting tool. \ ' Outside Corner 19 |


