95, страница 22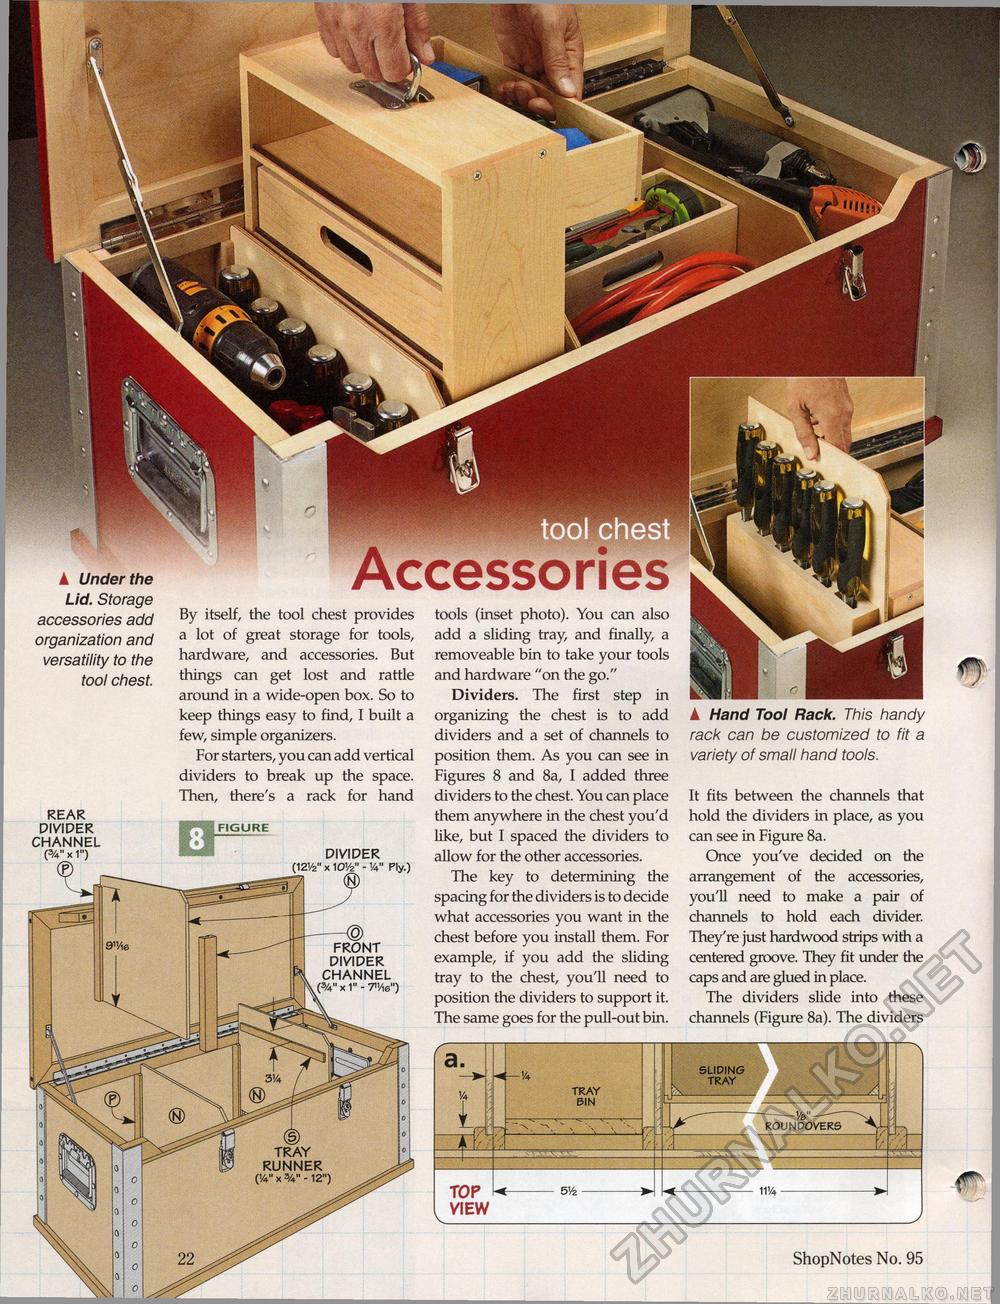
tool chest ▲ Under the Lid. Storage accessories add organization and versatility to the tool chest. By itself, the tool chest provides tools (inset photo). You can also a lot of great storage for tools, add a sliding tray, and finally, a hardware, and accessories. But removeable bin to take your tools things can get lost and rattle and hardware "on the go." around in a wide-open box. So to Dividers. The first step in keep things easy to find, I built a organizing the chest is to add few, simple organizers. dividers and a set of channels to For starters, you can add vertical position them. As you can see in dividers to break up the space. Figures 8 and 8a, I added three Then, there's a rack for hand dividers to the chest. You can place them anywhere in the chest you'd like, but I spaced the dividers to DIVIDER allow for the other accessories. The key to determining the spacing for the dividers is to decide what accessories you want in the chest before you install them. For example, if you add the sliding tray to the chest, you'll need to position the dividers to support it. The same goes for the pull-out bin. ▲ Hand Tool Rack. This handy rack can be customized to fit a variety of small hand tools. It fits between the channels that hold the dividers in place, as you can see in Figure 8a. Once you've decided on the arrangement of the accessories, you'll need to make a pair of channels to hold each divider. They're just hardwood strips with a centered groove. They fit under the caps and are glued in place. The dividers slide into these channels (Figure 8a). The dividers REAR DIVIDER CHANNEL FIGURE FRONT DIVIDER CHANNEL (%" x 1" - TV,e") SLIDING TRAY TRAY BIN ROUNDOVERS TRAY RUNNER (!4" x 3/t" -12") ShopNotes No. 95 |


