Woodworker's Journal 101-Projects-for-Woodworkers, страница 125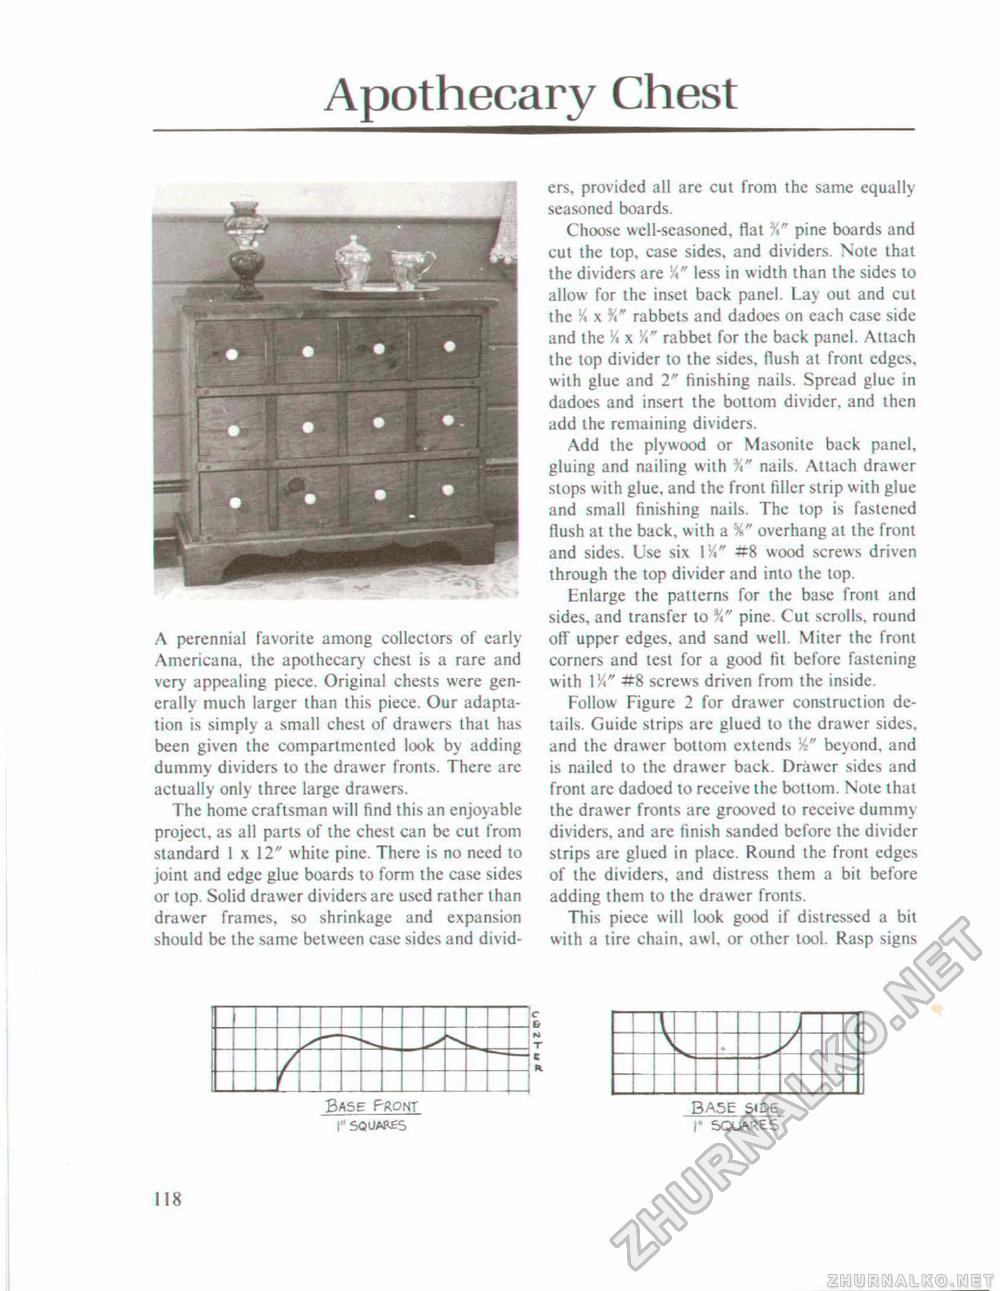
Apothecary ChestA perennial favorite among collectors of early Americana, the apothecary chest is a rare and very appealing piece. Original chests were generally much larger than this piece. Our adaptation is simply a small chest of drawers that has been given the compartmented look by adding dummy dividers to the drawer fronts. There arc actually only three large drawers. The home craftsman will find this an enjoyable project, as all parts of the chest can be cut from standard 1x12" white pine. There is no need to joint and edge glue boards to form the case sides or lop. Solid drawer dividers are used rather than drawer frames, so shrinkage and expansion should be the same between case sides and divid ers, provided all are cut from the same equally seasoned boards. Choose well-seasoned, flat 54" pine boards and cut the top, case sides, and dividers. Note that the dividers are V<" less in width than the sides to allow for the inset back panel. Lay out and cut the Vt xf*" rabbets and dadoes on each case side and the V* x V*" rabbet for the back panel. Attach the top divider to the sides, flush at front edges, with glue and 2" finishing nails. Spread glue in dadoes and insert the bottom divider, and then add the remaining dividers. Add the plywood or Masonite back panel, gluing and nailing with %" nails. Attach drawer stops with glue, and the front filler strip with glue and small finishing nails. The top is fastened flush at the back, with a %" overhang at the front and sides. Use six \Ya" #8 wood screws driven through the top divider and into the top. Enlarge the patterns for the base front and sides, and transfer to %" pine, Cut scrolls, round off upper edges, and sand well. Miter the fronl corners and lest for a good fit before fastening with 1 Vi" #8 screws driven from the inside Follow Figure 2 for drawer construction details. Guide strips are glued to the drawer sides, and the drawer bottom extends beyond, and is nailed to the drawer back. Drawer sides and fronl are dadoed to receive the bottom. Note that the drawer fronts are grooved to receive dummy dividers, and are finish sanded before ihe divider strips are glued in place. Round the front edges of the dividers, and distress them a bit before adding them to the drawer fronts. This piece will look good if distressed a bit with a tire chain, awl, or other tool. Rasp signs zt. Base Front I" SQUARES ba5e s'd£ r scxja^S c tl N T C R 118 |


