Woodworker's Journal 101-Projects-for-Woodworkers, страница 133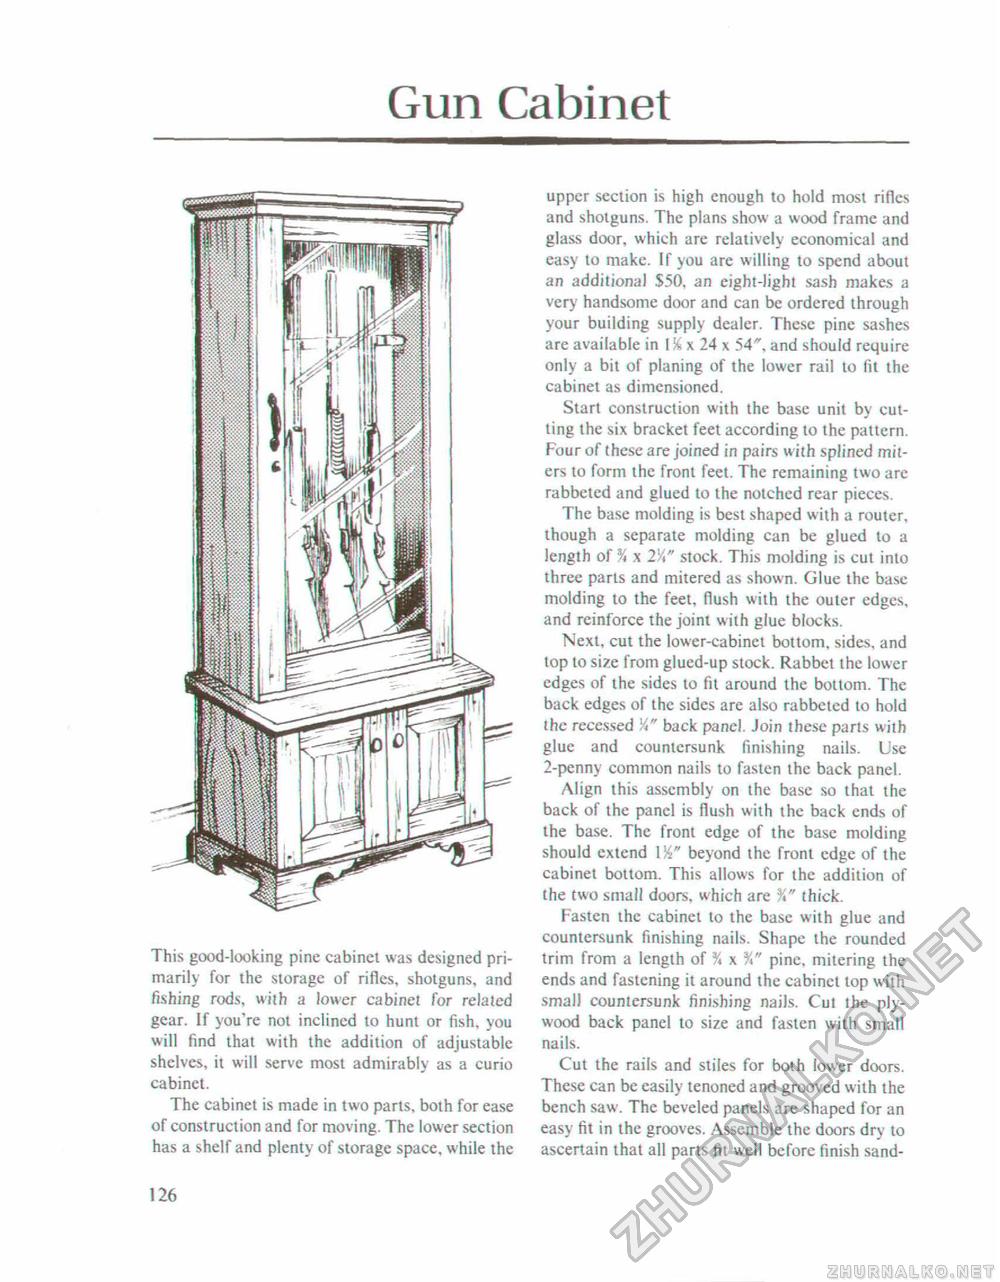
Gun CabinetThis good-looking pine cabinet was designed primarily for the storage of rifles, shotguns, and fishing rods, with a lower cabinet for related gear. If you're not inclined to hunt or fish, you will find that with the addition of adjustable shelves, it will serve most admirably as a curio cabinet. The cabinet is made in two parts, both for ease of construction and for moving. The lower section has a shelf and plenty of storage space, while the upper section is high enough to hold most rifles and shotguns. The plans show a wood frame and glass door, which are relatively economical and easy to make. If you are willing to spend about an additional $50, an eight-light sash makes a very handsome door and can be ordered through your building supply dealer. These pine sashes are available in 156 x 24 x 54", and should require only a bit of planing of the lower rail to fit the cabinet as dimensioned. Start construction with the base unit by cutting the six bracket feet according to the pattern. Four of these are joined in pairs with splined miters to form the front feet. The remaining two are rabbeted and glued to the notched rear pieces. The base molding is best shaped with a router, though a separate molding can be glued to a length of % x 2'A" stock. This molding is cut into three parts and mitered as shown. Glue the base molding to the feet, flush with the outer edges, and reinforce the joint with glue blocks. Next, cut the lower-cabinet bottom, sides, and top to size from glued-up stock. Rabbet the lower edges of the sides to fit around the bottom. The back edges of the sides are also rabbeted to hold the recessed V," back panel. Join these parts with glue and countersunk finishing nails. Use 2-penny common nails to fasten the back panel. Align this assembly on the base so that the back of the panel is flush with the back ends of the base. The front edge of the base molding should extend I Yi" beyond the front edge of the cabinet bottom. This allows for the addition of the two small doors, which are thick. Fasten the cabinet to the base with glue and countersunk finishing nails. Shape the rounded trim from a length of % x %" pine, mitering the ends and fastening it around the cabinet top with small countersunk finishing nails. Cut the plywood back panel to size and fasten with small nails. Cut the rails and stiles for both lower doors. These can be easily tenoned and grooved with the bench saw. The beveled panels are shaped for an easy fit in the grooves. Assemble the doors dry to ascertain that all parts fit well before finish sand- 126 |


