Woodworker's Journal 101-Projects-for-Woodworkers, страница 143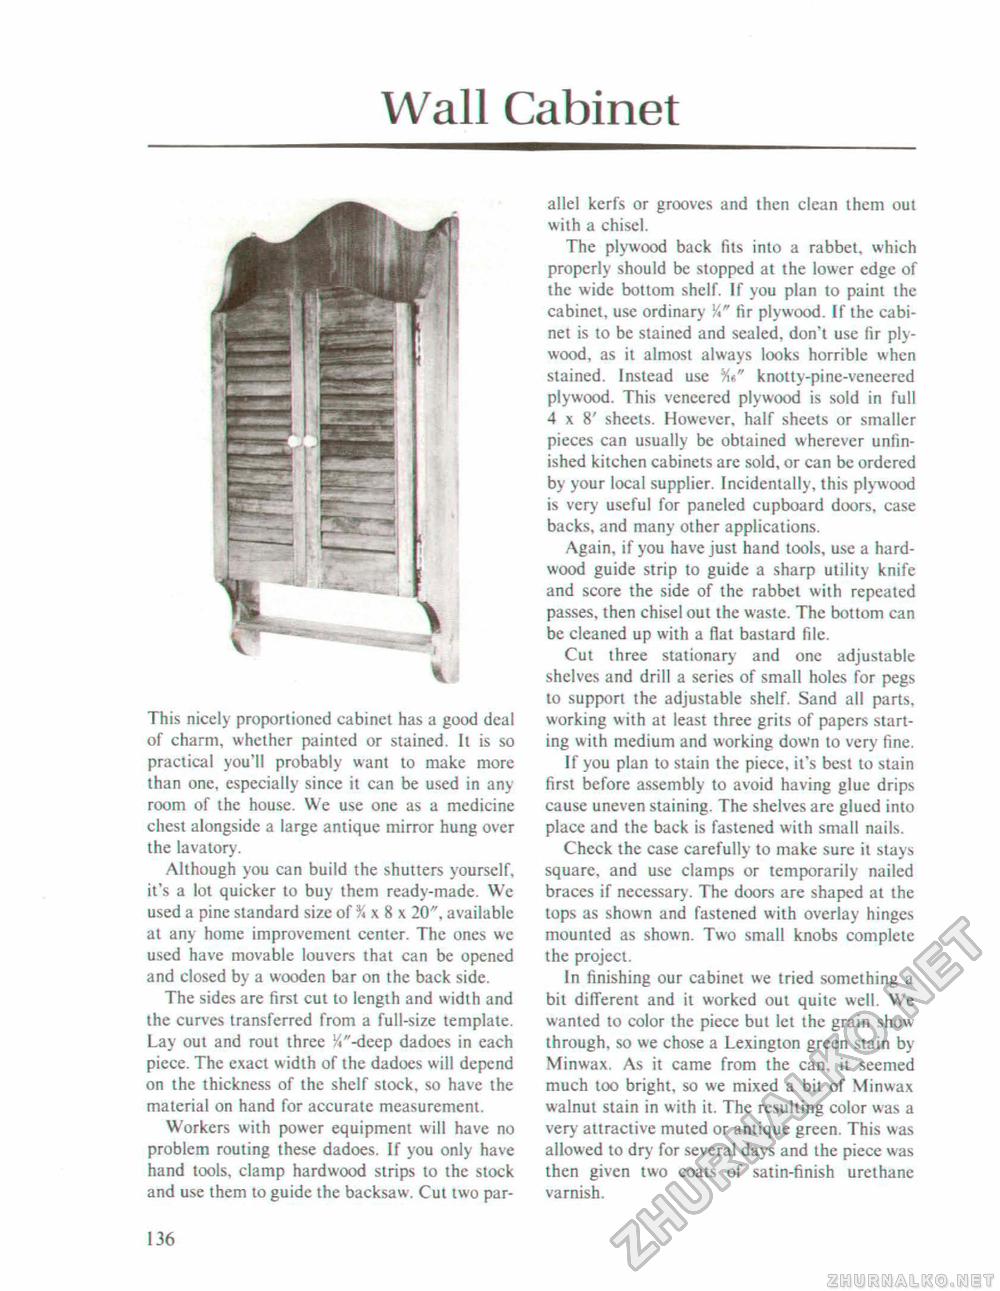
Wall CabinetThis nicely proportioned cabinet has a good deal of charm, whether painted or stained. It is so practical you'll probably want to make more than one, especially since it can be used in any room of the house. We use one as a medicine chest alongside a large antique mirror hung over the lavatory. Although you can build the shutters yourself, it's a lot quicker to buy them ready-made. We used a pine standard size of % x 8 x 20", available at any home improvement center. The ones we used have movable louvers that can be opened and closed by a wooden bar on the back side. The sides are first cut to length and width and the curves transferred from a full-size template. Lay out and rout three !4"-deep dadoes in each piece. The exact width of the dadoes will depend on the thickness of the shelf stock, so have the material on hand for accurate measurement. Workers with power equipment will have no problem routing these dadoes. If you only have hand tools, clamp hardwood strips to the stock and use them to guide the backsaw-. Cut two par allel kerfs or grooves and then clean them out with a chisel. The plywood back fits into a rabbet, which properly should be stopped at the lower edge of the wide bottom shelf. If you plan to paint the cabinet, use ordinary fir plywood. If the cabinet is to be stained and sealed, don't use fir plywood, as it almost always looks horrible when stained. Instead use knotty-pine-veneered plywood. This veneered plywood is sold in full 4x8' sheets. However, half sheets or smaller pieces can usually be obtained wherever unfinished kitchen cabinets arc sold, or can be ordered by your local supplier. Incidentally, this plywood is very useful for paneled cupboard doors, case backs, and many other applications. Again, if you have just hand tools, use a hardwood guide strip to guide a sharp utility knife and score the side of the rabbet with repeated passes, then chisel out the waste. The bottom can be cleaned up with a flat bastard file. Cut three stationary and one adjustable shelves and drill a series of small holes for pegs to support the adjustable shelf. Sand all parts, working with at least three grits of papers starting with medium and working down to very fine. If you plan to stain the piece, it's best to stain first before assembly to avoid having glue drips cause uneven staining. The shelves arc glued into place and the back is fastened with small nails. Check the case carefully to make sure it stays square, and use clamps or temporarily nailed braces if necessary. The doors are shaped at the tops as shown and fastened with overlay hinges mounted as shown. Two small knobs complete the project. In finishing our cabinet we tried something a bit different and it worked out quite well. We wanted to color the piece but let the grain show through, so we chose a Lexington green stain by Minwax. As it came from the can, it seemed much too bright, so we mixed a bit of Minwax walnut stain in with it. The resulting color was a very attractive muted or antique green. This was allowed to dry for several days and the piece was then given two coats of satin-finish urethane varnish. 136 |


