Woodworker's Journal 101-Projects-for-Woodworkers, страница 196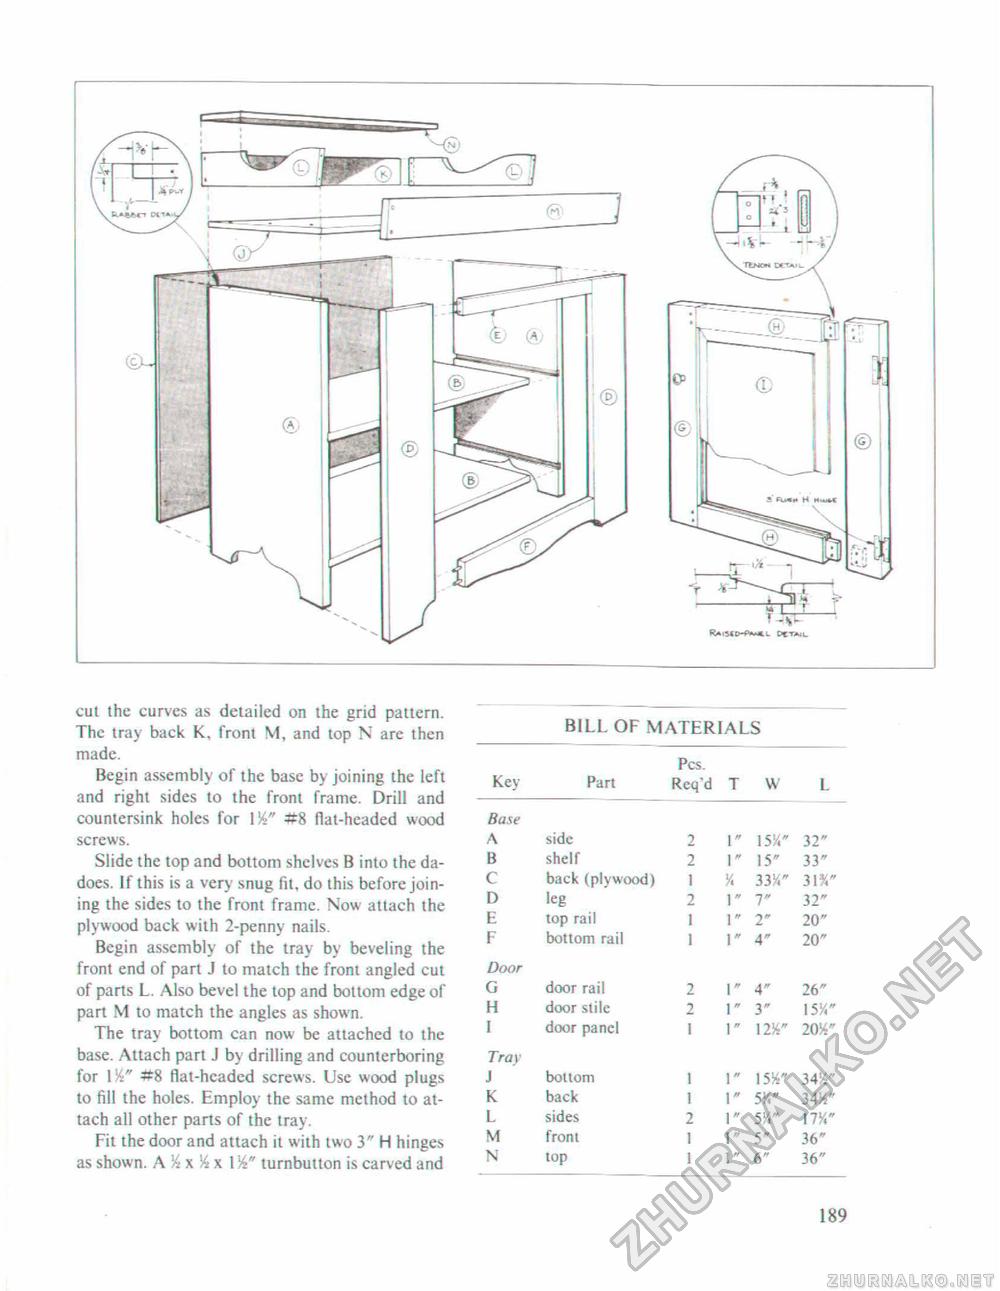
RAISSD-A^CL DCTA4L. cut the curves as detailed on the grid pattern. The tray back K, front M, and top N are then made. Begin assembly of the base by joining the left and right sides to the front frame. Drill and countersink holes for #8 flat-headed wood screws. Slide the top and bottom shelves B into the dadoes. If this is a very snug fit, do this before joining the sides to the front frame. Now attach the plywood back with 2-penny nails. Begin assembly of the tray by beveling the front end of part J to match the front angled cut of parts L. Also bevel the lop and boltom edge of part M to match the angles as shown. The tray bottom can now be attached to the base. Attach part J by drilling and counterboring for —8 flat-headed screws. Use wood plugs to fill the holes. Employ the same method to attach all other parts of the tray. Fit the door and attach it with two 3" H hinges as shown. A 'A x % x 1W turnbutton is carved and BILL OF MATERIALS BILL OF MATERIALS
189 |


