Woodworker's Journal 101-Projects-for-Woodworkers, страница 31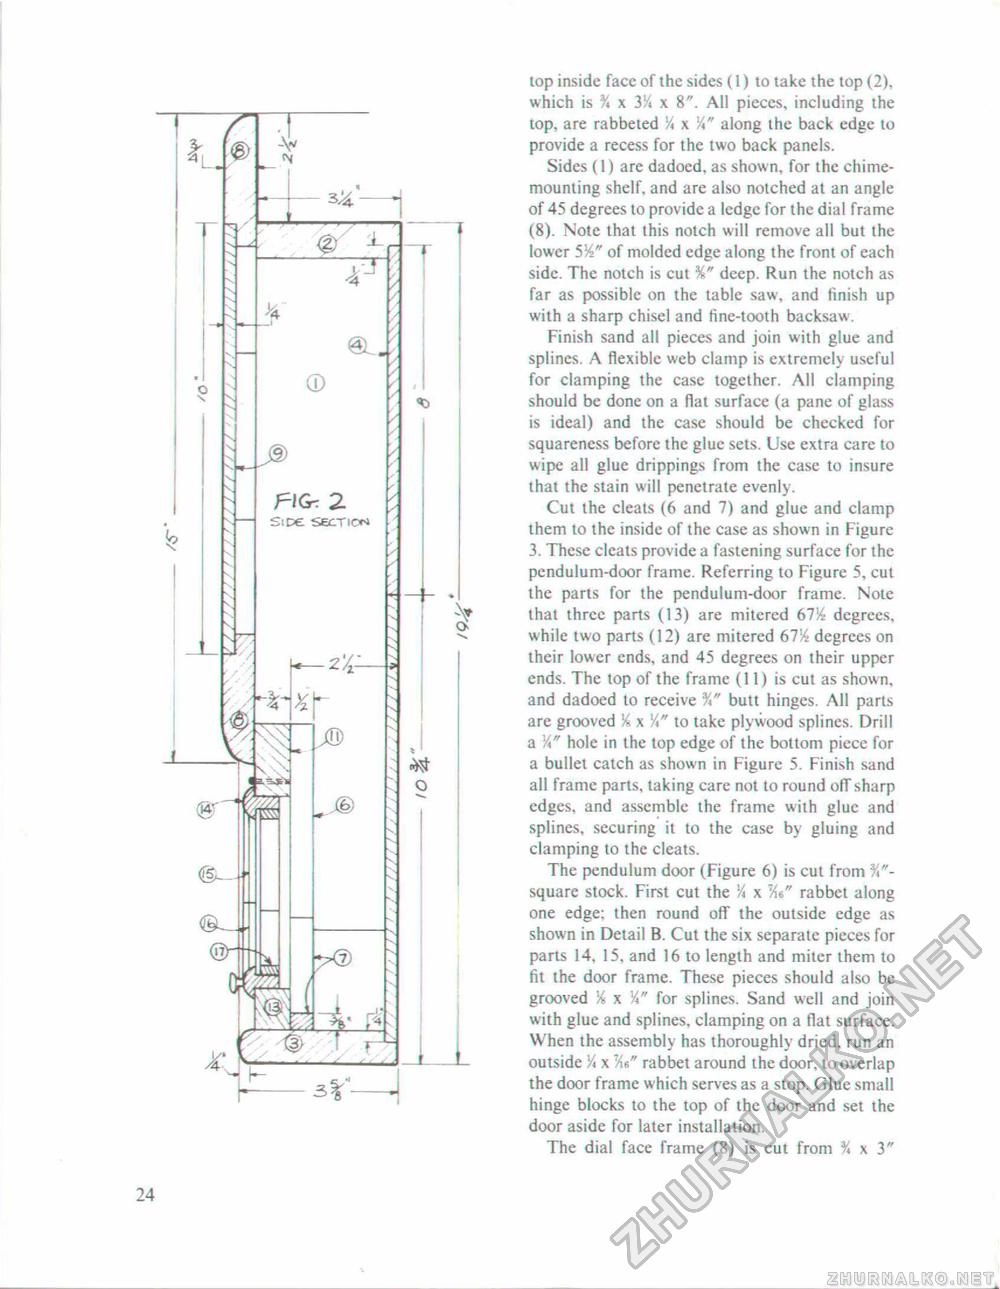
24 top inside face of the sides (1) to take the top (2), which is % x 3K x 8". All pieces, including the top, are rabbeted V* x >V along the back edge to provide a recess for the two back panels. Sides (1) are dadoed, as shown, for the chime-mounting shelf, and are also notched at an angle of 45 degrees to provide a ledge for the dial frame (8). Note that this notch will remove all but the lower 514" of molded edge along the front of each side. The notch is cut %" deep. Run the notch as far as possible on the table saw, and finish up with a sharp chisel and fine-tooth backsaw. Finish sand all pieces and join with glue and splines. A flexible web clamp is extremely useful for clamping the case together. All clamping should be done on a flat surface (a pane of glass is ideal) and the case should be checked for squareness before the glue sets. Use extra care to wipe all glue drippings from the case to insure that the stain will penetrate evenly. Cut the cleats (6 and 7) and glue and clamp them to the inside of the case as shown in Figure 3. These cleats provide a fastening surface for the pendulum-door frame. Referring to Figure 5, cut the parts for the pendulum-door frame. Note that three parts (13) are mitered 67& degrees, while two parts (12) are mitered 67% degrees on their lower ends, and 45 degrees on their upper ends. The top of the frame (11) is cut as shown, and dadoed to receive %" butt hinges. All parts are grooved 14 x Vt" to take plywood splines. Drill a V*" hole in the top edge of the bottom piece for a bullet catch as shown in Figure 5. Finish sand all frame parts, taking care not to round off sharp edges, and assemble the frame with glue and splines, securing it to the case by gluing and clamping to the cleats. The pendulum door (Figure 6) is cut from %"-square stock. First cut the Y* x '/«" rabbet along one edge; then round off the outside edge as shown in Detail B. Cut the six separate pieces for parts 14. 15, and 16 to length and miter them to fit the door frame. These pieces should also be grooved % x for splines. Sand well and join with glue and splines, clamping on a flat surface. When the assembly has thoroughly dried, run an outside K x 7Xb" rabbet around the door, to overlap the door frame which serves as a stop. Glue small hinge blocks to the top of the door and set the door aside for later installation. The dial face frame (8) is cut from % x 3" |


