Woodworker's Journal 101-Projects-for-Woodworkers, страница 39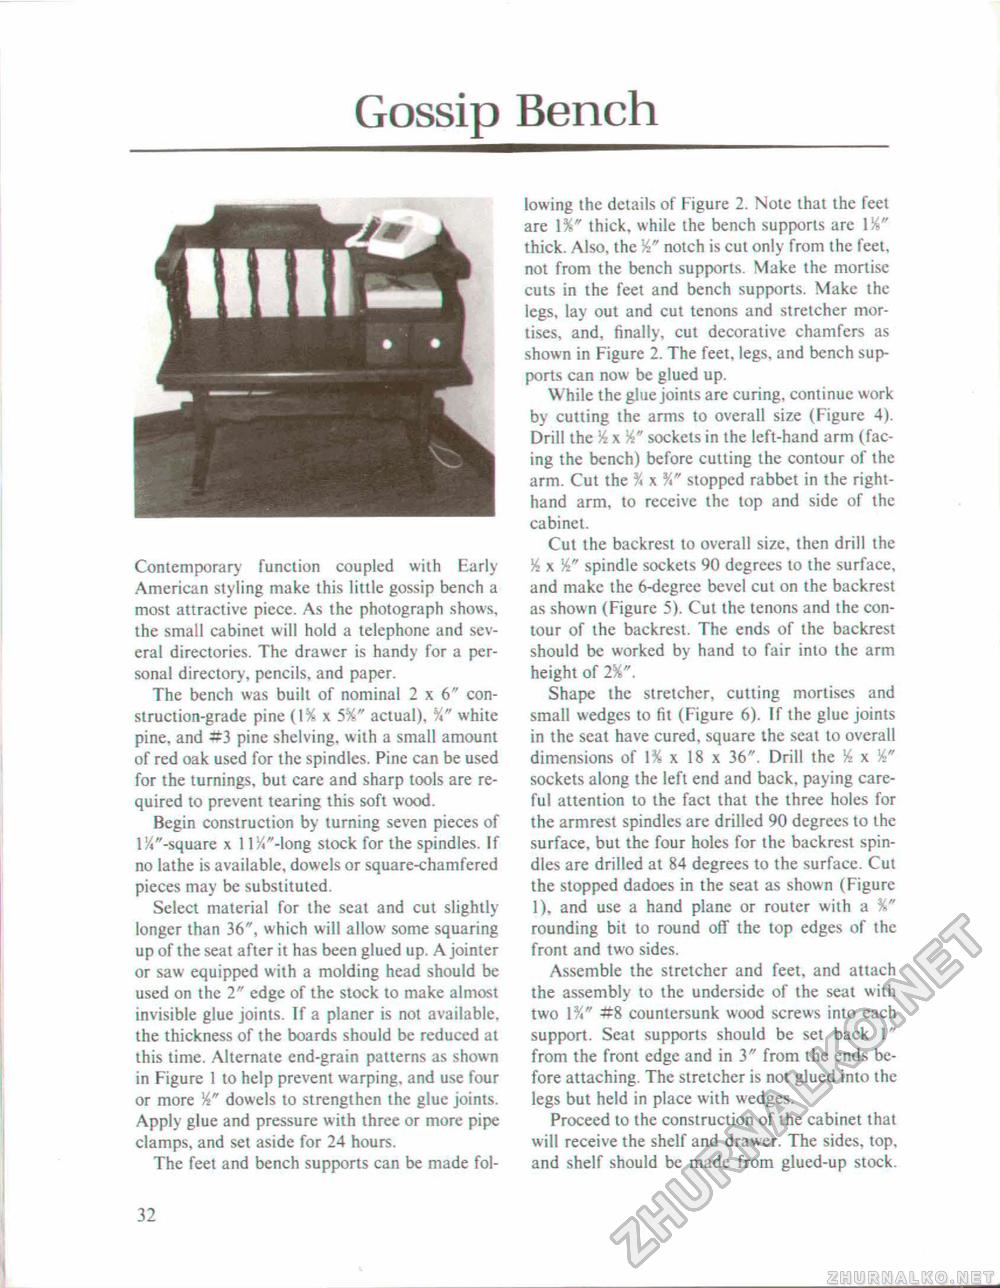
Gossip BenchContemporary function coupled with Early American styling make this little gossip bench a most attractive piece. As the photograph shows, the small cabinet will hold a telephone and several directories. The drawer is handy for a personal directory, pencils, and paper. The bench was built of nominal 2 x 6" construction-grade pine (1% x actual), %" white pine, and #3 pine shelving, with a small amount of red oak used for the spindles. Pine can be used for the turnings, but care and sharp tools are required to prevent tearing this soft wood. Begin construction by turning seven pieces of l'/T'-square x 1 lJ^-long stock for the spindles. If no lathe is available, dowels or square-chamfered pieces may be substituted. Select material for the scat and cut slightly longer than 36", which will allow some squaring up of the seat after it has been glued up. A jointer or saw equipped with a molding head should be used on the 2" edge of the stock to make almost invisible glue joints. If a planer is not available, the thickness of the boards should be reduced at this time. Alternate end-grain patterns as shown in Figure 1 to help prevent warping, and use four or more dowels to strengthen the glue joints. Apply glue and pressure with three or more pipe clamps, and set aside for 24 hours. The feet and bench supports can be made fol lowing the details of Figure 2. Note that the feet are \%" thick, while the bench supports are l%" thick. Also, the W notch is cut only from the feet, not from the bench supports. Make the mortise cuts in the feet and bench supports. Make the legs, lay out and cut tenons and stretcher mortises, and, finally, cut decorative chamfers as shown in Figure 2. The feet, legs, and bench supports can now be glued up. While the glue joints are curing, continue work by cutting the arms to overall size (Figure 4). Drill the J4 x W sockets in the left-hand arm (facing the bench) before cutting the contour of the arm. Cut the % x stopped rabbet in the right-hand arm, to receive the top and side of the cabinet. Cut the backrest to overall size, then drill the Yi x W spindle sockets 90 degrees to the surface, and make the 6-degree bevel cut on the backrest as shown (Figure 5). Cut the tenons and the contour of the backrest. The ends of the backrest should be worked by hand to fair into the arm height of 2%". Shape the stretcher, cutting mortises and small wedges to fit (Figure 6). If the glue joints in the seat have cured, square the seat to overall dimensions of 1% x 18 x 36". Drill the % x Jt* sockets along the left end and back, paying careful attention to the fact that the three holes for the armrest spindles are drilled 90 degrees to the surface, but the four holes for the backrcst spindles are drilled at 84 degrees to the surface. Cut the stopped dadoes in the seat as shown (Figure 1), and use a hand plane or router with a %" rounding bit to round off the top edges of the front and two sides. Assemble the stretcher and feet, and attach the assembly to the underside of the seat with two 1%" #8 countersunk wood screws into each support. Scat supports should be set back 1" from the front edge and in 3" from the ends before attaching. The stretcher is not glued into the legs but held in place with wedges. Proceed to the construction of the cabinet that will receive the shelf and drawer. The sides, top, and shelf should be made from glued-up stock. 32 |


