Woodworker's Journal 1981-5-6, страница 36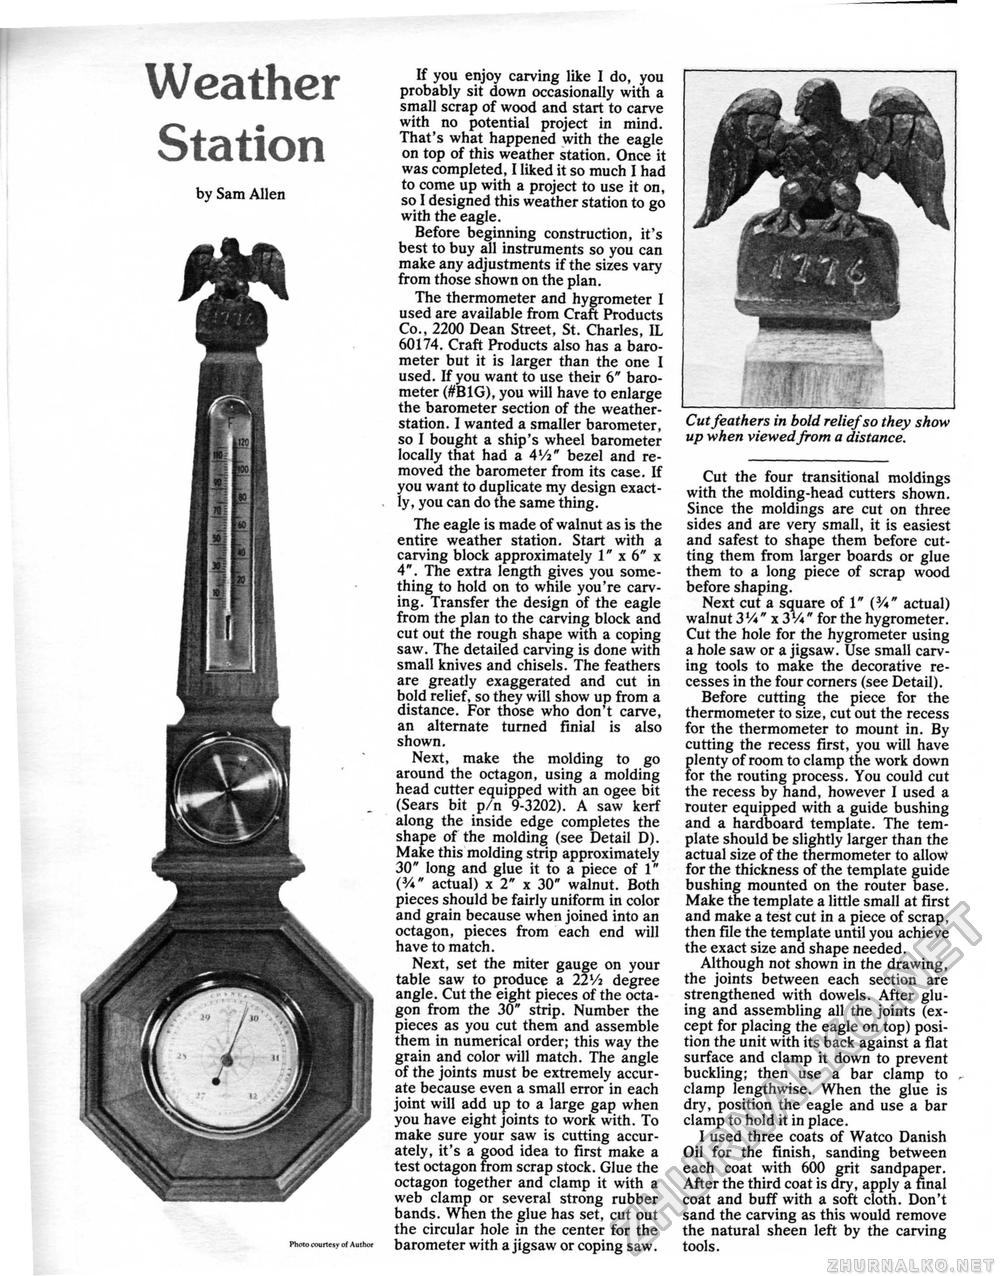
Weather Station by Sam Allen Photo courtesy of Author If you enjoy carving like 1 do, you probably sit down occasionally with a small scrap of wood and start to carve with no potential project in mind. That's what happened with the eagle on top of this weather station. Once it was completed, I liked it so much I had to come up with a project to use it on, so I designed this weather station to go with the eagle. Before beginning construction, it's best to buy all instruments so you can make any adjustments if the sizes vary from those shown on the plan. The thermometer and hygrometer I used are available from Craft Products Co., 2200 Dean Street, St. Charles, IL 60174. Craft Products also has a barometer but it is larger than the one I used. If you want to use their 6" barometer (#B1G), you will have to enlarge the barometer section of the weatherstation. I wanted a smaller barometer, so I bought a ship's wheel barometer locally that had a 4Vi" bezel and removed the barometer from its case. If you want to duplicate my design exactly, you can do the same thing. The eagle is made of walnut as is the entire weather station. Start with a carving block approximately 1" x 6" x 4". The extra length gives you something to hold on to while you're carving. Transfer the design of the eagle from the plan to the carving block and cut out the rough shape with a coping saw. The detailed carving is done with small knives and chisels. The feathers are greatly exaggerated and cut in bold relief, so they will show up from a distance. For those who don't carve, an alternate turned finial is also shown. Next, make the molding to go around the octagon, using a molding head cutter equipped with an ogee bit (Sears bit p/n 9-3202). A saw kerf along the inside edge completes the shape of the molding (see Detail D). Make this molding strip approximately 30" long and glue it to a piece of 1" (3/i" actual) x 2" x 30" walnut. Both pieces should be fairly uniform in color and grain because when joined into an octagon, pieces from each end will have to match. Next, set the miter gauge on your table saw to produce a 22Vi degree angle. Cut the eight pieces of the octagon from the 30" strip. Number the pieces as you cut them and assemble them in numerical order; this way the grain and color will match. The angle of the joints must be extremely accurate because even a small error in each joint will add up to a large gap when you have eight joints to work with. To make sure your saw is cutting accurately, it's a good idea to first make a test octagon from scrap stock. Glue the octagon together and clamp it with a web clamp or several strong rubber bands. When the glue has set, cut out the circular hole in the center for the barometer with a jigsaw or coping saw. Cut feathers in bold relief so they show up when viewed from a distance. Cut the four transitional moldings with the molding-head cutters shown. Since the moldings are cut on three sides and are very small, it is easiest and safest to shape them before cutting them from larger boards or glue them to a long piece of scrap wood before shaping. Next cut a square of 1" (%" actual) walnut 3'/«"x3%" for the hygrometer. Cut the hole for the hygrometer using a hole saw or a jigsaw. Use small carving tools to make the decorative recesses in the four corners (see Detail). Before cutting the piece for the thermometer to size, cut out the recess for the thermometer to mount in. By cutting the recess first, you will have plenty of room to clamp the work down for the routing process. You could cut the recess by hand, however I used a router equipped with a guide bushing and a hardboard template. The template should be slightly larger than the actual size of the thermometer to allow for the thickness of the template guide bushing mounted on the router base. Make the template a little small at first and make a test cut in a piece of scrap, then file the template until you achieve the exact size and shape needed. Although not shown in the drawing, the joints between each section are strengthened with dowels. After gluing and assembling all the joints (except for placing the eagle on top) position the unit with its back against a flat surface and clamp it down to prevent buckling; then use a bar clamp to clamp lengthwise. When the glue is dry, position the eagle and use a bar clamp to hold it in place. I used three coats of Watco Danish Oil for the finish, sanding between each coat with 600 grit sandpaper. After the third coat is dry, apply a final coat and buff with a soft cloth. Don't sand the carving as this would remove the natural sheen left by the carving tools. |


