Woodworker's Journal 1982-6-5, страница 30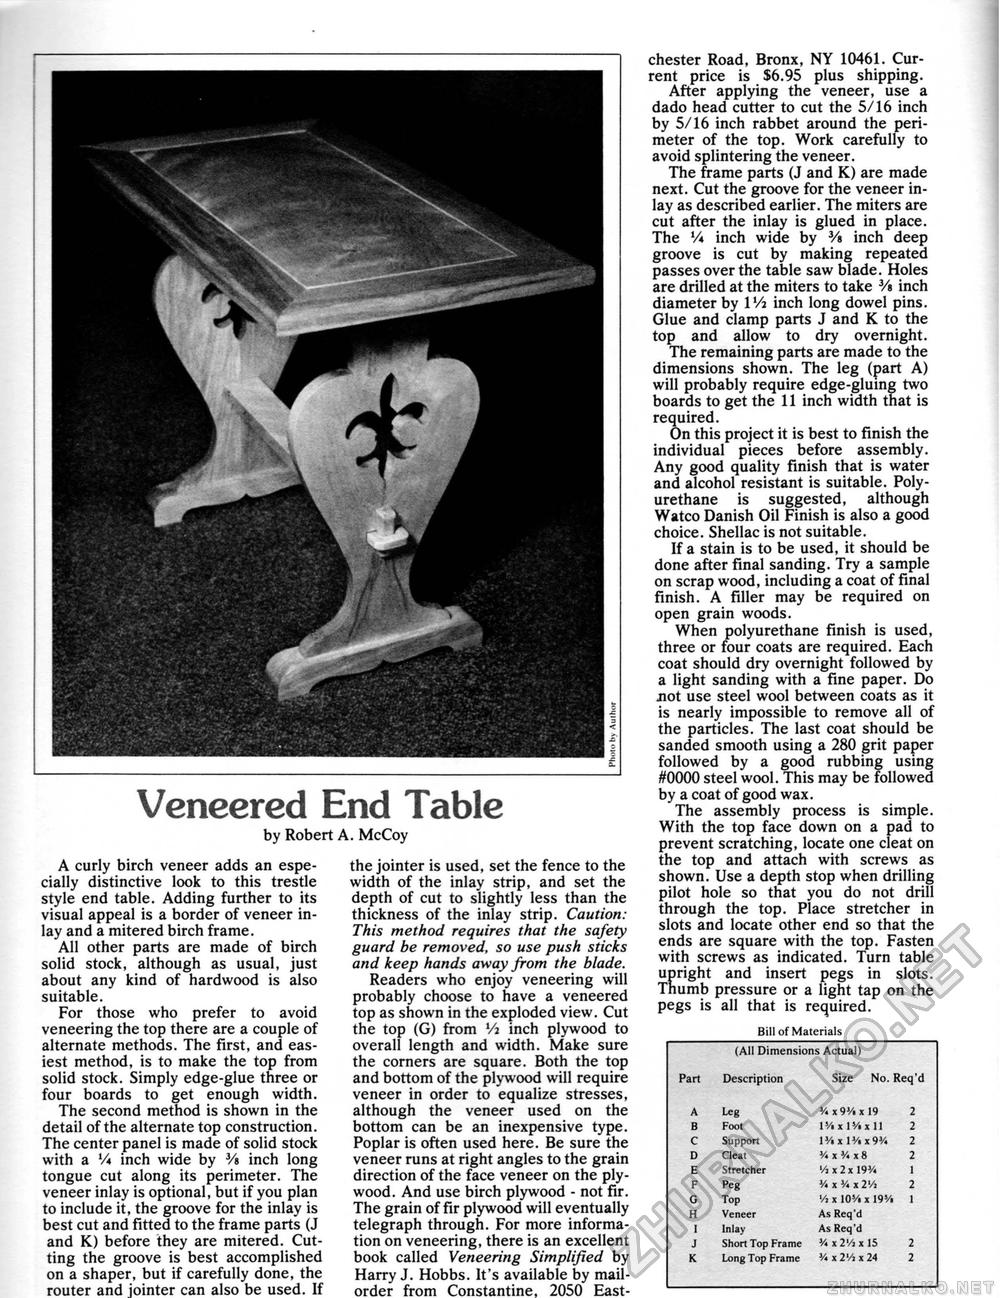
Veneered End Table by Robert A. McCoy A curly birch veneer adds an especially distinctive look to this trestle style end table. Adding further to its visual appeal is a border of veneer inlay and a mitered birch frame. All other parts are made of birch solid stock, although as usual, just about any kind of hardwood is also suitable. For those who prefer to avoid veneering the top there are a couple of alternate methods. The first, and easiest method, is to make the top from solid stock. Simply edge-glue three or four boards to get enough width. The second method is shown in the detail of the alternate top construction. The center panel is made of solid stock with a Vi inch wide by 3/« inch long tongue cut along its perimeter. The veneer inlay is optional, but if you plan to include it, the groove for the inlay is best cut and fitted to the frame parts (J and K) before they are mitered. Cutting the groove is best accomplished on a shaper, but if carefully done, the router and jointer can also be used. If < jo' the jointer is used, set the fence to the width of the inlay strip, and set the depth of cut to slightly less than the thickness of the inlay strip. Caution: This method requires that the safety guard be removed, so use push sticks and keep hands away from the blade. Readers who enjoy veneering will probably choose to have a veneered top as shown in the exploded view. Cut the top (G) from Vi inch plywood to overall length and width. Make sure the corners are square. Both the top and bottom of the plywood will require veneer in order to equalize stresses, although the veneer used on the bottom can be an inexpensive type. Poplar is often used here. Be sure the veneer runs at right angles to the grain direction of the face veneer on the plywood. And use birch plywood - not fir. The grain of fir plywood will eventually telegraph through. For more information on veneering, there is an excellent book called Veneering Simplified by Harry J. Hobbs. It's available by mailorder from Constantine, 2050 East- chester Road, Bronx, NY 10461. Current price is $6.95 plus shipping. After applying the veneer, use a dado head cutter to cut the 5/16 inch by 5/16 inch rabbet around the perimeter of the top. Work carefully to avoid splintering the veneer. The frame parts (J and K) are made next. Cut the groove for the veneer inlay as described earlier. The miters are cut after the inlay is glued in place. The Vi inch wide by 3/» inch deep groove is cut by making repeated passes over the table saw blade. Holes are drilled at the miters to take 3/« inch diameter by l'/i inch long dowel pins. Glue and clamp parts J and K to the top and allow to dry overnight. The remaining parts are made to the dimensions shown. The leg (part A) will probably require edge-gluing two boards to get the 11 inch width that is required. On this project it is best to finish the individual pieces before assembly. Any good quality finish that is water and alcohol resistant is suitable. Poly-urethane is suggested, although Watco Danish Oil Finish is also a good choice. Shellac is not suitable. If a stain is to be used, it should be done after final sanding. Try a sample on scrap wood, including a coat of final finish. A filler may be required on open grain woods. When polyurethane finish is used, three or four coats are required. Each coat should dry overnight followed by a light sanding with a fine paper. Do jiot use steel wool between coats as it is nearly impossible to remove all of the particles. The last coat should be sanded smooth using a 280 grit paper followed by a good rubbing using #0000 steel wool. This may be followed by a coat of good wax. The assembly process is simple. With the top face down on a pad to prevent scratching, locate one cleat on the top and attach with screws as shown. Use a depth stop when drilling pilot hole so that you do not drill through the top. Place stretcher in slots and locate other end so that the ends are square with the top. Fasten with screws as indicated. Turn table upright and insert pegs in slots. Thumb pressure or a light tap on the pegs is all that is required. Bill of Materials (All Dimensions Actual) Bill of Materials (All Dimensions Actual)
|
||||||||||||||||||||||||||||||||||||||||||||||||


