Woodworker's Journal 1982-6-5, страница 32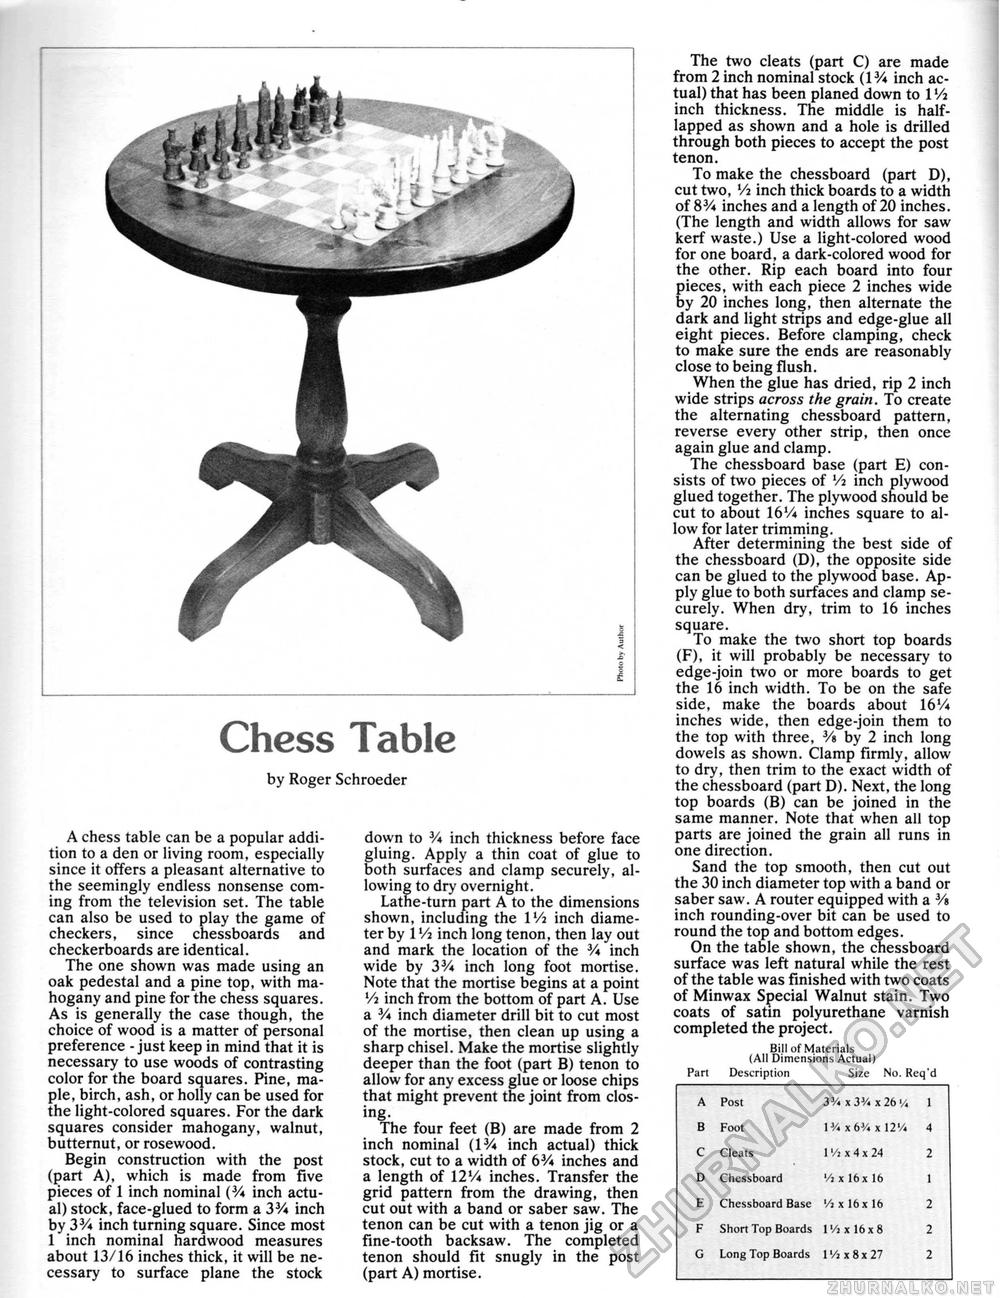
Chess Table by Roger Schroeder A chess table can be a popular addition to a den or living room, especially since it offers a pleasant alternative to the seemingly endless nonsense coming from the television set. The table can also be used to play the game of checkers, since chessboards and checkerboards are identical. The one shown was made using an oak pedestal and a pine top, with mahogany and pine for the chess squares. As is generally the case though, the choice of wood is a matter of personal preference - just keep in mind that it is necessary to use woods of contrasting color for the board squares. Pine, maple, birch, ash, or holly can be used for the light-colored squares. For the dark squares consider mahogany, walnut, butternut, or rosewood. Begin construction with the post (part A), which is made from five pieces of 1 inch nominal (3/« inch actual) stock, face-glued to form a 3V* inch by 3V* inch turning square. Since most 1 inch nominal hardwood measures about 13/16 inches thick, it will be necessary to surface plane the stock down to V* inch thickness before face gluing. Apply a thin coat of glue to both surfaces and clamp securely, allowing to dry overnight. Latne-turn part A to the dimensions shown, including the IVi inch diameter by IV2 inch long tenon, then lay out and mark the location of the Va inch wide by 33/* inch long foot mortise. Note that the mortise begins at a point Vi inch from the bottom of part A. Use a 3/« inch diameter drill bit to cut most of the mortise, then clean up using a sharp chisel. Make the mortise slightly deeper than the foot (part B) tenon to allow for any excess glue or loose chips that might prevent the joint from closing. The four feet (B) are made from 2 inch nominal (W* inch actual) thick stock, cut to a width of 6V* inches and a length of 12'/4 inches. Transfer the grid pattern from the drawing, then cut out with a band or saber saw. The tenon can be cut with a tenon jig or a fine-tooth backsaw. The completed tenon should fit snugly in the post (part A) mortise. The two cleats (part C) are made from 2 inch nominal stock (IV* inch actual) that has been planed down to 1 Vi inch thickness. The middle is half-lapped as shown and a hole is drilled through both pieces to accept the post tenon. To make the chessboard (part D), cut two, Vi inch thick boards to a width of inches and a length of 20 inches. (The length and width allows for saw kerf waste.) Use a light-colored wood for one board, a dark-colored wood for the other. Rip each board into four pieces, with each piece 2 inches wide by 20 inches long, then alternate the dark and light strips and edge-glue all eight pieces. Before clamping, check to make sure the ends are reasonably close to being flush. When the glue has dried, rip 2 inch wide strips across the grain. To create the alternating chessboard pattern, reverse every other strip, then once again glue and clamp. The chessboard base (part E) consists of two pieces of Vi inch plywood glued together. The plywood should be cut to about 16Vi inches square to allow for later trimming. After determining the best side of the chessboard (D), the opposite side can be glued to the plywood base. Apply glue to both surfaces and clamp securely. When dry, trim to 16 inches square. To make the two short top boards (F), it will probably be necessary to edge-join two or more boards to get the 16 inch width. To be on the safe side, make the boards about 16Vi inches wide, then edge-join them to the top with three, 3/s by 2 inch long dowels as shown. Clamp firmly, allow to dry, then trim to the exact width of the chessboard (part D). Next, the long top boards (B) can be joined in the same manner. Note that when all top parts are joined the grain all runs in one direction. Sand the top smooth, then cut out the 30 inch diameter top with a band or saber saw. A router equipped with a 3/s inch rounding-over bit can be used to round the top and bottom edges. On the table shown, the chessboard surface was left natural while the rest of the table was finished with two coats of Minwax Special Walnut stain. Two coats of satin polyurethane varnish completed the project. Bill of Materials (All Dimensions Actual) Part Description Size No. Req'd Bill of Materials (All Dimensions Actual) Part Description Size No. Req'd
|


