Woodworker's Journal 1982-6-5, страница 37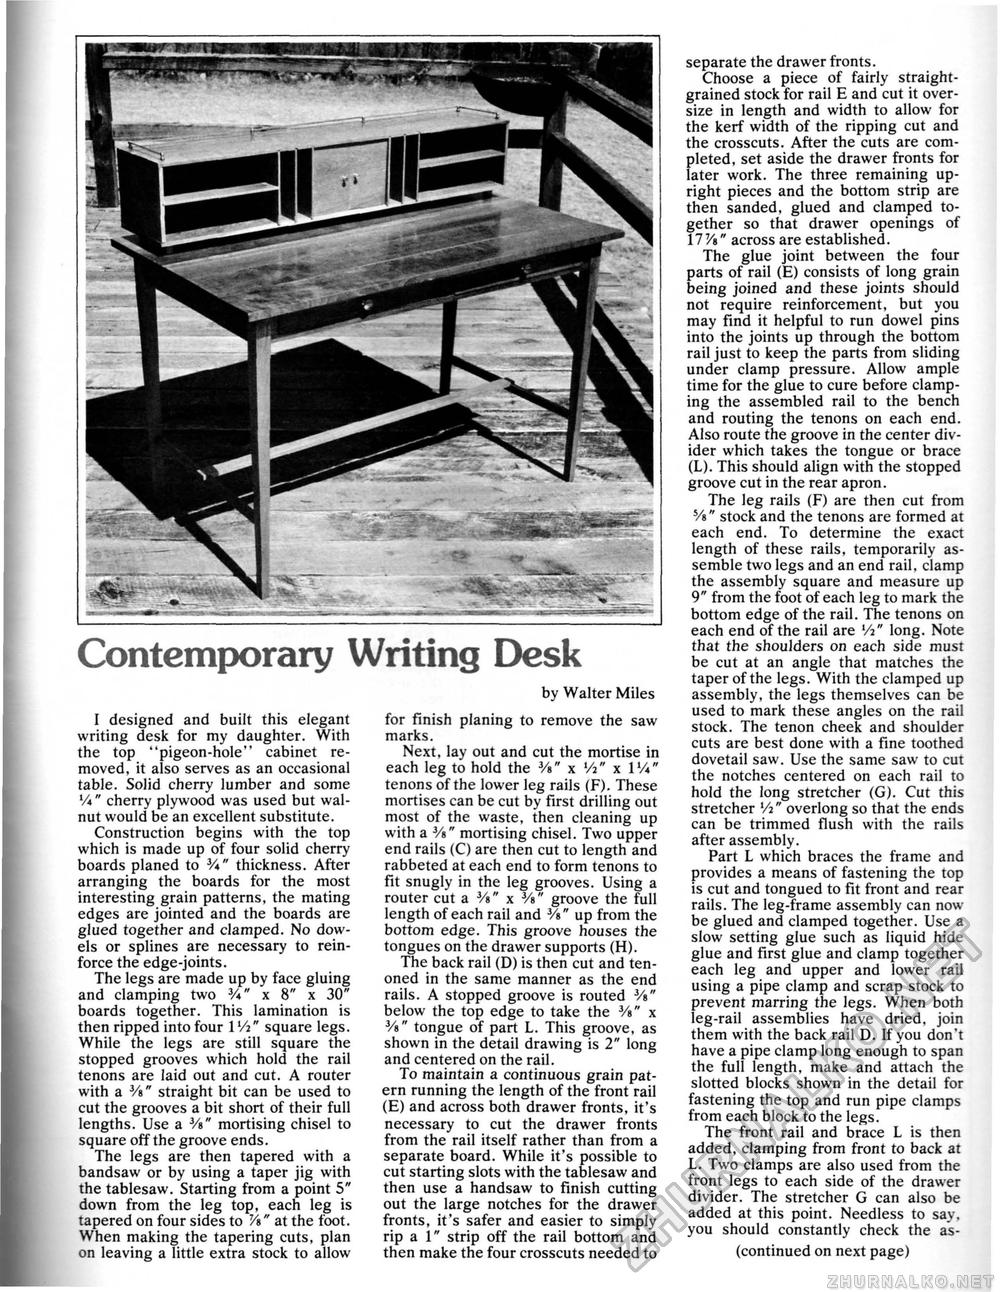
Contemporary Writing Desk I designed and buiit this elegant writing desk for my daughter. With the top "pigeon-hole" cabinet removed, it also serves as an occasional table. Solid cherry lumber and some V*" cherry plywood was used but walnut would be an excellent substitute. Construction begins with the top which is made up of four solid cherry boards planed to 3/«" thickness. After arranging the boards for the most interesting grain patterns, the mating edges are jointed and the boards are glued together and clamped. No dowels or splines are necessary to reinforce the edge-joints. The legs are made up by face gluing and clamping two x 8" x 30" boards together. This lamination is then ripped into four IV2" square legs. While the legs are still square the stopped grooves which hold the rail tenons are laid out and cut. A router with a 3A" straight bit can be used to cut the grooves a bit short of their full lengths. Use a 3/s" mortising chisel to square off the groove ends. The legs are then tapered with a bandsaw or by using a taper jig with the tablesaw. Starting from a point 5" down from the leg top, each leg is tapered on four sides to Vs" at the foot. When making the tapering cuts, plan on leaving a little extra stock to allow by Walter Miles for finish planing to remove the saw marks. Next, lay out and cut the mortise in each leg to hold the 3/»" x Vt" x IV*" tenons of the lower leg rails (F). These mortises can be cut by first drilling out most of the waste, then cleaning up with a V»" mortising chisel. Two upper end rails (C) are then cut to length and rabbeted at each end to form tenons to fit snugly in the leg grooves. Using a router cut a V»" x V»" groove the full length of each rail and V»" up from the bottom edge. This groove houses the tongues on the drawer supports (H). The back rail (D) is then cut and tenoned in the same manner as the end rails. A stopped groove is routed V»" below the top edge to take the V»" x Vs" tongue of part L. This groove, as shown in the detail drawing is 2" long and centered on the rail. To maintain a continuous grain pat-ern running the length of the front rail (E) and across both drawer fronts, it's necessary to cut the drawer fronts from the rail itself rather than from a separate board. While it's possible to cut starting slots with the tablesaw and then use a handsaw to finish cutting out the large notches for the drawer fronts, it's safer and easier to simply rip a 1" strip off the rail bottom and then make the four crosscuts needed to separate the drawer fronts. Choose a piece of fairly straight-grained stock for rail E and cut it oversize in length and width to allow for the kerf width of the ripping cut and the crosscuts. After the cuts are completed, set aside the drawer fronts for later work. The three remaining upright pieces and the bottom strip are then sanded, glued and clamped together so that drawer openings of 177/«" across are established. The glue joint between the four parts of rail (E) consists of long grain being joined and these joints should not require reinforcement, but you may find it helpful to run dowel pins into the joints up through the bottom rail just to keep the parts from sliding under clamp pressure. Allow ample time for the glue to cure before clamping the assembled rail to the bench and routing the tenons on each end. Also route the groove in the center divider which takes the tongue or brace (L). This should align with the stopped groove cut in the rear apron. The leg rails (F) are then cut from SA " stock and the tenons are formed at each end. To determine the exact length of these rails, temporarily assemble two legs and an end rail, clamp the assembly square and measure up 9" from the foot of each leg to mark the bottom edge of the rail. The tenons on each end of the rail are Vi" long. Note that the shoulders on each side must be cut at an angle that matches the taper of the legs. With the clamped up assembly, the legs themselves can be used to mark these angles on the rail stock. The tenon cheek and shoulder cuts are best done with a fine toothed dovetail saw. Use the same saw to cut the notches centered on each rail to hold the long stretcher (G). Cut this stretcher Vi" overlong so that the ends can be trimmed flush with the rails after assembly. Part L which braces the frame and provides a means of fastening the top is cut and tongued to fit front and rear rails. The leg-frame assembly can now be glued and clamped together. Use a slow setting glue such as liquid hide glue and first glue and clamp together each leg and upper and lower rail using a pipe clamp and scrap stock to prevent marring the legs. When both leg-rail assemblies have dried, join them with the back rail D. If you don't have a pipe clamp long enough to span the full length, make and attach the slotted blocks shown in the detail for fastening the top and run pipe clamps from each block to the legs. The front rail and brace L is then added, clamping from front to back at L. Two clamps are also used from the front legs to each side of the drawer divider. The stretcher G can also be added at this point. Needless to say. you should constantly check the as-(continued on next page) |


