Woodworker's Journal 1983-7-2, страница 53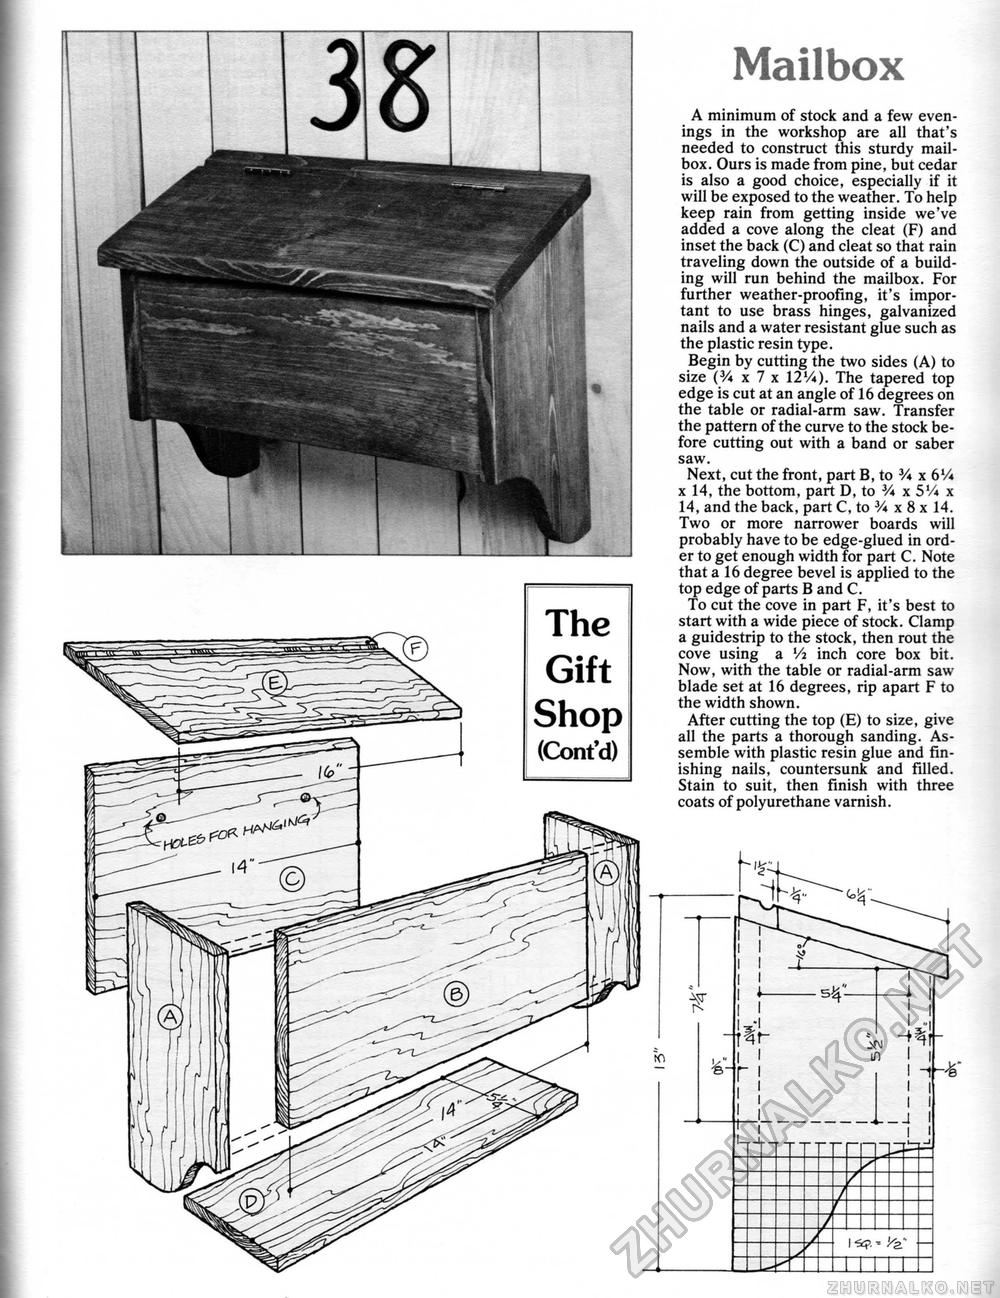
Mailbox A minimum of stock and a few evenings in the workshop are all that's needed to construct this sturdy mailbox. Ours is made from pine, but cedar is also a good choice, especially if it will be exposed to the weather. To help keep rain from getting inside we've added a cove along the cleat (F) and inset the back (C) and cleat so that rain traveling down the outside of a building will run behind the mailbox. For further weather-proofing, it's important to use brass hinges, galvanized nails and a water resistant glue such as the plastic resin type. Begin by cutting the two sides (A) to size (V* x 7 x 12V*). The tapered top edge is cut at an angle of 16 degrees on the table or radial-arm saw. Transfer the pattern of the curve to the stock before cutting out with a band or saber saw. Next, cut the front, part B, to V* x 61/* x 14, the bottom, part D, to V* x 5Vi x 14, and the back, part C, to V* x 8 x 14. Two or more narrower boards will probably have to be edge-glued in order to get enough width for part C. Note that a 16 degree bevel is applied to the top edge of parts B and C. To cut the cove in part F, it's best to start with a wide piece of stock. Clamp a guidestrip to the stock, then rout the cove using a Vi inch core box bit. Now, with the table or radial-arm saw blade set at 16 degrees, rip apart F to the width shown. After cutting the top (E) to size, give all the parts a thorough sanding. Assemble with plastic resin glue and finishing nails, countersunk and filled. Stain to suit, then finish with three coats of polyurethane varnish. |


