Woodworker's Journal 1983-7-5, страница 63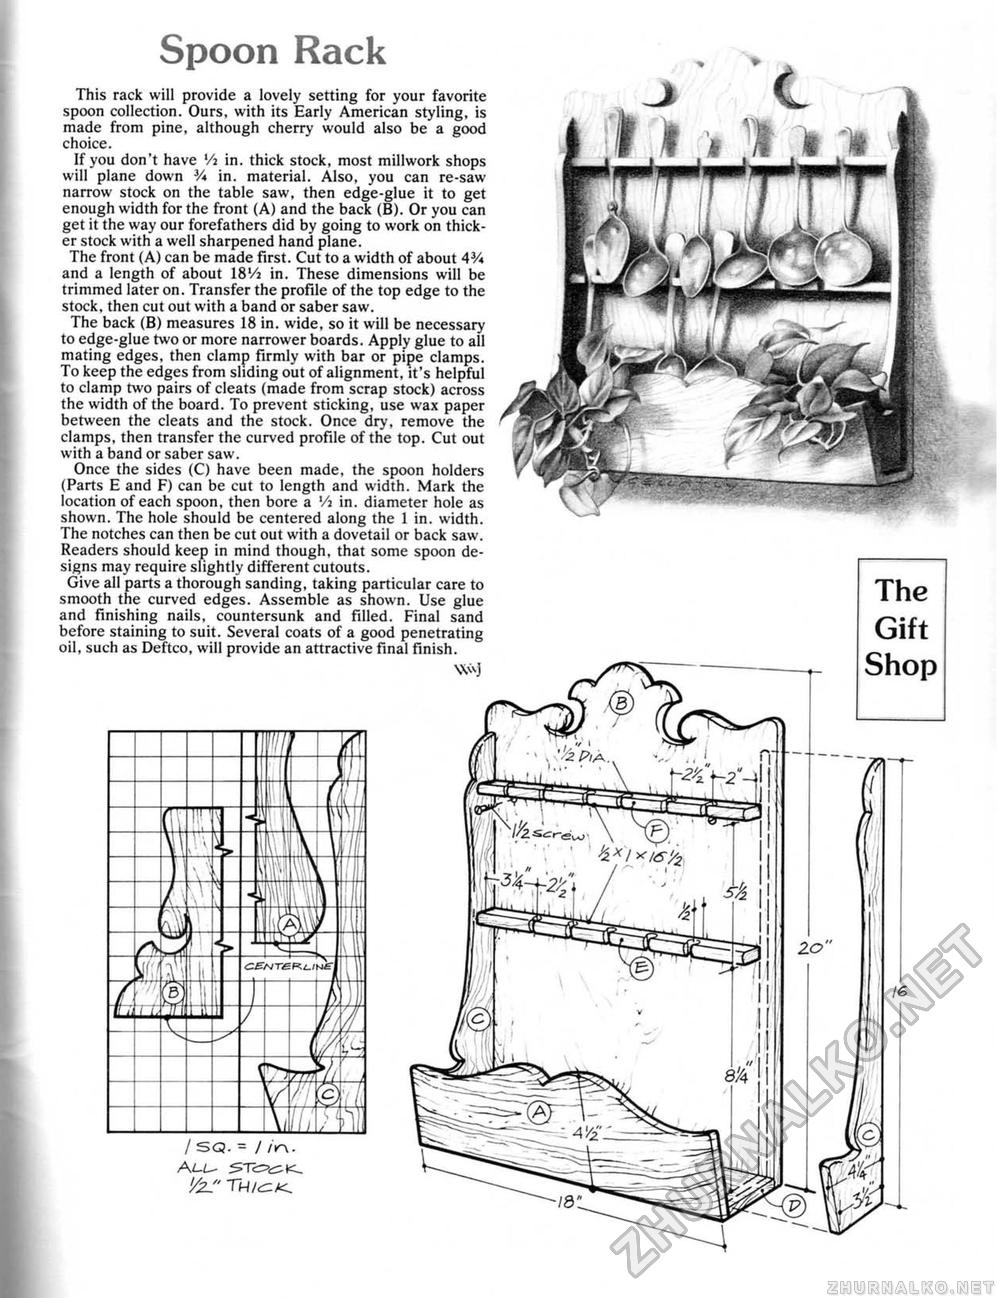
Spoon Rack This rack will provide a lovely setting for your favorite spoon collection. Ours, with its Early American styling, is made from pine, although cherry would also be a good choice. If you don't have Vt in. thick stock, most millwork shops will plane down V* in. material. Also, you can re-saw narrow stock on the table saw, then edge-glue it to get enough width for the front (A) and the back (B). Or you can get it the wray our forefathers did by going to work on thicker stock with a well sharpened hand plane. The front (A) can be made first. Cut to a width of about 43A and a length of about IS'/j in. These dimensions will be trimmed later on. Transfer the profile of the top edge to the stock, then cut out with a band or saber saw. The back (B) measures 18 in. wide, so it will be necessary to edge-glue two or more narrower boards. Apply glue to all mating edges, then clamp firmly with bar or pipe clamps. To keep the edges from sliding out of alignment, it's helpful to clamp two pairs of cleats (made from scrap stock) across the width of the board. To prevent sticking, use wax paper between the cleats and the stock. Once dry. remove the clamps, then transfer the curved profile of the top. Cut out with a band or saber saw. Once the sides (C) have been made, the spoon holders (Parts E and F) can be cut to length and width. Mark the location of each spoon, then bore a Vi in. diameter hole as shown. The hole should be centered along the 1 in. width. The notches can then be cut out with a dovetail or back saw. Readers should keep in mind though, that some spoon designs may require slightly different cutouts. Give all parts a thorough sanding, taking particular care to smooth the curved edges. Assemble as shown. Use glue and finishing nails, countersunk and filled. Final sand before staining to suit. Several coats of a good penetrating oil, such as Deftco, will provide an attractive final finish. / SQ. = / /V\. '/ZJ' TH/c^ |


