Woodworker's Journal 1983-7-6, страница 61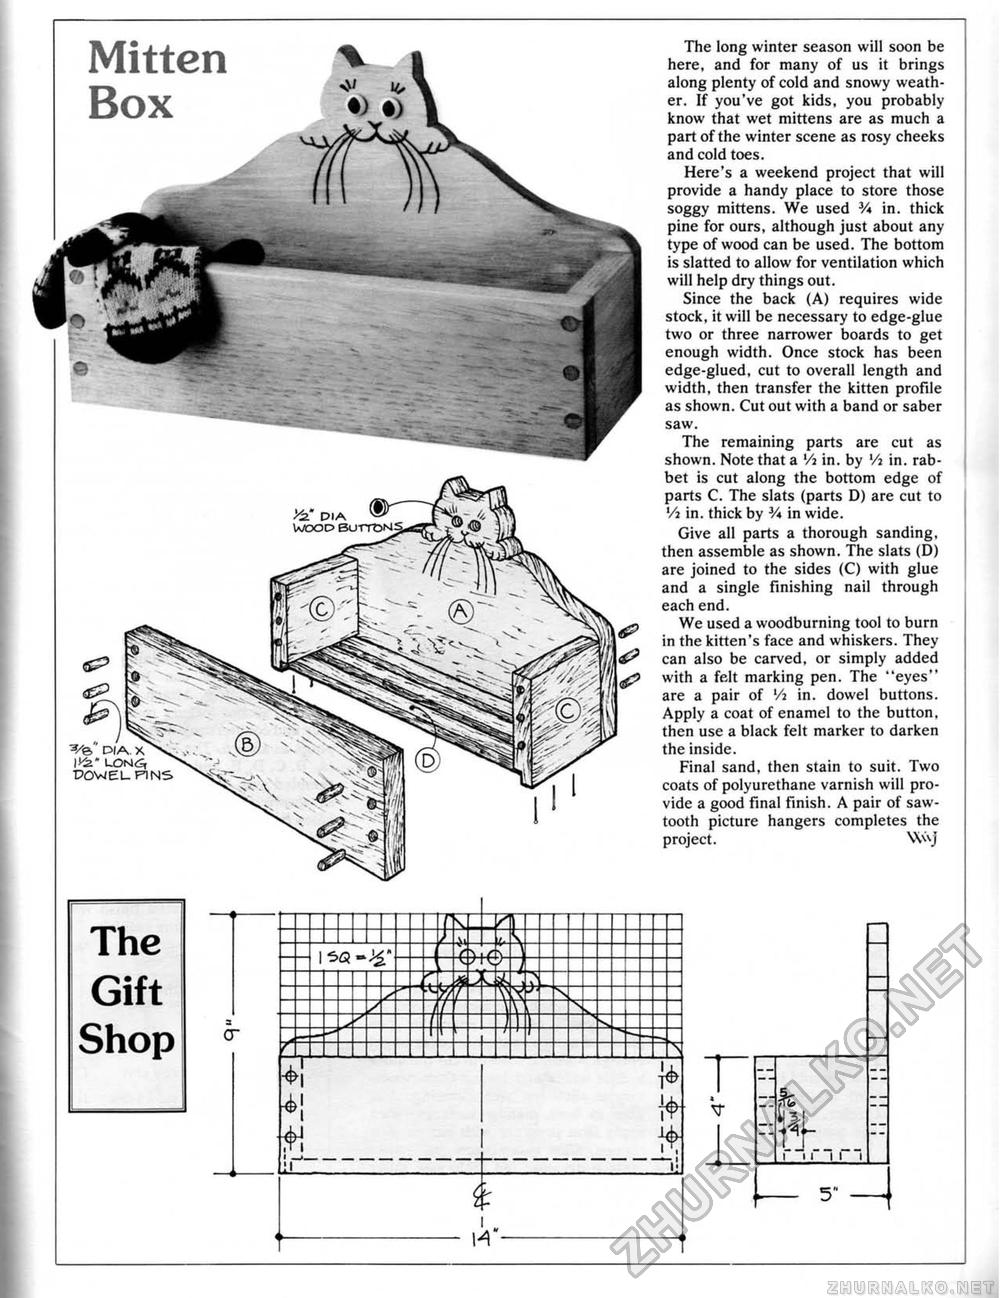
Mitten Box The long winter season will soon be here, and for many of us it brings along plenty of cold and snowy weather. If you've got kids, you probably know that wet mittens are as much a part of the winter scene as rosy cheeks and cold toes. Here's a weekend project that will provide a handy place to store those soggy mittens. We used V* in. thick pine for ours, although just about any-type of wood can be used. The bottom is slatted to allow for ventilation which will help dry things out. Since the back (A) requires wide stock, it will be necessary to edge-glue two or three narrower boards to get enough width. Once stock has been edge-giued, cut to overall length and width, then transfer the kitten profile as shown. Cut out with a band or saber saw. The remaining parts are cut as shown. Note that a Vi in. by '/j in. rabbet is cut along the bottom edge of parts C. The slats (parts D) are cut to '/i in. thick by V* in wide. Give all parts a thorough sanding, then assemble as shown. The slats (D) are joined to the sides (C) with glue and a single finishing nail through each end. We used a woodburning tool to burn in the kitten's face and whiskers. They can also be carved, or simply added with a felt marking pen. The "eyes" are a pair of Vi in. dowel buttons. Apply a coat of enamel to the button, then use a black felt marker to darken the inside. Final sand, then stain to suit. Two coats of polyurethane varnish will provide a good final finish. A pair of sawtooth picture hangers completes the project. Wvj The Gift Shop |


