Woodworker's Journal 1984-8-1, страница 28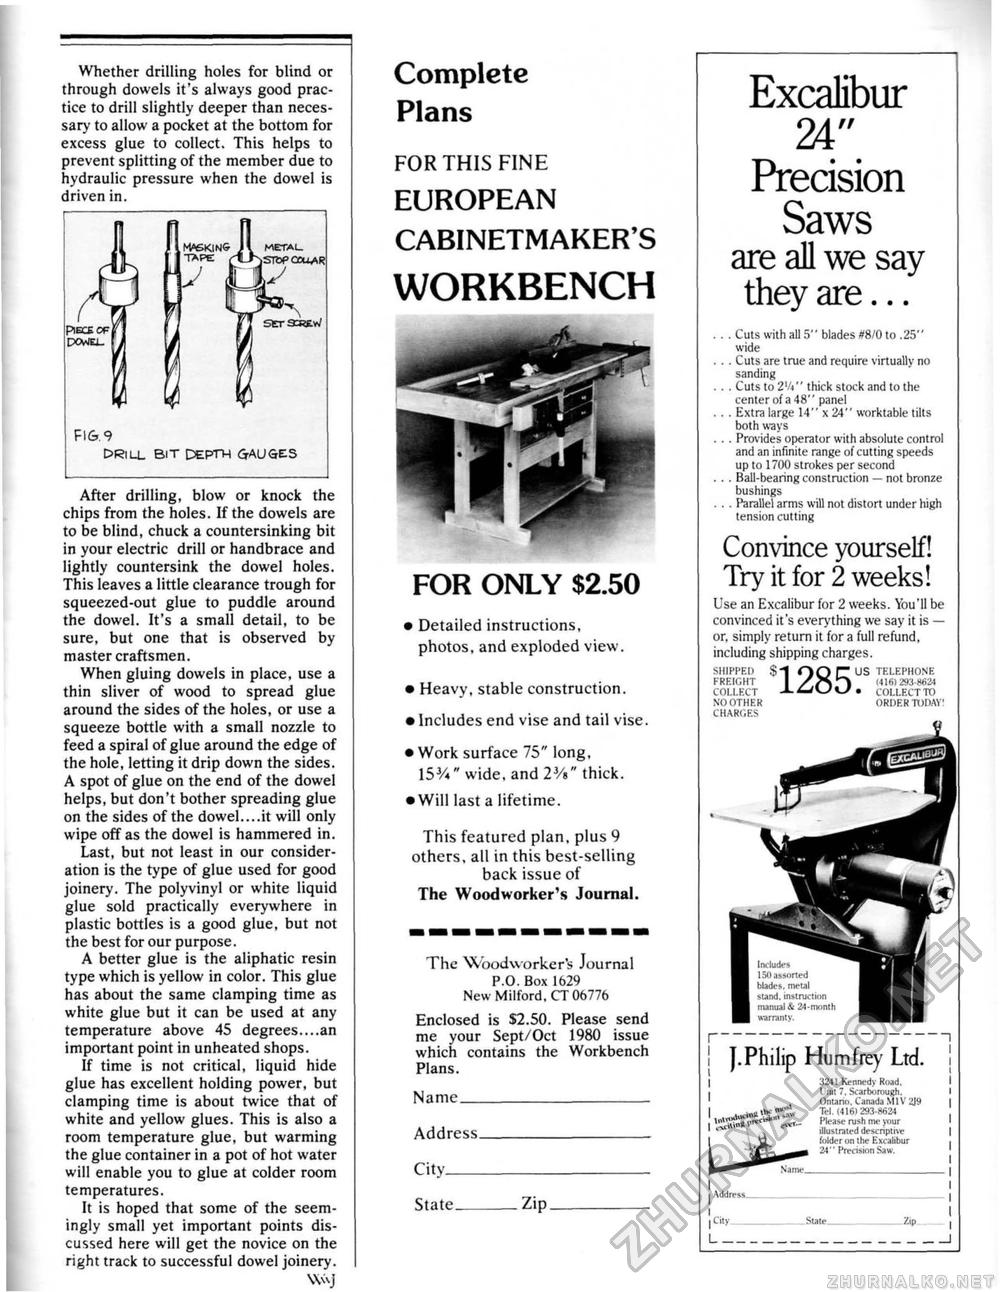
Whether drilling holes for blind or through dowels it's always good practice to drill slightly deeper than necessary to allow a pocket at the bottom for excess glue to collect. This helps to prevent splitting of the member due to hydraulic pressure when the dowel is driven in. After drilling, blow or knock the chips from the holes. If the dowels are to be blind, chuck a countersinking bit in your electric drill or handbrace and lightly countersink the dowel holes. This leaves a little clearance trough for squeezed-out glue to puddle around the dowel. It's a small detail, to be sure, but one that is observed by master craftsmen. When gluing dowels in place, use a thin sliver of wood to spread glue around the sides of the holes, or use a squeeze bottle with a small nozzle to feed a spiral of glue around the edge of the hole, letting it drip down the sides. A spot of glue on the end of the dowel helps, but don't bother spreading glue on the sides of the dowel....it will only wipe off as the dowel is hammered in. Last, but not least in our consideration is the type of glue used for good joinery. The polyvinyl or white liquid glue sold practically everywhere in plastic bottles is a good glue, but not the best for our purpose. A better glue is the aliphatic resin type which is yellow in color. This glue has about the same clamping time as white glue but it can be used at any temperature above 45 degrees,...an important point in unheated shops. If time is not critical, liquid hide glue has excellent holding power, but clamping time is about twice that of white and yellow glues. This is also a room temperature glue, but warming the giue container in a pot of hot water will enable you to glue at colder room temperatures. It is hoped that some of the seemingly small yet important points discussed here will get the novice on the right track to successful dowel joinery. Complete Plans FOR THIS FINE EUROPEAN CABINETMAKER'S WORKBENCH FOR ONLY $2.50 • Detailed instructions, photos, and exploded view. • Heavy, stable construction. • Includes end vise and tail vise. • Work surface 75" long, 15%" wide, and 2V>" thick. • Will last a lifetime. This featured plan, plus 9 others, all in this best-selling back issue of The Woodworker's Journal. The Woodworker's Journal P.O. Box 1629 New Milford.CT 06776 Enclosed is $2.50. Please send me your Sept/Oct 1980 issue which contains the Workbench Plans. Name__ Address. City-—. State. Zip. Excalibur 24 // Precision Saws are all we say they are... . . . Cuts with all 5" blades #8/0 to ,25" wide . . . Cuts are true and require virtually no sanding . . . Cuts to 2Vi" thick stock and to the center of a 48" panel . . . Extra large 14" x 24" worktable tilts both ways . . . Provides operator with absolute control and an infinite range of cutting speeds up to 1700 strokes per second . . . Ball-hearing construction — not bronze bushings . . . Parallel arms will not distort under high tension cutting Convince yourself! Try it for 2 weeks! Use an Excalibur for 2 weeks. You'll be convinced it's everything we say it is — or, simply return it for a full refund, including shipping charges. SHIPPED $" FREIGHT COLLECT NO OTHER CHARGES 1285: US TELEPHONE (4161 COLLECT TO ORDER TODAY: T" ]. Philip Humfrey Ltd. VSlwKl'"'* gacT-' 3341 Kennedy Road, Unit 7. Scarborough. Ontanri. Canada M1V39 Tel. 14161 293-8624 Please rash me your illustrated descriptive folder on the Excalibur 24" Precision Saw. 1___ |


