Woodworker's Journal 1984-8-1, страница 53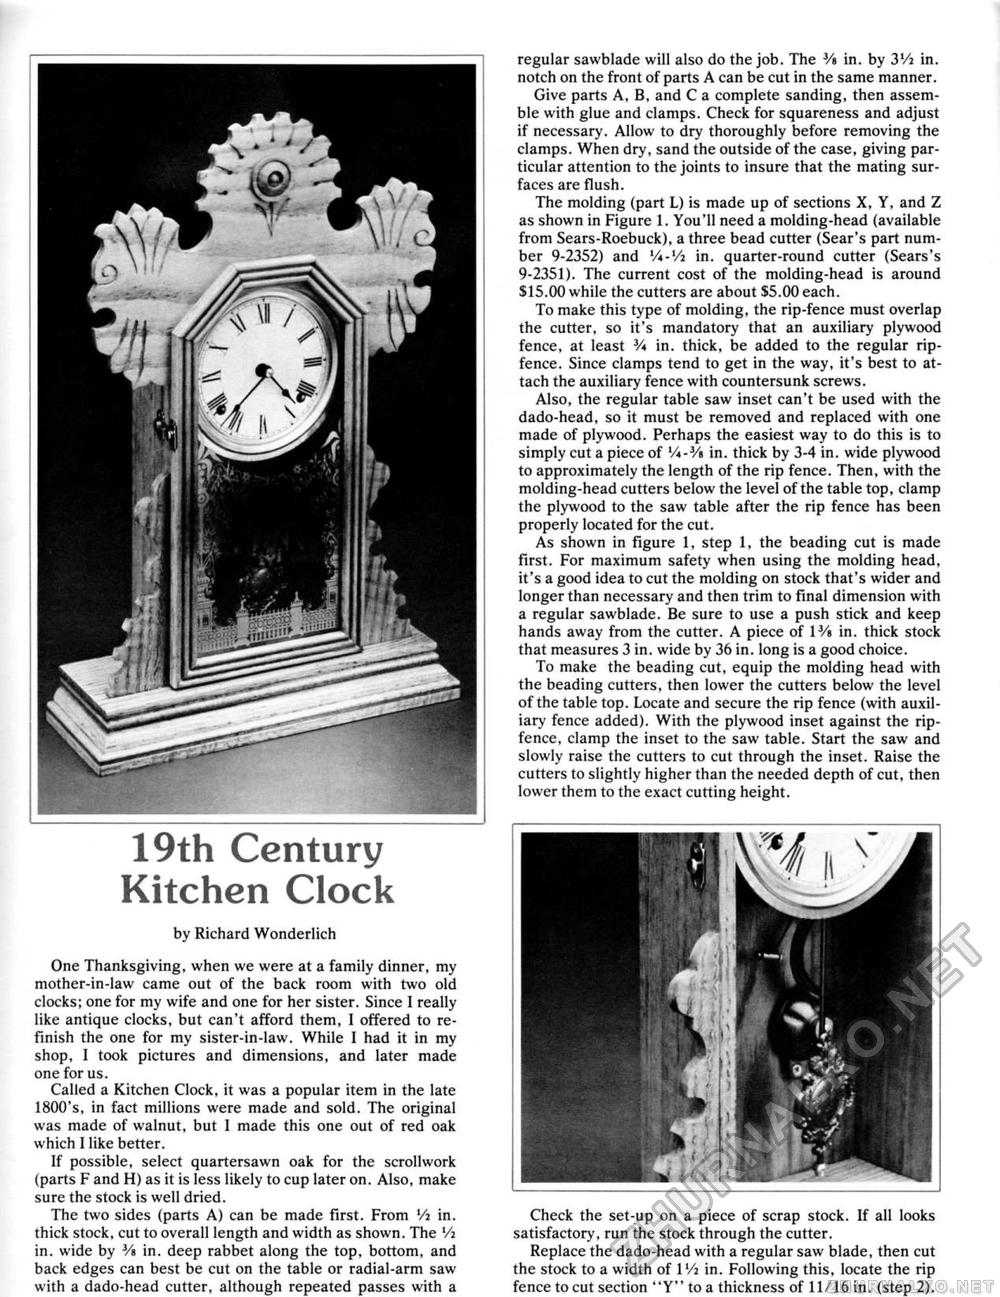
19th Century Kitchen Clock by Richard Wonderlich One Thanksgiving, when we were at a family dinner, my mother-in-law came out of the back room with two old clocks; one for my wife and one for her sister. Since 1 really like antique clocks, but can't afford them, 1 offered to re-finish the one for my sister-in-law. While I had it in my shop, 1 took pictures and dimensions, and later made one for us. Called a Kitchen Clock, it was a popular item in the late 1800's, in fact millions were made and sold. The original was made of walnut, but I made this one out of red oak which I like better. If possible, select quartersawn oak for the scrollwork (parts F and H) as it is less likely to cup later on. Also, make sure the stock is well dried. The two sides (parts A) can be made first. From Vi in. thick stock, cut to overall length and width as shown. The Vi in. wide by Vt in. deep rabbet along the top, bottom, and back edges can best be cut on the table or radial-arm saw with a dado-head cutter, although repeated passes with a regular sawblade will also do the job. The Vt in. by 3Vi in. notch on the front of parts A can be cut in the same manner. Give parts A, B, and C a complete sanding, then assemble with glue and clamps. Check for squareness and adjust if necessary. Allow to dry thoroughly before removing the clamps. When dry, sand the outside of the case, giving particular attention to the joints to insure that the mating surfaces are flush. The molding (part L) is made up of sections X, Y, and Z as shown in Figure 1. You'll need a molding-head (available from Sears-Roebuck), a three bead cutter (Sear's part number 9-2352) and V*-Vi in. quarter-round cutter (Sears's 9-2351). The current cost of the molding-head is around $15.00 while the cutters are about $5.00 each. To make this type of molding, the rip-fence must overlap the cutter, so it's mandatory that an auxiliary plywood fence, at least 3A in, thick, be added to the regular rip-fence. Since clamps tend to get in the way, it's best to attach the auxiliary fence with countersunk screws. Also, the regular table saw inset can't be used with the dado-head, so it must be removed and replaced with one made of plywood. Perhaps the easiest way to do this is to simply cut a piece of 'A-Vt in. thick by 3-4 in. wide plywood to approximately the length of the rip fence. Then, with the molding-head cutters below the level of the table top, clamp the plywood to the saw table after the rip fence has been properly located for the cut. As shown in figure 1, step 1, the beading cut is made first. For maximum safety when using the molding head, it's a good idea to cut the molding on stock that's wider and longer than necessary and then trim to final dimension with a regular sawblade. Be sure to use a push stick and keep hands away from the cutter. A piece of 1 Vt in. thick stock that measures 3 in. wide by 36 in. long is a good choice. To make the beading cut, equip the molding head with the beading cutters, then lower the cutters below the level of the table top. Locate and secure the rip fence (with auxiliary fence added). With the plywood inset against the rip-fence, clamp the inset to the saw table. Start the saw and slowly raise the cutters to cut through the inset. Raise the cutters to slightly higher than the needed depth of cut, then lower them to the exact cutting height. Check the set-up on a piece of scrap stock. If all looks satisfactory, run the stock through the cutter. Replace the dado-head with a regular saw blade, then cut the stock to a width of 1 Vi in. Following this, locate the rip fence to cut section "Y" to a thickness of 11/16 in. (step 2). |


